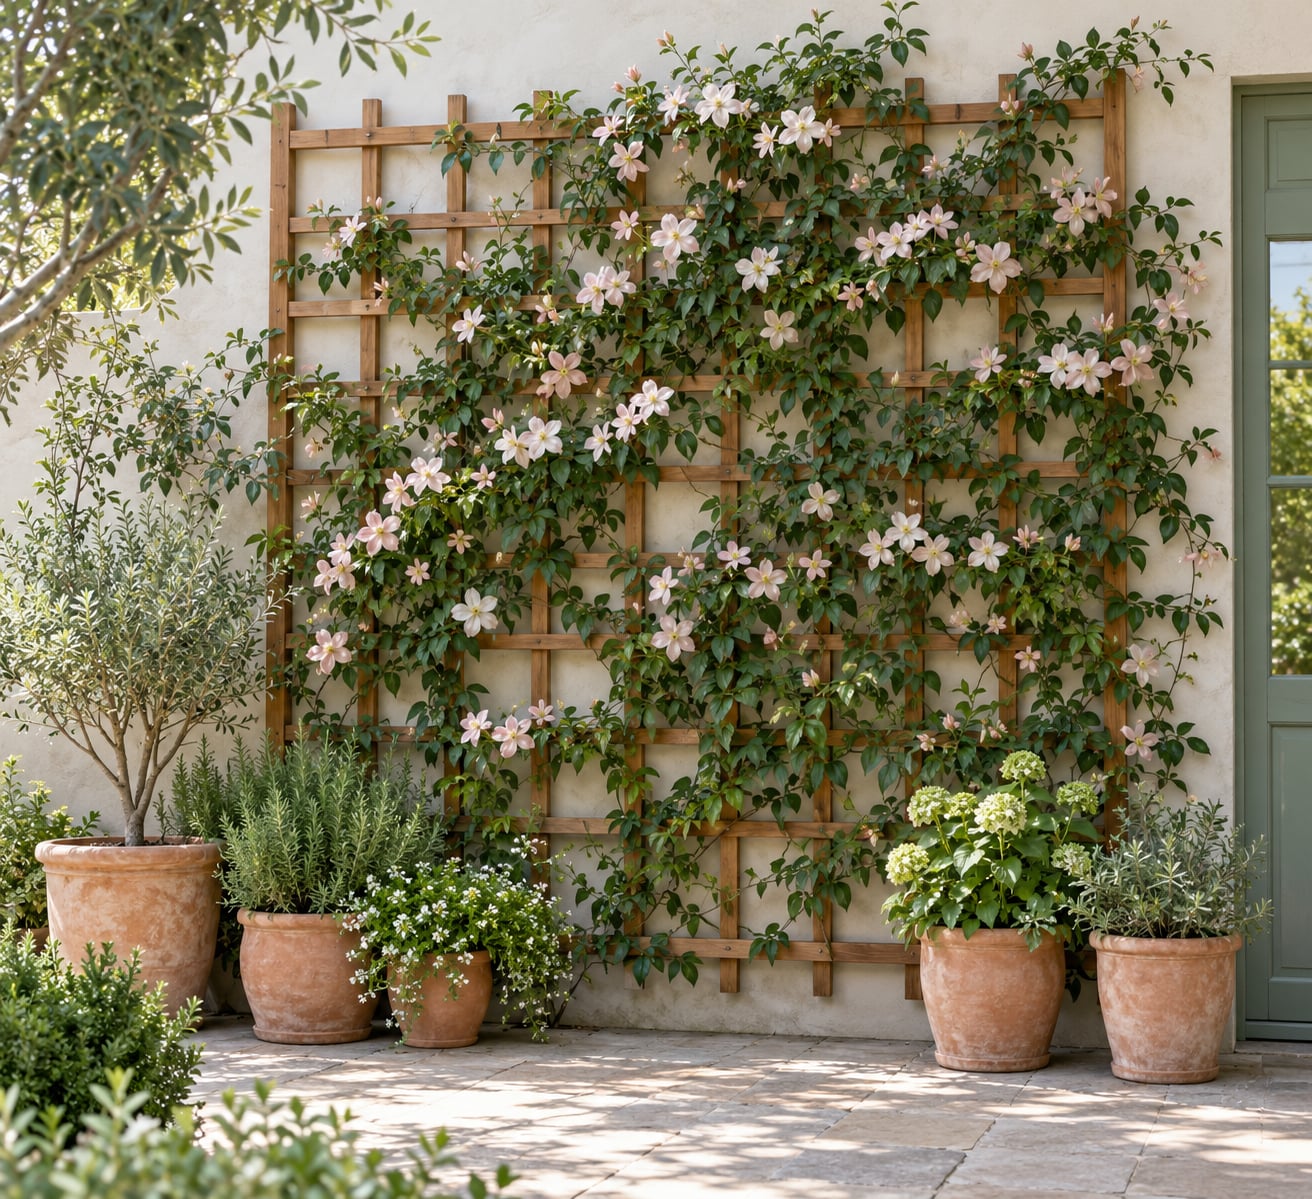
A DIY trellis wall is a flat framework of wire, bamboo, cedar or lattice fixed to a wall or fence, so climbing plants have something to twine around or cling to. Building a DIY trellis wall for climbing plants takes an afternoon for the frame and another morning for the anchor drilling. Pick your climbers first, then match the support to how each plant actually climbs.
I have built three of these now, one indoors over a pot and two outdoors on brick, and the same rule kept winning: the frame is easy, the wall is the hard part. Choose your plants, pick your anchors, and the rest is carpentry.
Last updated: October 2026
Table of Contents
- What You Need
- Frame materials for outdoor walls
- Materials for indoor trellis walls
- Tools
- Free and upcycled alternatives
- Sizing rules worth fixing before you drill
- Step-by-Step: How to Build a DIY Trellis Wall for Climbing Plants
- 1. Measure the Wall and Choose a Layout
- 2. Select Climbing Plants and Their Support Requirements
- 3. Choose Materials for Indoor or Outdoor Use
- 4. Build or Assemble the Trellis Frame
- 5. Install Horizontal and Vertical Supports
- 6. Mount the Trellis Safely
- 7. Plant and Train the Climbing Plants
- 8. Check Stability and Maintain the Display
- Common Mistakes
- Hanging the frame off drywall screws
- Under-building for a vigorous climber
- Overcrowding the base
- Building in the wrong light
- Letting the base dry out
- Not leaving room to grow
- Frequently Asked Questions
- What is the best material for a DIY trellis wall indoors?
- How do I attach a trellis to drywall without damaging the wall?
- Which climbing plants are easiest to train on a trellis?
- Can I build a trellis wall outdoors on a balcony or patio?
- How much weight can a DIY trellis wall support?
- How often should I prune and tie climbing plants on a trellis?
- Conclusion
What You Need
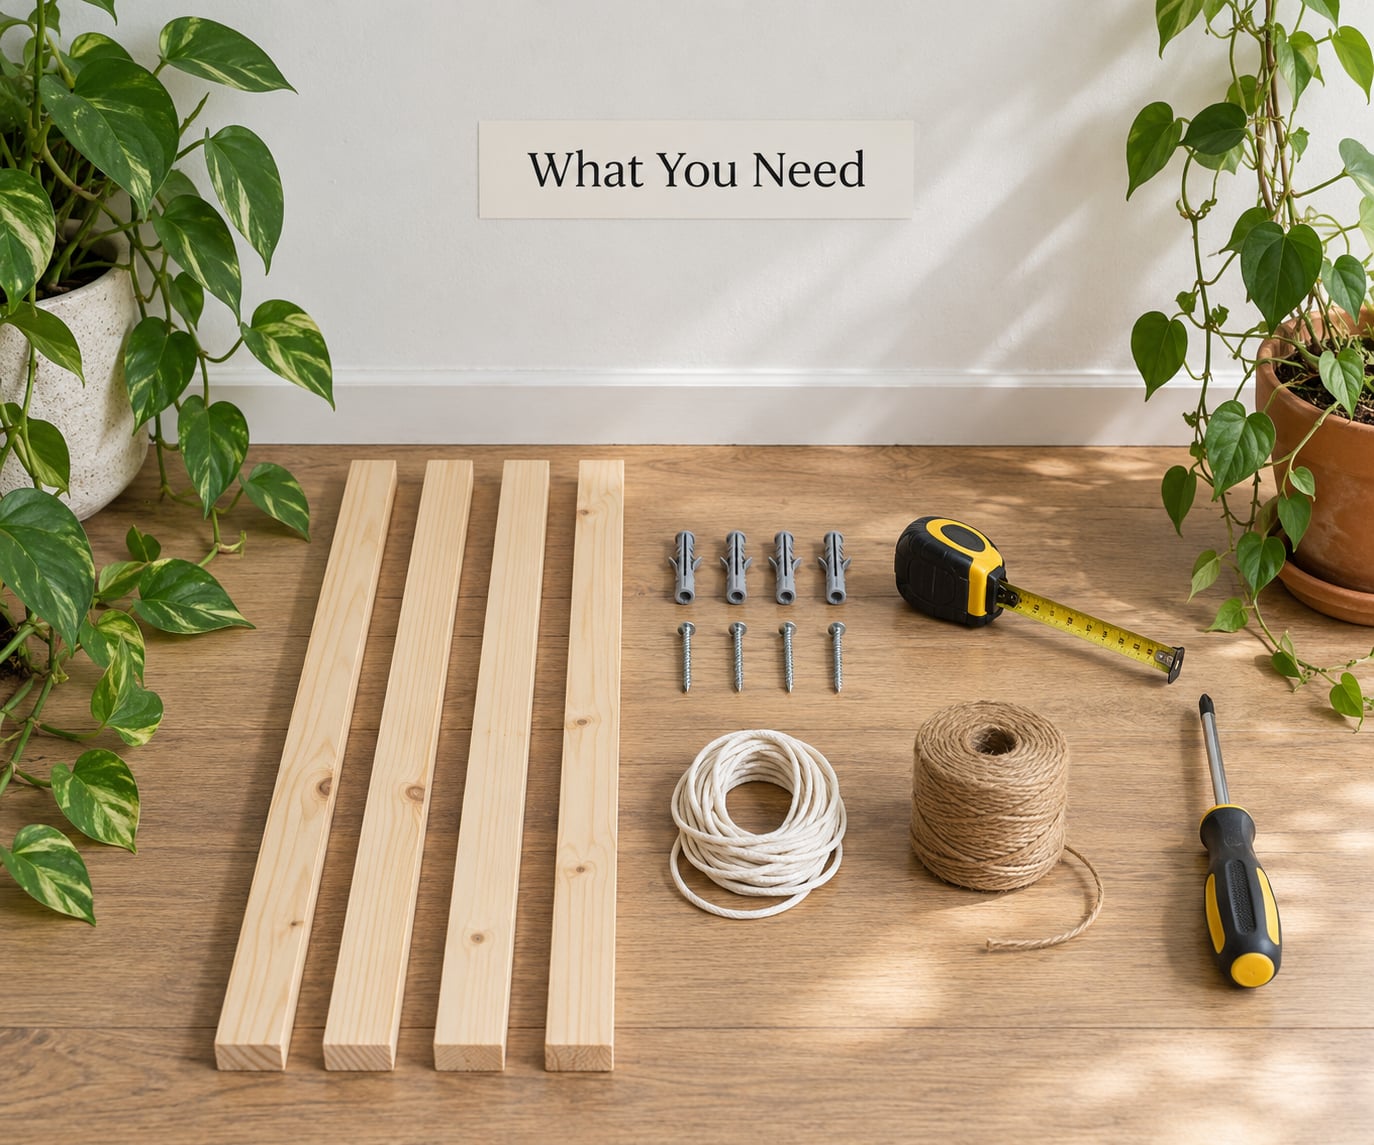
Start with the frame material, then the fasteners. The fasteners are where most builds fail, because they have to carry the frame, the vines and several years of wet leaves.
Frame materials for outdoor walls
- Cedar or pressure-treated lumber for the outer frame. Cedar resists rot without treatment and weathers to a silver grey.
- Galvanized or stainless wire for the infill. Stainless costs more and lasts longest; galvanized is fine inland.
- Exterior-grade screws and lag bolts, never interior drywall screws outdoors.
- Chicken wire or welded mesh for climbers with tendrils and small rootlets.
- Garden twine or lashing twine for the finished horizontal runs.
Materials for indoor trellis walls
Indoors you can skip the masonry work entirely. Untreated bamboo, a slim cedar stake, or a moss pole in the pot works, and jute or natural twine looks better than plastic line. Keep the trellis leaning in the pot rather than fixed to the wall, so you can turn it for light.
Tools
A tape measure, a level, a drill driver, a stud finder and wire cutters cover most of it. Add a hammer drill with a masonry bit when you are going into brick or concrete, plus eye protection and gloves whenever you are overhead.
Free and upcycled alternatives
Straight tree prunings and bamboo poles lashed with twine are the most-recommended cheap route on r/gardening, and they genuinely work. Old dry-cleaning hangers can be straightened with wire clippers and needle-nose pliers into a small pot trellis. Chopsticks and butchers twine make a decent support for a young potted climber too.
Sizing rules worth fixing before you drill
Leave 2 to 4 inches of air between the trellis and the wall. That gap lets you tie stems on without crushing them and keeps damp masonry off the frame. Set vertical supports every 4 to 6 inches for tendril climbers, and run horizontals no more than 8 to 10 inches apart for twining vines. Add a planting strip or containers along the base sized for the number of mature plants you want, not the number you can fit.
Step-by-Step: How to Build a DIY Trellis Wall for Climbing Plants
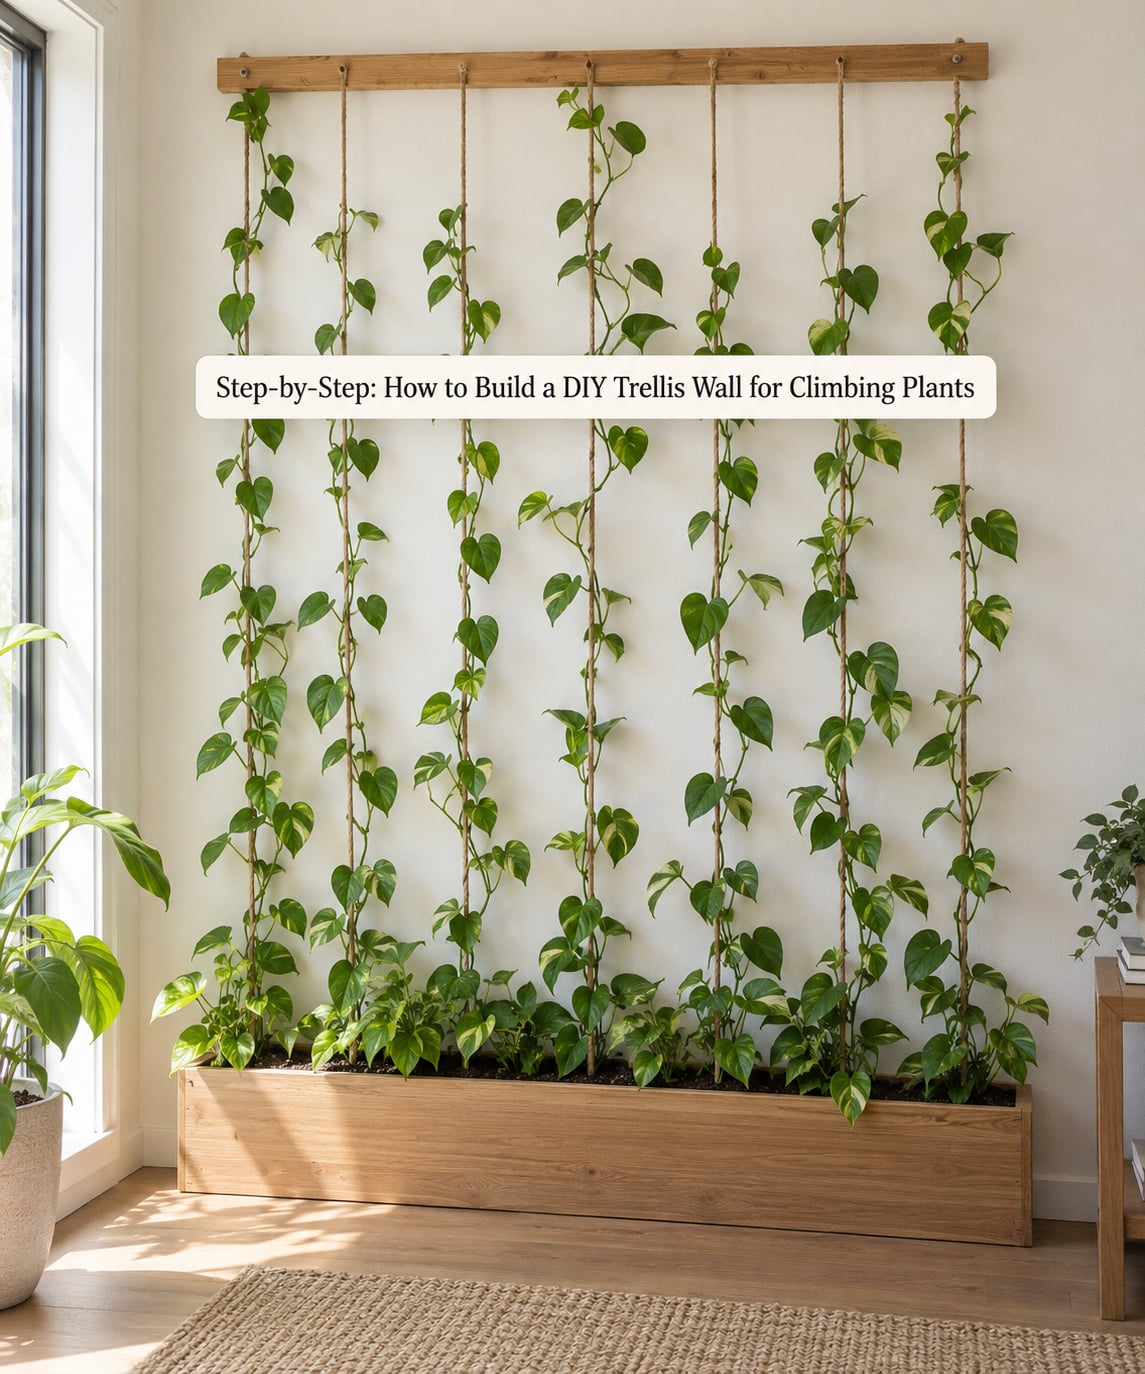
1. Measure the Wall and Choose a Layout
Measure the height and width of the usable wall, then mark the window, vent and door swings inside that rectangle. Check the light over a full day, because a spot that looks fine at noon can be in deep shade by late afternoon. Keep the finished trellis clear of walkways and of anything that opens or swings.
Sketch the layout at actual scale on tracing paper and tape it to the wall. It costs five minutes and saves drilling holes you cannot use.
2. Select Climbing Plants and Their Support Requirements
Climbers climb in four different ways, and the support has to match. Get this wrong in a DIY trellis wall for climbing plants and you will be tying every stem by hand forever.
- Twining — Clematis, honeysuckle (Lonicera sempervirens), Wisteria and morning glory wrap their stems around anything they can circle, so thin cord or wire under half an inch across is ideal.
- Aerial rootlets — Climbing hydrangea (Hydrangea petiolaris) and Boston ivy stick themselves to a flat surface, so they want a solid panel or wire mesh, not lines.
- Tendrils — Peas, cucumbers, squash and passionflower reach for small openings, so chicken wire or welded mesh with a 2 to 3 inch grid works best.
- Scrambling — Climbing roses such as Rosa ‘New Dawn’ neither twine nor cling; they need wide, strong slats to push along.
Underneath all of it is thigmotropism: touch-triggered growth that makes stems thicken and strengthen where they meet a support. Phototropism pulls the new growth toward light, which is why a vertical frame fills in faster than a flat one.
3. Choose Materials for Indoor or Outdoor Use
Weight decides the material as much as weather does. A trellis carrying wisteria, mature Boston ivy or fruiting squash needs 2×2 cedar or heavier and joints screwed and bolted, not just nailed. Lightweight climbers like morning glory or a young pothos will happily climb cord on a cane.
Outdoors, treat any softwood with an exterior sealer and use stainless or hot-dip galvanized fasteners near coastal or damp gardens. Indoors, untreated wood is fine and looks better.
4. Build or Assemble the Trellis Frame
Cut the frame members to size, then fasten the corners. Pocket the screws where they will not show, add a brace across the long dimension, and check the diagonal measurement between opposite corners. Equal diagonals mean the frame is square; if they differ, correct it now because a twisted frame makes the wire impossible to tension.
Building the frame on the ground and lifting it into place is far easier than assembling it overhead.
5. Install Horizontal and Vertical Supports
Staple or wire the horizontals first, roughly level and 8 to 10 inches apart, then add verticals at 4 to 6 inches. Work from one edge across and re-check level as you go.
If you are going with wire, tension it by eye. Each run should sing faintly when plucked and should not pull the frame out of square. A turnbuckle at one end lets you re-tighten it years later once the vine has loaded the frame.
6. Mount the Trellis Safely
Find studs with a stud finder and fix into those wherever the layout allows. Then match the fastener to the surface:
- Drywall — screw into studs; between studs, use hollow-wall toggle anchors rated for the load, never a plain drywall screw.
- Brick or concrete block — hammer drill a hole with a masonry bit and use expansion or sleeve anchors, drilled slightly deeper than the fastener length.
- Concrete — masonry anchors or a chemical anchor system, drilled with a masonry bit and cleaned out with a brush and compressed air before setting.
- Stucco — anchor into the framing behind wherever possible; stucco alone will not hold a loaded trellis.
- Vinyl or wood siding — mount to a vertical board or a blocking panel added between studs, and seal every screw hole.
- Fence panel — fasten to the rails and posts behind the pickets, not to the pickets alone.
Keep the fixings 2 to 4 inches off the wall face where you can, and check for buried services before drilling anywhere near pipes or a gas line. Any install where the substrate, the load or the height looks uncertain, get a qualified tradesperson to check the wall first.
7. Plant and Train the Climbing Plants
Set plants 4 to 6 inches back from the trellis base so the stems reach it rather than growing along it. Tie new growth with soft plant tape or cloth strips, spaced roughly 6 to 12 inches apart as each shoot lengthens. Tie loosely; a tight tie cuts into the thickening stem.
Guide the first shoots toward the frame and let them set the direction. From there the plant largely trains itself, though tendril climbers need their shoots redirected into the mesh every week or two during the fast growth.
8. Check Stability and Maintain the Display
Push firmly on each corner before you leave it. Any movement at the frame or the fixings means back out and re-anchor. Check again after the first season, when a wall of foliage catches wind like a sail.
Tie in new growth through the season, prune to the shape you want, and replace any broken wire or ties as soon as you see them. Indoor trellises need a turn toward the light every week or two, or the growth will lean permanently.
Common Mistakes
Hanging the frame off drywall screws
The most common failure, and it happens slowly until the frame drops with a mature vine attached. Screw into studs or use toggle anchors rated well above the expected load, and test every fixing with a hard pull before you plant.
Under-building for a vigorous climber
Wisteria, Boston ivy and fruiting squash put far more weight on a frame once they are in leaf. Size the lumber and the fixings for the mature plant, not the new one, and brace anything longer than about 6 feet.
Overcrowding the base
Six vines where three belong means competition for light and root space, and the understorey dies. Space plants for their mature width, and accept that a wall takes two or three growing seasons to look full.
Building in the wrong light
Most flowering climbers want at least six hours of direct sun. Record the light across a full day before you drill anything, or you will be replacing the whole build in autumn.
Letting the base dry out
A wall of foliage pulls far more water than a single pot, and climbers against masonry dry out fast in wind. Water at soil level rather than over the frame, and check the planting strip every few days in the first summer.
Not leaving room to grow
Trellises set tight against a wall or a corner trap the vine and it strangles itself. Keep the 2 to 4 inch standoff and leave clear space at both ends so you can reach in and prune.
One more worth knowing: vines that grip masonry with rootlets, such as Boston ivy, are excellent at covering a wall but should be kept off siding, render and anything you cannot repaint later. Give self-clinging climbers their own trellis so you can take it down with the plant.
Frequently Asked Questions
What is the best material for a DIY trellis wall indoors?
Bamboo canes or a slim cedar stake leaning in the pot, with jute or natural twine running between them, is the easiest indoor option. It needs no anchors, can be turned for light and costs very little. Avoid plastic-coated wire indoors, which is stiff and can abrade stems. For heavier indoor climbers such as hoya or pothos, a moss pole or a wider slatted panel gives the stems something to grip.
How do I attach a trellis to drywall without damaging the wall?
Fix into the studs wherever you can, using a stud finder and screws long enough to bite an inch and a half into the timber. Where studs do not line up, use hollow-wall toggle anchors rated well above the load the vine will reach. Never rely on a plain drywall screw. Patch the holes with filler and paint once the plant is established, and check the fixings each spring as the vine loads up.
Which climbing plants are easiest to train on a trellis?
Morning glory, nasturtium and sweet pea are the quickest, and they will climb cord within weeks with almost no help. Honeysuckle and clematis follow closely and are far more long-lived. Plants with tendrils, such as peas and passionflower, need mesh with small openings rather than open cord. Self-clinging climbers like Boston ivy and climbing hydrangea attach themselves to a solid panel, which means less tying for you.
Can I build a trellis wall outdoors on a balcony or patio?
Yes, and a balcony is one of the best places for it. Build a free-standing frame in cedar or treated timber and set it in a heavy planter rather than fixing it through the floor, which keeps the surface intact and the unit removable. Check the railing height rules for your building, keep weight in planters on the floor rather than hung from the rail, and leave the back of the frame open so air can move through.
How much weight can a DIY trellis wall support?
The limit is always the weakest of three things: the frame, the fasteners or the wall itself. A cedar frame on masonry anchors into brick or block will carry a mature wisteria or a wall of ivy; the same frame fixed into drywall will not. Before loading a trellis, push hard on every corner and each fixing, and if you are unsure what is behind the wall, have a qualified tradesperson check it before the vine adds weight.
How often should I prune and tie climbing plants on a trellis?
Check ties and new growth every two weeks during the peak season, redirecting tendrils into the mesh as they appear. Prune twice a year: cut back hard in late winter before growth starts, and trim runaway shoots in summer to keep the plant on the frame and flowering. Replace broken ties and wire as soon as you notice them rather than letting the shoot drag against the support. Roses and wisteria fruit on old wood, so time the winter cut carefully.
Conclusion
Measure the wall and watch the light for a full day, choose your climbers based on how they climb rather than how they look in the pot, pick the support to match, and mount the frame into studs or masonry with anchors rated for the mature plant. Then build it a panel at a time. A 4 foot section you finish this weekend will teach you more than a 12 foot wall you abandon in the rain.