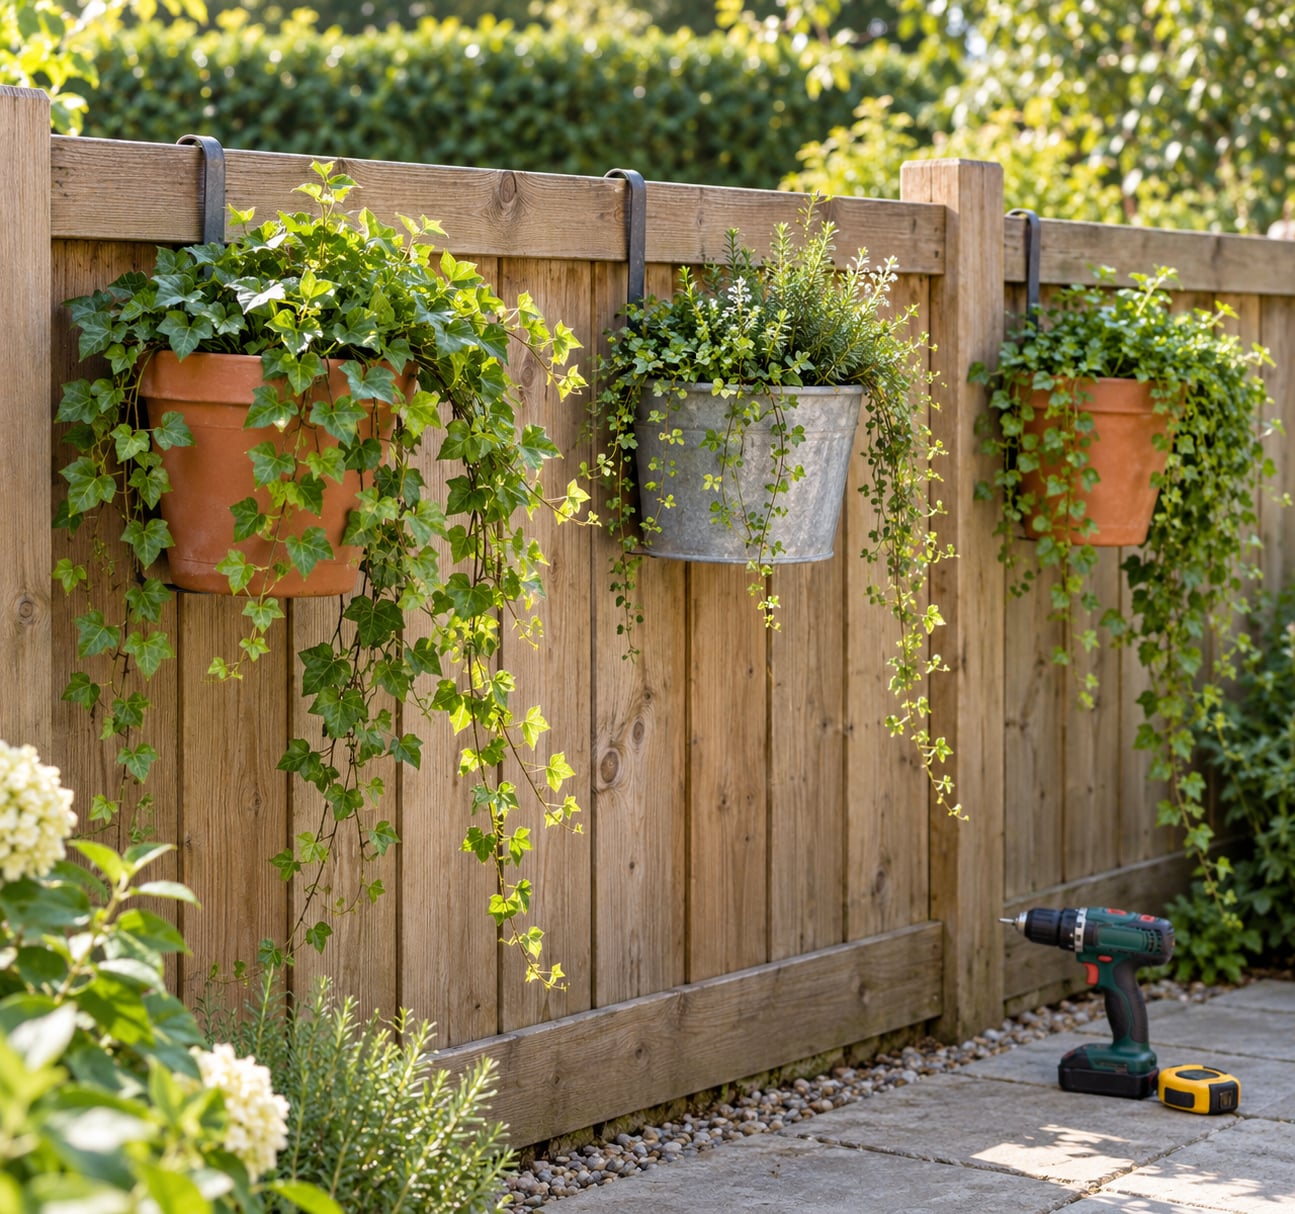
Most fence planters fail the same way: one hook screwed into a thin picket, a pot hung on it, and a wet pot pulling the whole thing loose in the first stiff wind. To attach planters to a fence safely, fix into a post or a batten, use two fixing points — one near the top of the container and one at its base — and size every bracket for the pot’s saturated weight rather than its empty weight. Budget a couple of hours for a panel, and set up on a step stool or ladder, never a chair.
Table of Contents
- What You Need
- How to Attach Planters to a Fence Safely: Step-by-Step
- 1. Identify the fence material and usable fixing point
- 2. Calculate the wet weight and check wind exposure
- 3. Choose brackets or hooks for the fence type
- 4. Prepare the fence and planter mounting area
- 5. Attach the mounting hardware securely
- 6. Add drainage and secure the planter
- 7. Test the installation and maintain it
- Common Mistakes
- Frequently Asked Questions
- Can you attach planters to any type of fence?
- How much weight can a fence planter safely hold?
- Should I mount planters to fence panels or posts?
- What screws or bolts are best for fence planters?
- How do I attach planters to a vinyl privacy fence?
- When should a professional install fence planters?
- Conclusion
What You Need
The fully loaded planter decides the hardware, so work out the weight before you buy anything. A 30 cm pot of potting mix that feels light when you lift it can weigh 55 to 60 lb once it has drained properly after a watering, and that figure sits on the fence for weeks at a time.
- Assessment tools — a tape measure, a pencil or chalk marker, a spirit level, an awl or bradawl for marking pilot holes, and a stud finder if the fence is attached to a wall or house.
- A sound fence — the fence itself, plus a driver or wrench sized to the fastener you pick. Check the panel you intend to use is firm; a panel that moves under hand pressure will not hold a loaded pot.
- Planters matched to the load — light plastic or fibre-cement containers for hook-mounted pots, and sturdier timber or metal planters if you want something with a base rest underneath.
- Mounting hardware — purpose-made fence hooks or brackets with a published load rating, structural exterior screws or lag bolts for timber, masonry anchors for walls, and stainless or hot-dip galvanised fittings if the fence sits in a wet climate.
- A base restraint — a matching lower bracket, a metal pot hanger with a shelf, or a stainless cable tie to a second fixing point. This is the part most people skip and the part that stops a pot overturning.
- Drainage materials — a free-draining potting mix with perlite or grit, a mesh or crock layer over the drainage hole, and a small angled spacer so runoff clears the panel instead of running down it.
- Protective and finishing materials — exterior wood sealer or a paint touch-up pen for screw holes, and eye protection, gloves and a dust mask if you are drilling masonry or treated timber.
Read the load rating on a bracket before you commit to it, and treat it as a floor rather than a target. A bracket rated for 10 kg gives you nothing useful if your pot plus wet soil lands at 12 kg, and ratings rarely account for the sideways push of wind on a full plant.
How to Attach Planters to a Fence Safely: Step-by-Step
Seven steps cover the whole job, and the order matters: identify the structure, calculate the loaded weight, pick hardware that matches, then fix. Skipping straight to drilling is how panels end up bowed and fixings pulled out.
1. Identify the fence material and usable fixing point
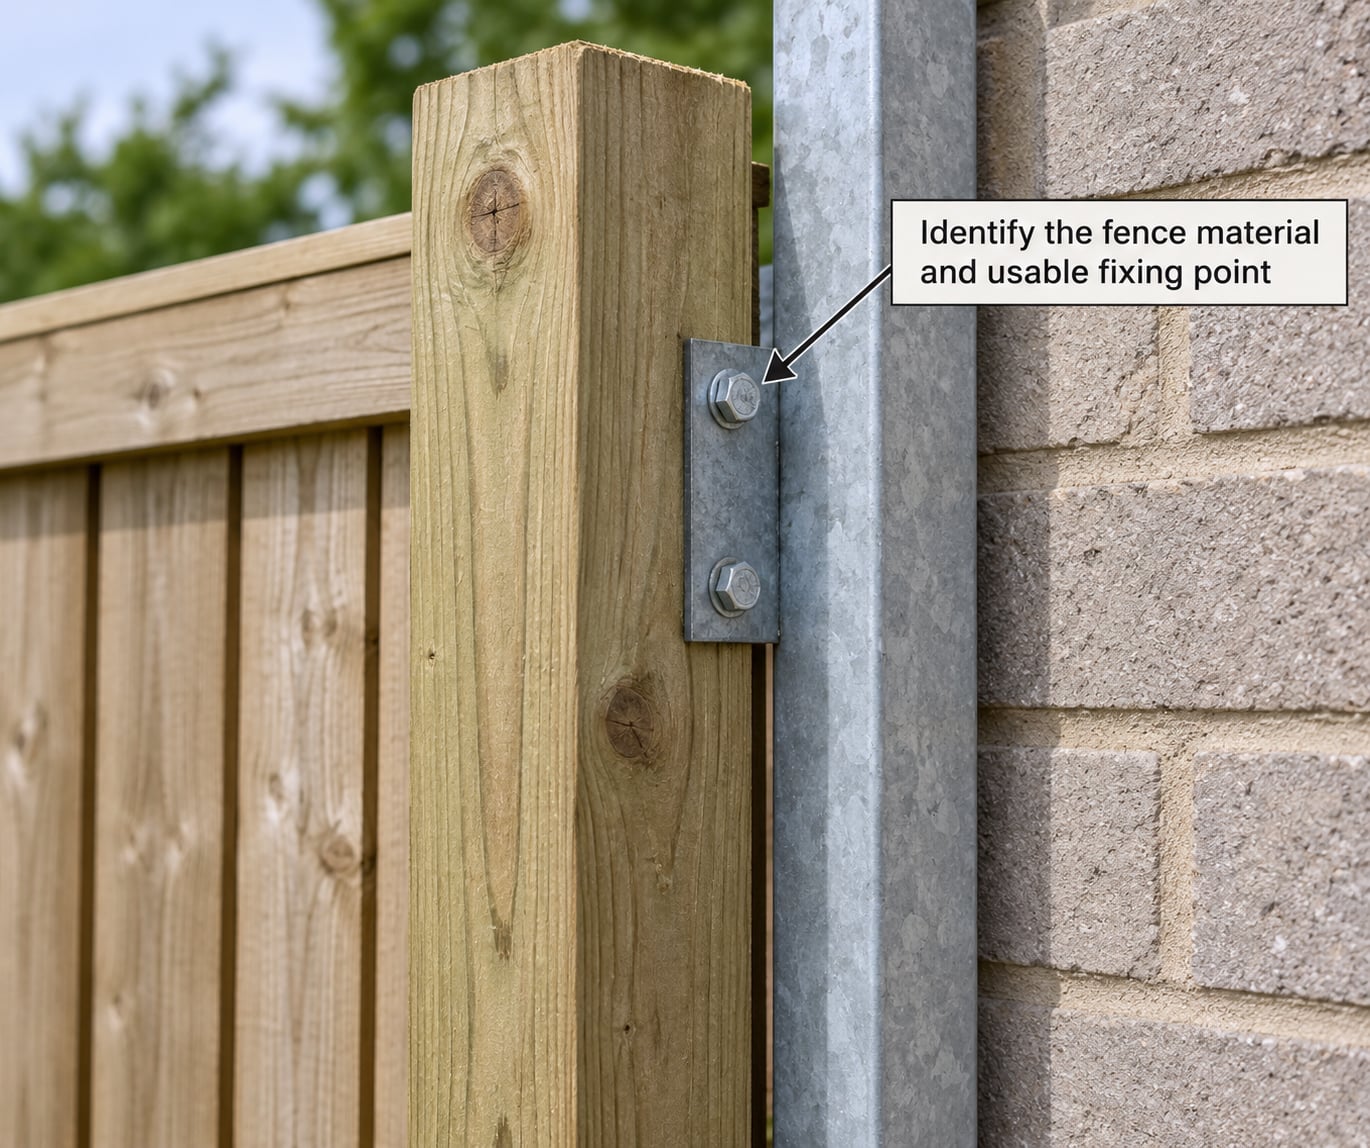
Start by naming the material, because each one has a completely different set of sound fixing points. Timber fences fix into posts or rails, metal fences fix into the frame members or a welded rail, masonry takes anchors, and hollow vinyl or composite panels have almost nothing that can take a load.
On timber, look for the posts — usually every 6 to 8 feet — and the horizontal rails between them. Sound wood is firm, the colour runs through the cut end, and a probe with an awl meets no softness. Reject any board with dark streaks, a crumbly surface, a screw that spins without biting, or a panel that has visible bow between posts.
Avoid hollow vinyl panels entirely. They are thin extruded shells with no internal structure, and a screw driven into one will either spin in the void or split the panel. If that describes your fence, move to a batten or a trellis fixed to the posts, or use an over-the-top hook that grips the rail instead of drilling.
On masonry, work only into a solid joint or the face of a block, never into the mortar alone, and confirm what is behind the wall before you drill. A single tap with a masonry bit, listening for a hollow ring, is cheap insurance against a buried cable or irrigation line.
2. Calculate the wet weight and check wind exposure
Add up four things: the empty container, the growing medium dry, the plants at mature size, and the water that stays in the pot after it drains. Water roughly doubles the weight of potting mix, and a container with a saucer or a self-watering reservoir holds even more than you would guess.
| Container size | Wet growing medium | Typical loaded total |
|---|---|---|
| 20 cm (8 inch) pot | about 9 kg / 20 lb | 11 to 14 kg / 25 to 30 lb |
| 25 cm (10 inch) pot | about 16 kg / 35 lb | 20 to 25 kg / 45 to 55 lb |
| 30 cm (12 inch) pot | about 27 kg / 60 lb | 32 to 38 kg / 70 to 85 lb |
| 40 cm (16 inch) pot | about 50 kg / 110 lb | 60 kg+ / 130 lb+ |
Figures vary with the mix, so treat them as a starting point and add roughly 20% for a dense planting of mature growth. If your total lands above 25 kg, put the pot on a base support rather than a single hook.
Then look at exposure. An open fence with a clear gap on both sides lets wind through, while a planter mounted against a wall or on a solid corner panel catches the full push of a gust and turns that push into an overturning moment at the fixing points. A trailing plant with a heavy curtain of growth behaves like a small sail, and a mature climber adds considerably more.
Any loaded planter above about 15 kg, or anything fixed above head height or on a corner or end post, should get two fixing points and, ideally, a stainless restraint cable as a third. If the fence line sits in a coastal or storm-prone area, design for the worst wind you get rather than the average.
3. Choose brackets or hooks for the fence type
Match the fixing to the material and the load, and check compatibility with the planter’s shape. Hooks suit lip-hung pots and light loads; brackets with a base shelf carry heavier containers; clamps and over-the-top hooks avoid drilling entirely.
| Fence type | Can you drill it? | Recommended fixing | Load caution |
|---|---|---|---|
| Cedar or pine board-on-board | Yes, into posts and rails only | Exterior structural screws or lag bolts into the post; pilot holes first | Pickets are thin and hold little; seal holes to keep water out |
| Pressure-treated post and rail | Yes, with a masonry bit for the harder stock | Galvanised or stainless lag bolts, plus a base bracket | Treated wood resists rot but brackets can corrode and stain the timber |
| Vinyl or composite privacy fence | Generally no | Over-the-top rail hooks, clamps, or a batten screwed to the posts | Drilling voids the panel warranty and splits the shell |
| Aluminium or wrought iron | Carefully, into solid members | Bolts or purpose-made clamps, never self-drilling screws into thin tube | Thin tube collapses; check the section is solid before torquing |
| Chain link | Not into the fabric | Clamps or ties to the top rail, or purpose-made mesh clips | The mesh carries nothing; the top rail or a tension wire is the only structure |
Two cautions on material. Avoid indoor or bright-plated screws outdoors; they corrode in a season or two, and rusting steel stains the timber around every fixing. And check stand-off clearance — brackets that hold a pot flush against the panel trap moisture and block airflow, which is how the timber behind a planter goes soft.
4. Prepare the fence and planter mounting area
Clean the fixing area with a stiff brush and wipe it down, because dirt and algae hide soft patches you would otherwise miss. Mark the bracket positions in pencil, allowing for the full width of the container and leaving 15 to 20 cm between pots so leaves and air can move.
Measure twice, drill once, and account for the post centres rather than eyeballing. If the fence has a coating, paint or a bitumen-based finish, take it back to bare material around each fixing point so the sealant and the head of the fastener have something to grip.
Check the planter itself before it goes up. Unobstructed drainage holes are the first requirement; a pot with a blocked hole will push water straight down the fence and eventually stain or rot the panel below it. If the container needs modifying, do it on the ground now rather than while it is hanging at height.
5. Attach the mounting hardware securely
Drill pilot holes first — roughly half the fastener’s diameter — so the screw or bolt starts straight and does not split the timber. Keep the drill level and check the fence is still firm in the area you are working; if it flexes noticeably, stop and find a post.
Work in a fixed order: top fixing first, then the base support, then the restraint. Fit a washer under every head that sits proud of the surface, because it spreads the load and stops the fastener pulling a cone of wood out of the board as it tightens.
Tighten to firm and no more. Over-tightening crushes timber and cracks vinyl. If the fence moves, cracks, or the driver bottoms out without reaching solid material, stop: you have gone into a hollow section or a void, and the fix is a longer fastener or a different fixing point, not more force.
6. Add drainage and secure the planter
Fit the planter while it is still light and empty, sit it squarely on the base support, and check with a spirit level across two directions. A container mounted even slightly out of square keeps working its way loose under wind, because the load never sits directly over the fixing.
Use a free-draining mix, and skip the plastic liner or pot-within-a-pot arrangement unless it has its own drainage. An impermeable liner traps water so the pot stays at maximum weight permanently, which is exactly the load case you sized the bracket against and hoped to avoid.
Run the upper fixing through the pot’s rim hole or lip hook, then attach the base restraint and, on anything heavy, a stainless cable from the planter to a second structural point. Confirm the planter cannot lift off by hand, and that the soil sits clear of the fastener heads so nothing is spalling down onto the fence.
7. Test the installation and maintain it
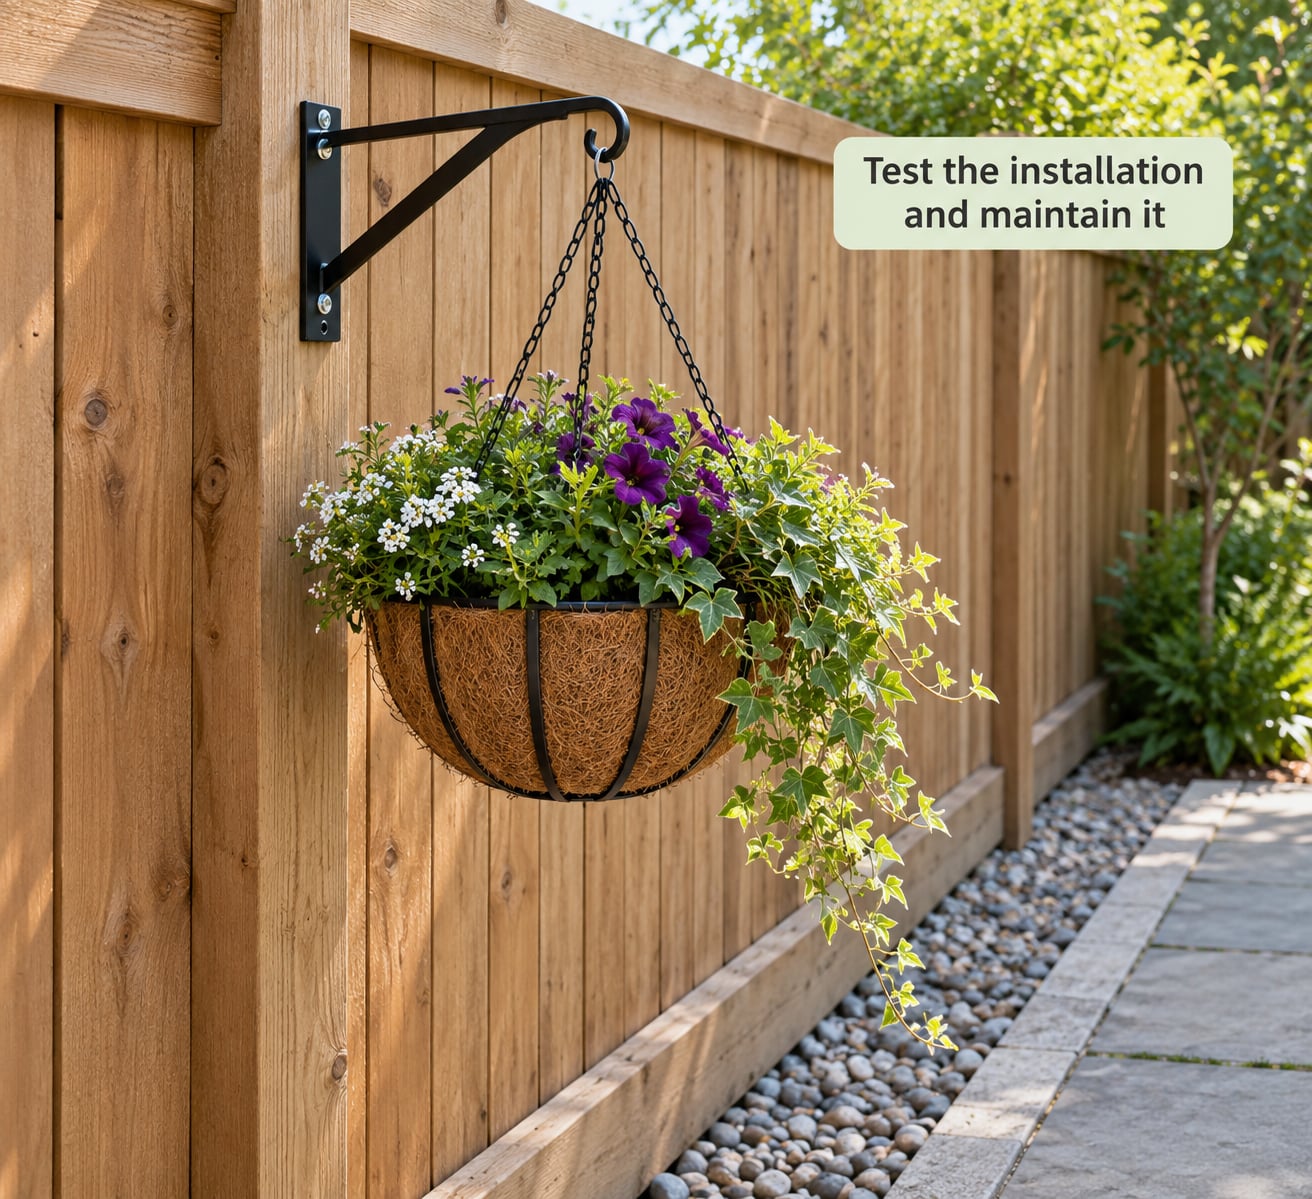
Test before you plant. Push firmly on the side of the container and then lift it slightly at the front — there should be no movement at the fixings and no creak from the fence. Then water it slowly and fully, wait an hour, and check underneath for a damp patch on the panel and for any weeping at the drainage hole.
Re-test after a real load. The empty test proves the fixings hold; the loaded test is the one that matters, because saturated soil changes the force on every fixing. If the panel develops a curve or the fasteners back out, take the pot down and move to a post.
Set a seasonal rhythm. In spring, walk the fence line and hand-tighten every fixing before growth fills the space. Before autumn storms, remove the heaviest planters or take the trailing growth back so the wind profile is smaller. Twice a year, check for corrosion, blocked drainage and rot around the fixings — all of which are quick to catch and slow to notice.
Common Mistakes
Almost every failure traces back to one of seven habits, and each has a straightforward fix.
- Fixing into a picket instead of a post or rail. Thin boards are decorative, not structural. Move the fixing point to the nearest post, or fix a vertical batten across the panel into two posts so the load is shared.
- Using indoor screws or the wrong anchor. Bright-plated screws corrode and stain, and a masonry plug driven into timber will split it. Match the fastener to the material and use stainless or galvanised rated for exterior use.
- Hanging a heavy pot from a single point. A large container needs a top fixing and a base support, ideally with a restraint as well. The top fixing alone is a pivot, and wind will find it.
- Sizing hardware on the empty pot. Buyers check what the container weighs, not what it weighs full. Calculate the saturated load and choose a bracket rated comfortably above it.
- Crowding planters together. Touching foliage traps humidity, blocks drainage and prevents inspection. Leave 15 to 20 cm between containers so air moves and you can see a failing fixing before it drops.
- Blocking drainage or letting soil touch the fence. Water running down a panel causes staining and rot, and a liner that holds water keeps the load permanently at its maximum. Use a free-draining mix, clear holes, and angle the pot out on a spacer.
- Working at height without protection. A ladder on uneven ground is the most common cause of injury in this job. Set it on firm level ground, keep three points of contact, and have someone steady it. Anything above head height is worth doing with a helper or a tradesperson.
One more that gets missed: mounting to a fence you do not own. A shared boundary often belongs to the neighbour, the association, or the landlord, and drilling into it without asking is a good way to lose the planter and the friendship. Check before you mark anything.
Frequently Asked Questions
Can you attach planters to any type of fence?
No. Timber board fences, posts and rails, masonry walls, and solid metal frames all take fixings well. Hollow vinyl and composite panels cannot be drilled safely because there is no internal structure to bite into, and chain link mesh carries no load at all. On those, clamp or hook onto the top rail, or fix a batten or trellis to the posts and hang the planters from that instead.
How much weight can a fence planter safely hold?
It depends on the fixing, the timber and the wind exposure, but useful reference points help. A 25 cm pot of potting mix holds roughly 16 kg of wet medium and around 20 to 25 kg fully loaded. Keep any single hook-mounted planter under about 10 kg, use a base-supported bracket for loads up to 25 kg, and go to a bolted bracket on a post for anything heavier. Always take a margin above your calculated load.
Should I mount planters to fence panels or posts?
Posts, every time, if you have the option. Posts carry the fence’s structural load and are thick enough to take screws or bolts without splitting. Panels and pickets are thinner, bow under load and can creep as the fixing moves. If a panel is the only option, fix a batten across two posts so the weight is spread, and keep planters to the lighter end of your load range.
What screws or bolts are best for fence planters?
For timber, use exterior-rated structural screws or galvanised lag bolts driven into the post, with pilot holes drilled first and washers under every head. Avoid standard drywall screws and indoor bright-plated screws, which corrode and stain the wood within a season or two. For masonry, use the correct anchors with the right drill bit and wall plugs, and never fix into mortar alone.
How do I attach planters to a vinyl privacy fence?
Do not drill the panels. Hollow vinyl has no internal structure, and a screw will either spin in the void or split the shell. Use over-the-top hooks that grip the top rail, purpose-made clamps, or a timber batten or trellis screwed into the posts and rails. Keep the total load modest, and add a stainless restraint cable if the fence line is exposed to wind.
When should a professional install fence planters?
Call in a qualified carpenter or metalworker when the fixing point sits above head height, when the load is over about 25 kg, or when the structure is masonry, aluminium or wrought iron. Get structural advice first if the fence panel already bows, the posts are leaning, or the timber is soft at ground level. Professionals also handle cases where the fence belongs to a neighbour or an association.
Conclusion
The safest sequence is short: identify the fence material, find a structural fixing point rather than a decorative board, and confirm the fully loaded weight before you buy a single bracket. Then fix the top, add the base support and a restraint, leave the drainage clear, and test the installation under real load before anything gets planted.
Start with the loaded weight. It is the one number that decides whether the whole job works, and everything else — the bracket, the fastener, the fixing point, the spacing — follows from it.