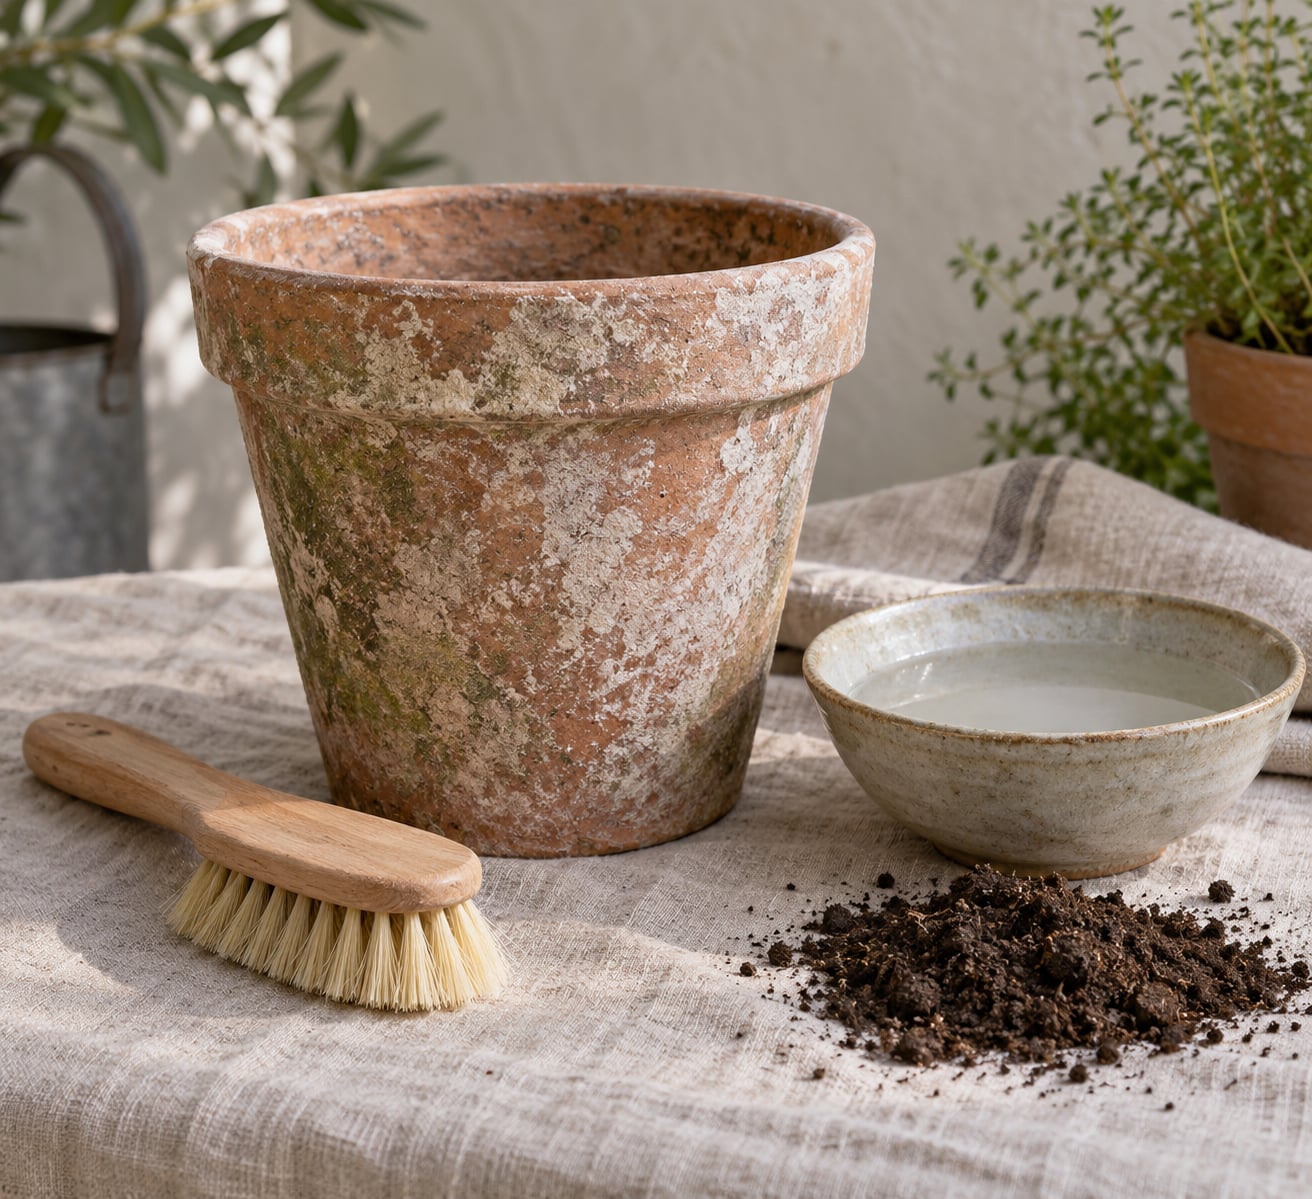
Aging terracotta means adding the visual evidence of years outdoors — mineral staining, darkened pores, softened edges and moss — until a bright new pot reads as a weathered find. Most people do it with a lime or mineral wash plus a paint patina, and the whole job takes an afternoon plus drying time.
The reason it works at all is the clay itself. Unglazed terracotta is porous and thirsty, so a wash sinks into the surface and dries chalky instead of sitting on top like a plastic shell. The five finishes below range from a subtle patina to something that looks thirty years buried in a garden bed.
Start with the gentlest option and build up. Terracotta that has already gone too dark is difficult to undo, and the mistakes that bother people most are usually too much water or too heavy a coat, applied too fast.
Table of Contents
- What You Need
- Step-by-Step: How to Age Terracotta Pots for a Rustic Look
- 1. Clean the terracotta thoroughly
- 2. Choose the level of weathering you want
- 3. Apply a base aging solution to the clay
- 4. Build natural-looking mineral variation
- 5. Dry, brush, and inspect the finish
- 6. Protect the pot when needed
- How to age terracotta pots outdoors with no chemicals at all
- Common Mistakes
- Frequently Asked Questions
- How do I paint terracotta pots to look old?
- What is the fastest way to age terracotta pots?
- Can you use yogurt to age terracotta pots?
- What kind of paint goes on terracotta pots?
- Does aging terracotta pots change drainage?
- Is a painted or sealed terracotta pot safe to plant in?
- Conclusion
What You Need
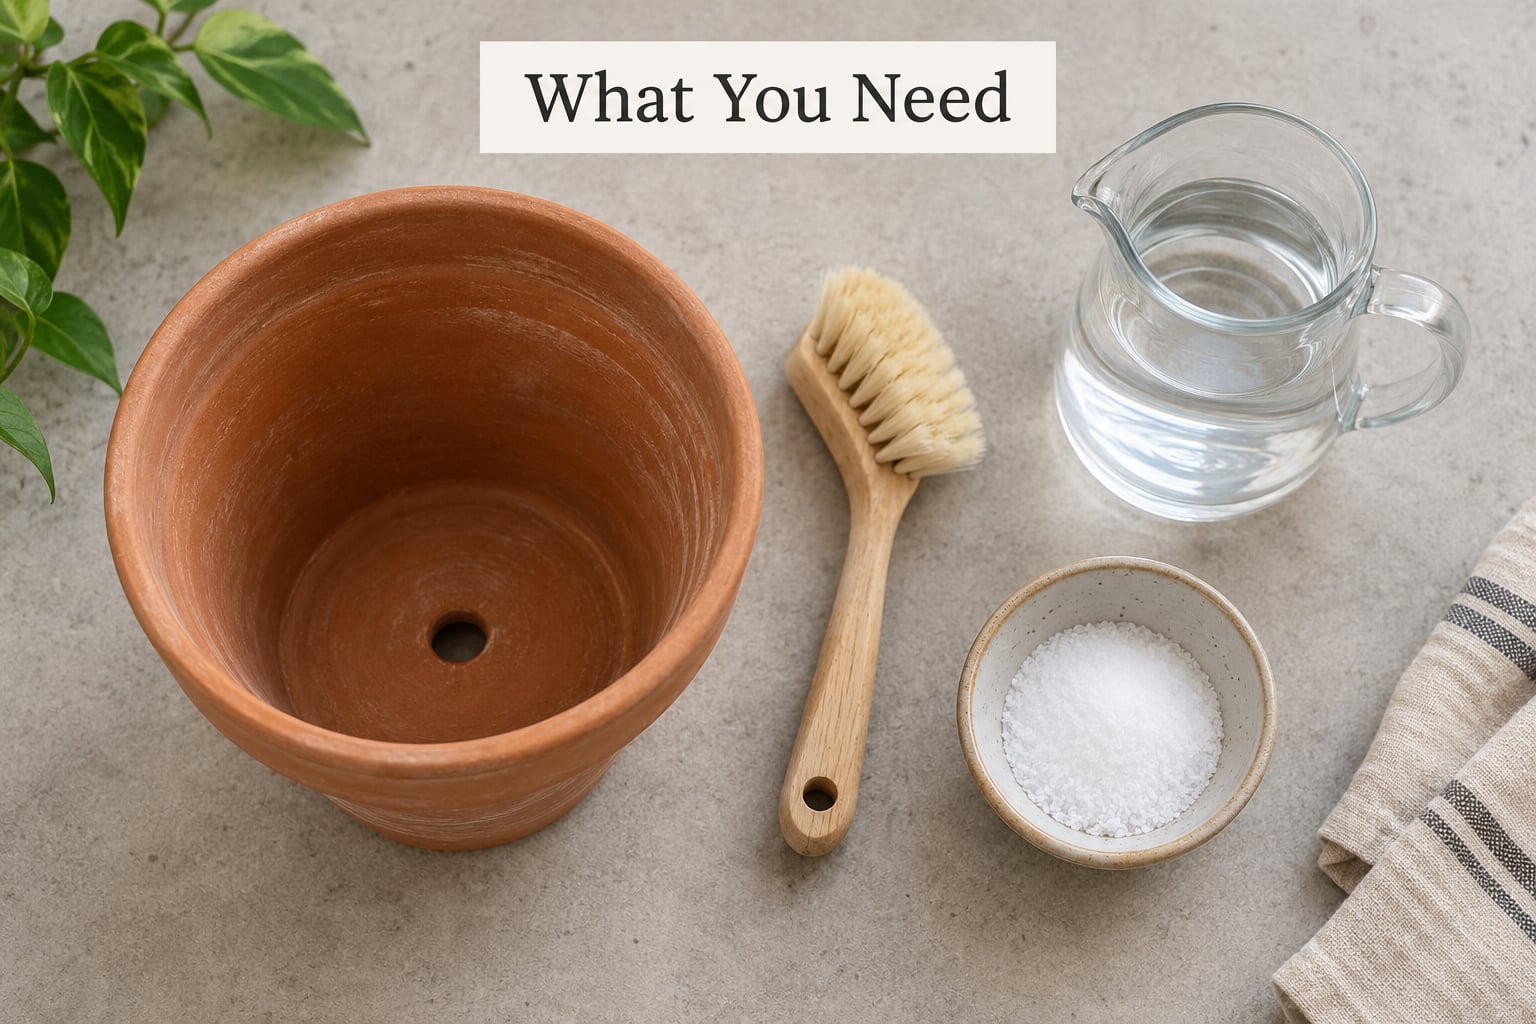
Every method shares a short base kit. The rest depends on which finish you pick.
- A soft-bristled brush or sponge brush for washing and for applying thin washes. Stiff bristles scratch unglazed clay.
- A plastic bowl and a measuring jug for mixing. Metal reacts with acidic mixtures and stains them grey.
- Plain salt for building uneven mineral variation. This is the cheapest and least messy of the aging agents.
- Tea or coffee if you want warm brown mottling rather than pale mineral bloom.
- Fine-grit sandpaper or a stiff nylon brush for softening residue and revealing raw clay on worn edges.
- A clear matte sealer for pots that will be planted or left in the rain.
- Rubber gloves and a dust mask for sanding steps, plus newspaper or a drop cloth to protect the work surface.
Work outside or in a well-ventilated room. Lime dust, sanding grit and aerosol sealer are all things you do not want to breathe in, and a drop cloth saves your table from the wash stage.
If you want to skip buying almost anything, a sponge, a bowl of water and a bit of table salt will get you most of the way there. Save the joint compound and the sealer for a pot you want to last outdoors.
Step-by-Step: How to Age Terracotta Pots for a Rustic Look
Work in this order and the finish builds naturally: clean, decide how weathered you want it, apply a base wash, break up the colour with mineral variation, dry and brush, then protect.
1. Clean the terracotta thoroughly
Dust, oil from handling, price-tag glue and old finishing residue all sit on the surface and block any treatment you apply on top. A dirty pot ages unevenly no matter how careful you are afterwards.
Scrub the pot with a stiff brush and warm water, adding a drop of dish soap if it is greasy. Rinse with clean water and let it dry completely — a full day in the sun for a large pot, or overnight indoors.
For thrifted pots, look for white crusty patches. Those are mineral deposits or efflorescence, left behind by years of watering, and they will flake off unevenly later if you leave them. Buff them away with fine sandpaper before you start.
Check the drainage hole while you are at it. Poke out compacted soil or pebbles, and scrape any mineral crust from around the rim and base where water collects.
2. Choose the level of weathering you want
Subtle patina suits indoor shelves and table displays, where a pot sits close to the eye and heavy distressing reads as damage. Dark, strongly rustic finishes suit outdoor planters and pots half-buried in a border.
Match the method to where the pot lives, not just to how dramatic you want it. A pot holding a watered plant needs a breathable finish, and a pot sitting in full sun needs a sealer more than a pot on a shelf.
| Finish | Time to an aged look | Plant-safe when sealed | Best for |
|---|---|---|---|
| Lime wash | 30 minutes plus a dry day | Yes | A soft chalky vintage tone, indoors or out |
| Paint patina | 1 to 2 hours plus drying between coats | Yes, if the inside is left breathable or sealed matte | Control over colour and a distressed farmhouse look |
| Joint compound texture | 1 hour plus overnight drying | Yes | Crusty antique texture that catches light |
| Live moss patina | 10 to 14 days of daily misting | Yes on the outside; keep moss away from drainage | The most convincing, living result |
| Natural weathering | 6 to 12 months outdoors | Yes, nothing added | A genuinely untouched rustic look |
Nothing here is permanent, so pick based on patience and location rather than fear of ruining the clay. A sealed lime wash wipes off with a damp cloth if you decide you went too dark.
3. Apply a base aging solution to the clay
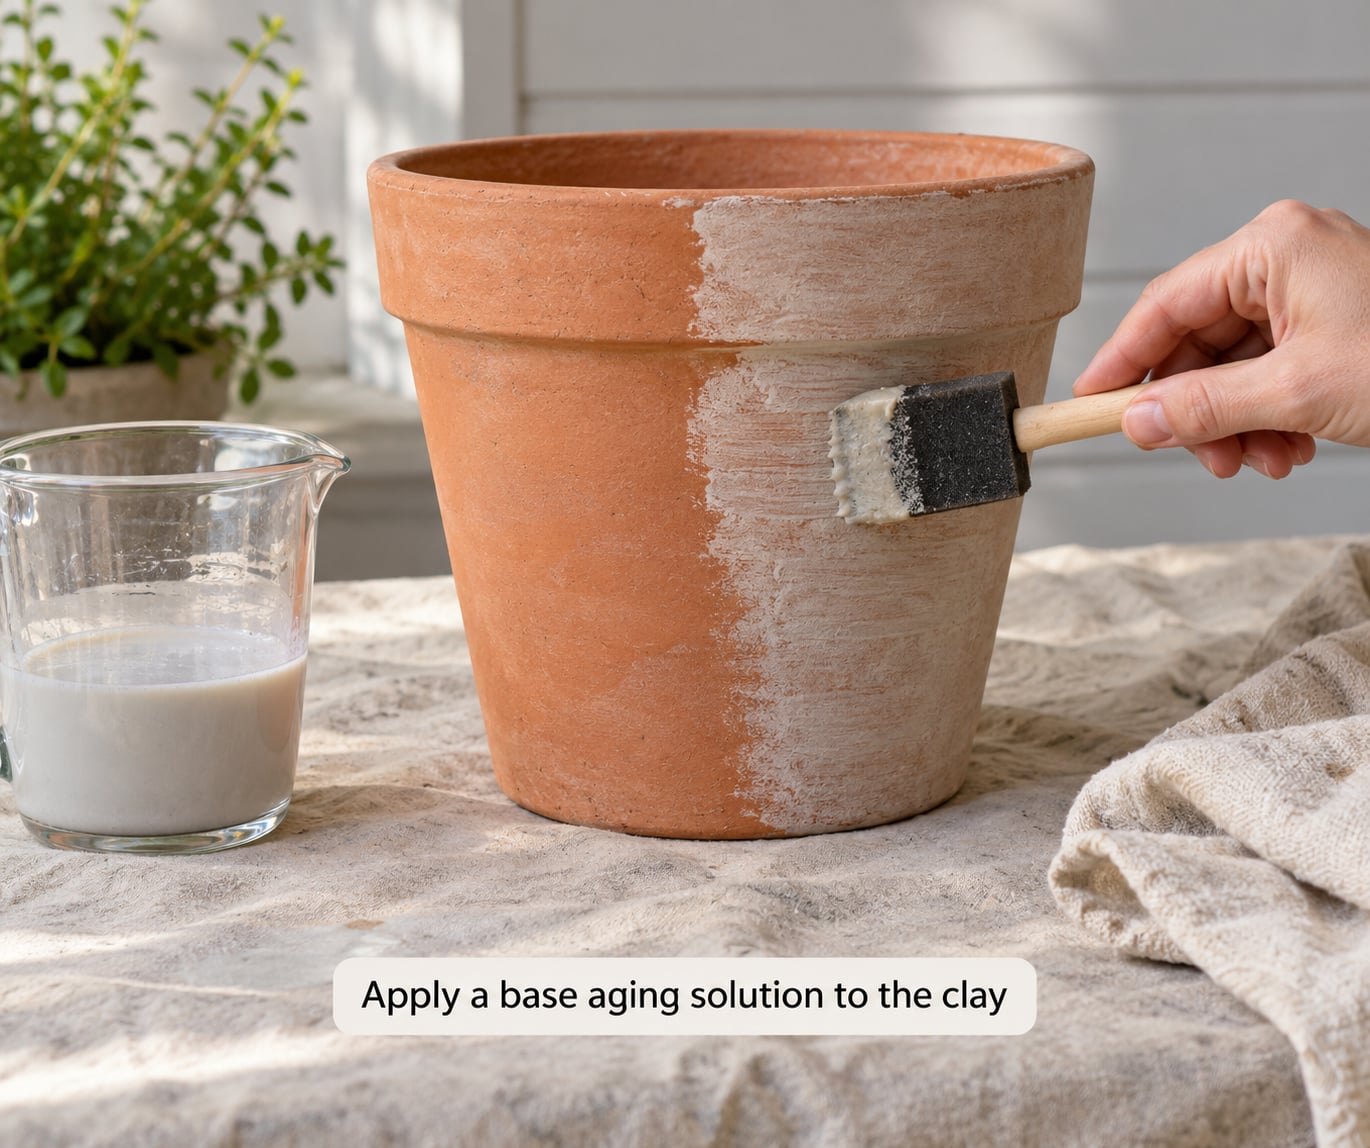
The simplest base is plain water. Wipe it on with a sponge and let the clay drink it in — this wets the surface evenly so the next layer spreads instead of beading.
For a stronger mineral effect, mix garden lime with water at roughly two cups of lime to half a cup of water. Stir it until it reaches the consistency of thick cream, then keep stirring as you apply, because the lime settles fast and a thin first coat grabs and a thick second coat flattens.
Apply it with a sponge brush in thin, uneven passes. Work it into the pores rather than laying it on as a coat, and carry it 2 or 3 inches down inside the rim so the aged finish reads when you look into the pot.
Leave each section slightly different in tone. A pot that dries one flat shade looks manufactured, while a pot with soft pale patches and warmer areas looks handled.
Always test on the base or the back first. Terracotta brands differ, and some clay drinks the wash so fast it patches before you can blend it.
4. Build natural-looking mineral variation
The part that sells the age is the uneven part. Perfectly even colour reads as a coat of paint no matter how pale you make it.
While the wash is still damp, dissolve plain salt in warm water and flick or dab it on in scattered spots. The salt settles into different pores and dries to a pale bloom in some places and nearly nothing in others.
Use tea or coffee for a different tone. Brew it strong, dab it on with a rag or sponge, and let it sit a few minutes before blotting off the excess — the longer it sits, the darker the patch.
Smear garden soil or potting compost onto the wet surface with your fingers, then brush most of it away. A trace of soil settled in the texture is the single most convincing detail, because it looks like a decade of watering rather than a technique.
Dab a little dark brown or moss green wax into the deepest crevices once the pot is dry and sealed. It mimics the staining that collects where water runs, and it takes about a minute.
5. Dry, brush, and inspect the finish
Give the pot at least 24 hours in a dry, ventilated spot before you touch it. Rushing this is the most common reason a finish cracks, flakes or ends up patchy.
Once it is dry, brush it gently with a soft brush to knock off loose salt and lime residue. Then sand or scrape only the high points — rim edges, the base, and any raised joint compound — back to raw clay so warm orange shows through where a real pot would be rubbed by hands, hoses and weather.
Stand the pot next to the space it will live in and look at it from a step back. That distance is roughly where a passerby will see it, and it shows patchy coverage instantly.
If it looks too uniform, add another light pass of salt water and let it dry again. Two thin builds beat one heavy one every time.
6. Protect the pot when needed
Sealing matters for any pot that holds soil, gets rained on, or sits in full sun. Skip it only for a decorative pot on a dry indoor shelf.
Choose a clear matte sealer, or Polycrylic, and read the label for the surface and the exposure. Matte keeps the clay looking like clay; satin leaves a slight sheen that reads as plastic once it is dusty.
Seal the outside generously and the inside lightly. A heavy interior coat can slow drainage and hold moisture against the root ball, which is how you end up with a pot that stays wet long after you have watered it.
Leave 24 hours before you plant, longer in humid weather. If the pot will hold food plants or a pet might chew it, pick a product labelled food-safe and let it cure fully first.
How to age terracotta pots outdoors with no chemicals at all
If “rustic” means untouched material in your house, skip every wash above. Set the pot outside and let the weather do it.
Bury the lower third in garden soil, or stand it in a damp, shaded corner where rain collects but full sun does not. Moss, algae and soil will colonise the porous clay on their own within a few months.
Salt air near a coast works faster than dry inland air, because damp wind carries mineral onto the surface. Six to twelve months gives a pot that looks genuinely old, and the surface keeps improving after that.
If you only have a few months, a yoghurt and moss slurry speeds this up. Blend about one cup of plain yoghurt per pot with live sheet moss, dab the paste on the damp clay, and seal the pot in a plastic bag to hold humidity. Mist it daily and open the bag for air every few days.
Green fuzz is moss. White or grey fuzzy growth is mould, and it means the surface stayed too wet or the mix carried too much sugar. Scrub it off with a stiff brush, cut back on misting, and start again.
Common Mistakes
Soaking the pot instead of washing it. Standing terracotta in water for hours draws salts to the surface as it dries, and you get a white bloom you did not plan for. Wipe and sponge, never soak.
One heavy coat of lime or paint. Terracotta absorbs fast, and a thick coat dries patchy because the top sets before the clay underneath finishes drawing moisture. Thin coats, each allowed to dry, behave far better.
Testing only after the pot is planted. Always try a base wash on the back of the pot first. If the clay drinks it unevenly, you find out in thirty seconds instead of after you have painted the whole thing.
Sealing the interior heavily. A thick interior coat reduces drainage and holds water against the soil. Seal the inside lightly, or leave raw clay inside and only seal the outside.
Reading mould as moss. White or grey fuzz means the yoghurt mix went mouldy, usually from excess sugar or misting that was too generous. Green fuzz is the result you wanted.
Expecting even coverage. Real pots have wear on the rim, the base and the sides people touch. Leaving some of those areas bare, or sanding back to raw clay, does more for believability than extra colour.
Skipping the inside edge. Carry every finish 2 or 3 inches below the rim. From most viewing angles you see inside the pot, and a raw interior under a finished exterior looks unfinished.
Frequently Asked Questions
How do I paint terracotta pots to look old?
Paint the pot in thin, uneven layers of matte acrylic or chalk paint, letting each one dry before the next. Sand or scrape the rim, base and high spots back to raw clay so warm orange shows through. Leave some areas less covered than others, then dab brown or moss green wax into the crevices and finish with a clear matte sealer.
What is the fastest way to age terracotta pots?
The petroleum jelly resist is the quickest at around 30 minutes. Run a thin film of petroleum jelly along the rim and base, paint over the whole pot, then sand or scrape the jelly away so the paint lifts off and raw clay shows. Dryness and light mineral dabbing take longer, and a live moss patina needs 10 to 14 days of daily misting.
Can you use yogurt to age terracotta pots?
Yes. Blend about one cup of plain yoghurt or buttermilk per pot with live sheet moss, dab the paste onto damp clay, and put the pot in a plastic bag to hold humidity. Mist it every day and let air in every few days. Green fuzz usually appears in 10 to 14 days. White or grey fuzz means mould, so wipe it off and reduce the moisture.
What kind of paint goes on terracotta pots?
Use matte acrylic craft paint or chalk paint, ideally paint made for outdoor use if the pot will live on a patio. Matte finishes read as clay, while satin and gloss look like plastic once they collect dust. Paint the outside generously and the inside lightly, since a heavy interior coat slows drainage.
Does aging terracotta pots change drainage?
Wash and staining have almost no effect on drainage. Paint and sealer do. A heavy interior coat, or fine sanding grit washed into the drainage hole, can slow water leaving the pot. Keep the interior coat thin, clear the hole after sanding, and check that water runs through freely before you add soil.
Is a painted or sealed terracotta pot safe to plant in?
It can be, as long as the inside is left unglazed and breathable or sealed with a light, matte coat, and the product is labelled safe for potted plants. Let the sealer cure for at least 24 hours before planting. Avoid glossy and thick interior coats, which hold moisture against the root ball and can make soil stay wet too long.
Conclusion
Start by scrubbing the pot and wiping on plain water. That single afternoon gives you an evenly prepared surface, and everything after it layers cleanly.
Then choose one finish and commit to it. Lime for a soft chalky tone, paint for control over colour, joint compound for real crusty texture, moss for the most convincing result, or six months outdoors if you want a pot nobody can tell was new.
Test on the back, build in thin passes, leave the rim and base a little worn, and seal lightly before planting. That is the whole process, and it is easier than hunting down genuinely old clay.