Yes, you can use a pot without drainage holes, but treat it as an outer sleeve rather than a place where soil sits on its own. The reliable method is to grow the plant in a plastic nursery pot with drainage holes and set that pot inside your decorative pot, emptying the outer pot after 30 to 60 minutes. Most plant problems happen when soil is planted directly in a hole-less container and water has nowhere to go.
The word for a decorative pot used this way is a cachepot, French for hidden pot. It holds the plant’s real pot rather than the plant’s roots, so the pot you liked at the shop still does its job as a display piece while the soil does its job somewhere it can breathe.
There are other routes. You can drill holes yourself, use a wicking cord to pull water out on a schedule, or run the container in LECA clay pebbles. What none of them do is make a gravel layer drain water, which is the first thing most people try and the first thing that quietly kills the plant.
This guide walks through the setup in six steps, then the mistakes that trip people up. It takes about twenty minutes of work plus the drying time your plant needs before you water it again.
Table of Contents
- What You Need to Use a Pot Without Drainage Holes Safely
- Step-by-Step
- How to Use a Pot Without Drainage Holes Safely: Assess the Pot and the Plant
- Create an Unobstructed Route for Excess Water
- Choose a Mix That Releases Water Slowly
- Plant Without Leaving Water at the Bottom
- Water Only When the Plant Needs It
- Watch for Roots, Odor, and Other Warning Signs
- Common Mistakes
- Frequently Asked Questions
- Can I put gravel at the bottom of a pot without drainage holes?
- What plants grow best in pots without drainage holes?
- Is a cachepot without a drainage hole safe for plants?
- How often should I water a plant in a pot without drainage?
- Can I make drainage holes in a terracotta or ceramic pot?
What You Need to Use a Pot Without Drainage Holes Safely
Four things matter, and one common idea does not.
- A plant that tolerates wet soil. Ferns, pothos, snake plants, ZZ plants, prayer plants and most tropical foliage plants cope far better with a slow-draining pot than succulents or drought-tolerant herbs do. Match the plant to the container, not the other way round.
- The decorative pot. Any pot, bowl or vase works, as long as the inner pot fits inside with a little room around it.
- A removable inner pot with drainage holes. A cheap plastic nursery pot in the size that matches the root ball does the real work here. If the plant arrived in one, do not throw it away.
- A porous potting mix. Anything that drains freely and holds some air: a standard indoor mix amended with perlite, pumice or fine bark. Skip dense garden soil and anything that packs down into a wet slab.
- Optional tools: a finger or a wooden chopstick for the moisture test, a mesh or coffee filter to keep mix out of a drilled hole, pot feet to lift the inner pot off the base, and a drill with a masonry bit if you plan to make your own holes.
One thing you do not need is a drainage layer. Rocks, gravel and pebbles at the bottom of a hole-less pot do not create drainage, and putting them there makes the situation worse rather than better. I will explain why in the mistakes section, but treat it as settled now: nothing goes at the bottom.
Step-by-Step
These six steps are a repeatable setup rather than a one-off rescue. Work through them in order and check the result at each stage, because most failures trace back to skipping step two and improvising at step five.
How to Use a Pot Without Drainage Holes Safely: Assess the Pot and the Plant
Start by measuring what you have. Set the plant’s root ball inside the decorative pot and check the fit before you go any further. You want the inner pot to sit level, not tilted, with about 2 to 3 cm of clearance around the sides so you can reach in and see the soil.
Next, judge the plant honestly. Ask what it is and how often it wants water in a normal pot. A fern or a pothos in a hole-less pot is a workable compromise. A cactus, a succulent or a rosemary plant is not, because those plants die in wet soil and no amount of careful watering fixes a sealed container.
If your plant came from a nursery already sitting in standing water, that is a separate problem and step six covers how to handle it.
Last in this step: rule out the gravel layer. I know it feels wrong to look down into an empty decorative pot, but a layer of rocks creates a perched water table, meaning the water collects in the perched layer and then wicks back up into the soil above it by capillary action. The layer holds the water where the roots are instead of holding it away from them, so drainage gets worse, not better.
Create an Unobstructed Route for Excess Water
This is the step that decides whether the setup works. Excess water needs a path out, and in a hole-less pot you have to build that path yourself.
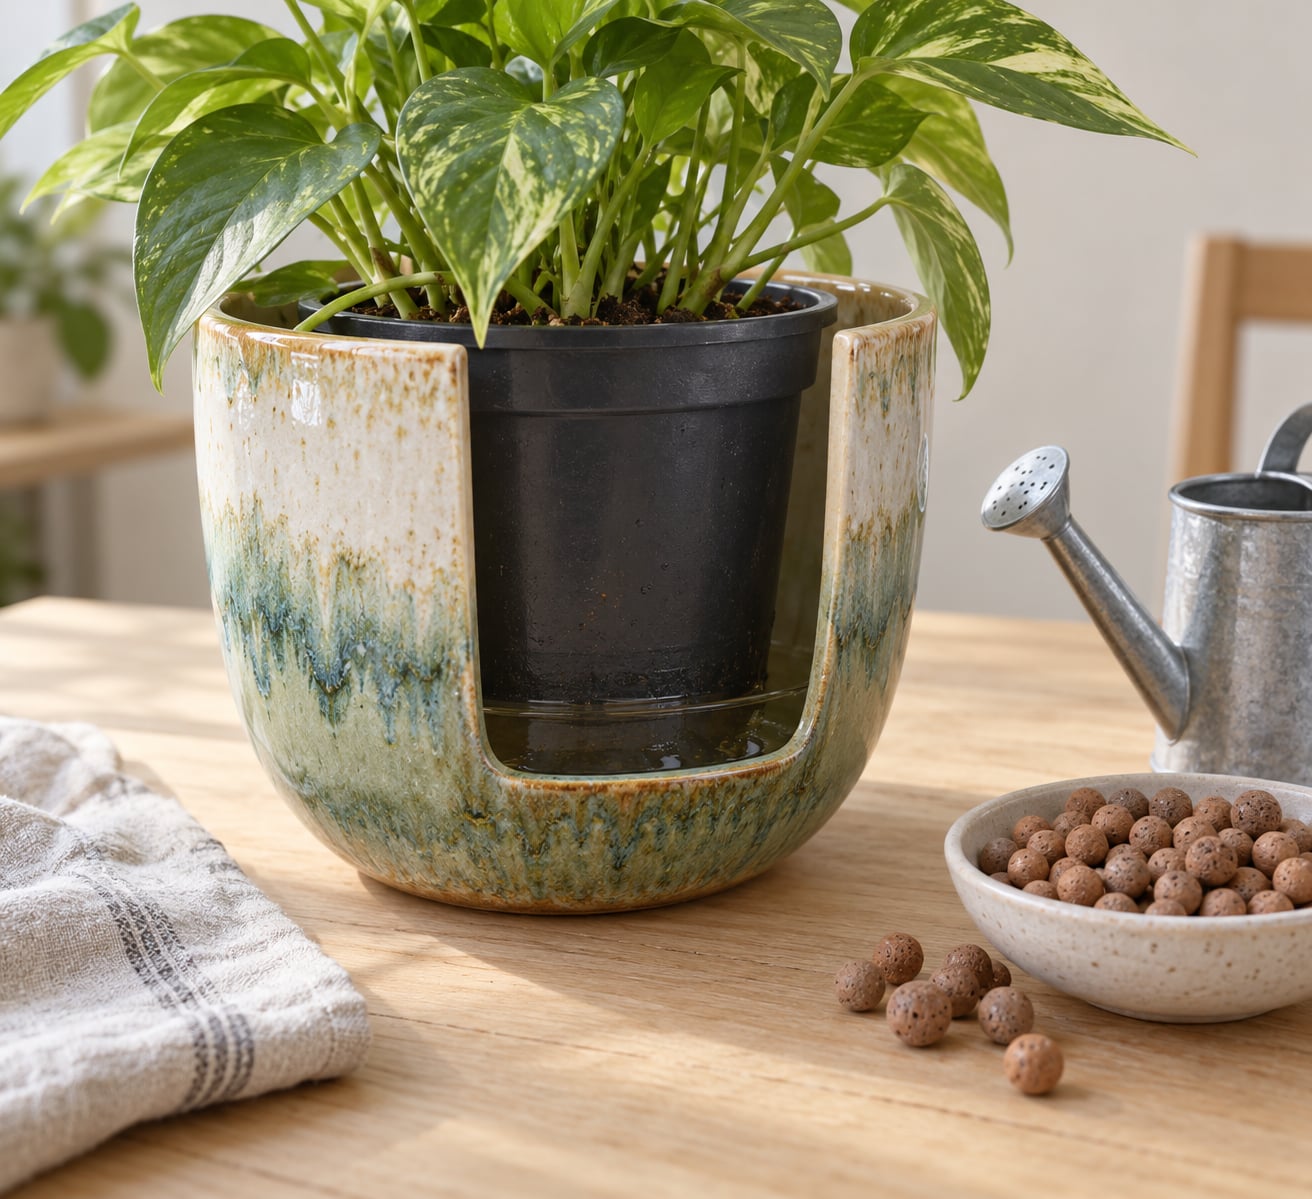
Option one, and the best one: a removable nursery pot. Slip the plant into a plastic pot with drainage holes and set that inside the decorative pot. Water runs through the inner pot, out the holes, and into the outer pot where it no longer touches the roots. Wait 30 to 60 minutes, then tip the outer pot and empty it. This is the method experienced growers on r/houseplants and r/succulents recommend most often, and it costs very little.
If you want the inner pot raised off the base so it cannot sit in collected water, put pot feet or a couple of risers underneath it. Gardeners describe bottle caps and flat pebbles as risers, which is exactly what they are. The function is to lift the pot, not to filter water.
Option two: drill your own drainage holes. Two or three holes, roughly 1 cm across, in the base, placed symmetrically. The technique changes by material.
- Plastic nursery pots and light resin planters drill easily with a general bit.
- Terracotta drills with a masonry bit, on a low setting, with water running over the surface to keep dust down and the bit cool.
- Glazed ceramic and stoneware crack easily. Soak the pot in water for 20 minutes first, drill at the lowest speed you can hold, keep the bit lubricated, and go around the outside of each hole rather than pushing all the way through.
- Metal containers need a step bit and a file to knock out the burr.
Structural terracotta, thick stone and anything antique or glazed all carry a real cracking risk. Check with the manufacturer before drilling, and if the pot is expensive, brittle or already chipped, stop and use the nursery pot method instead.
Option three: a wicking system. A cotton or felt cord running from the root zone down through the base into a reservoir of 1 to 2 cm of water pulls excess moisture out by capillary action. It works well for vacations and for plants in vases. It also fails quietly, so check that the cord is genuinely damp and sitting in water rather than assuming.
Choose a Mix That Releases Water Slowly
In a sealed container, the mix is your only control over how long water stays around the roots. A porous mix with visible perlite or bark releases water slowly and evenly; a dense one holds it in a lump and goes sour.
Use a standard indoor potting mix amended with roughly a quarter to a third perlite, pumice or fine orchid bark by volume. For a moisture-loving plant, you can go slightly richer than you would in a draining pot, but never dense.
Do not compact the mix by pressing it down hard. Water moves sideways through loose channels and sits in compacted pockets, which is how the bottom of a pot ends up wet while the top looks dry. Fill in even layers and tap the pot instead of pushing with your hands.
Skip garden soil, and skip anything that has been sitting open and dried to solid. Fresh mix, loose and fibrous, is the point.
Plant Without Leaving Water at the Bottom
Prepare the container first. If you drilled holes, cover each one with a small square of mesh or a coffee filter so mix does not wash out, while water still passes freely. If the pot has no hole at all, give it a clean, dry base and set it where it will not collect spill water.
Fill the mix evenly, leaving the planting depth the same as it was in the nursery pot. Planting too deep buries the stem and invites rot at the soil line, and planting too high lets the root ball dry out from the sides.
Put the plant in, firm the mix gently around the root ball, and check that the inner pot sits level rather than rocking. Then water once, thoroughly, until water runs out of the bottom of the inner pot. Let it drain fully in a sink or on a newspaper before the pot goes back on the shelf.
That first watering settles the mix and tells you the pot drains when it can. Empty anything collected in the outer pot, wait 30 to 60 minutes, and check again. If it drained in a reasonable time, your setup is working.
Water Only When the Plant Needs It
This is where sealed pots are usually lost. Watering on a schedule ignores what is happening in the soil, and a hole-less pot has no margin for error because the water cannot leave.
Before every watering, push a finger about 2 to 3 cm into the top of the mix. If it comes up cool and damp, wait. If it feels dry and the pot feels noticeably lighter than it did when you watered last, water now. A wooden chopstick pushed in and pulled out tells you the same thing at more depth.
When you do water, pour slowly until you see water leaving the drainage holes of the inner pot and collecting in the base of the outer one. Then stop. Do not keep pouring because the pot looks dry on top; the surface dries while the roots are still sitting in wet soil.
Empty the outer pot or saucer after 30 to 60 minutes. Standing water in the base is where fungus gnats breed, and in warm weather it will draw mosquitoes too. Nobody mentions that on the forums, but it is a real reason to empty on a schedule rather than whenever you remember.
Slow everything down in cool, cloudy or low-light conditions. A pot on a windowsill in winter may need half the water and half the frequency of the same pot in June. Rule of thumb for most foliage plants: roughly every 7 to 10 days in summer and every 2 to 3 weeks in winter, adjusted entirely by the finger test.
Watch for Roots, Odor, and Other Warning Signs
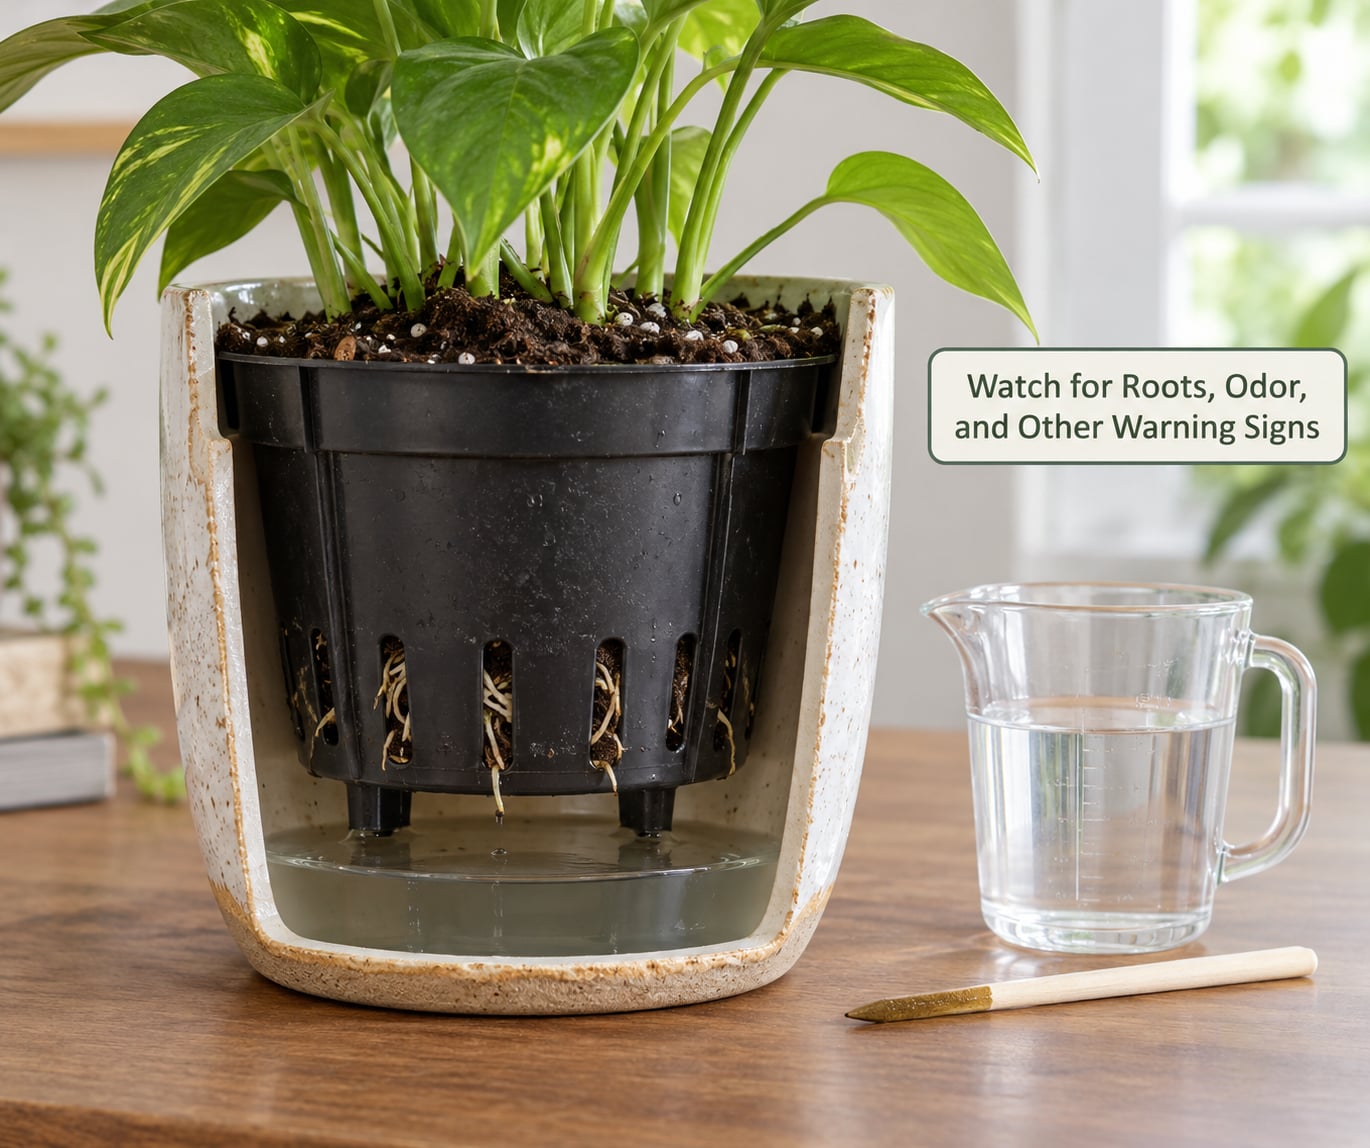
Check early and often, because a hole-less pot gives you less warning than a draining one does.
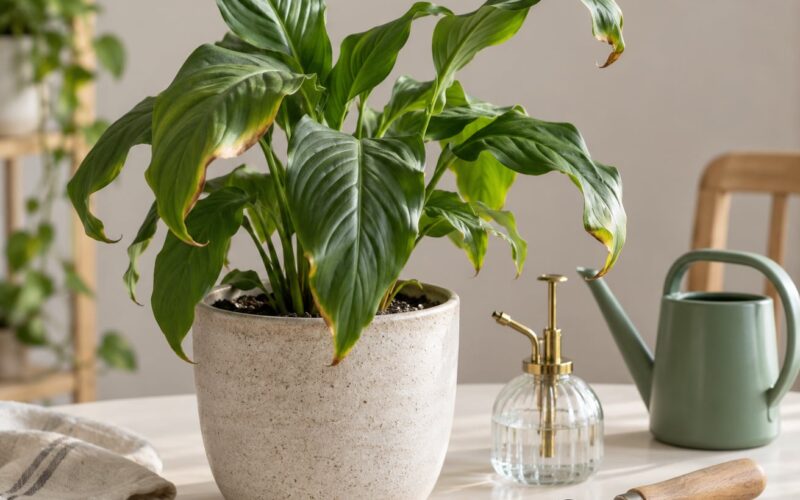
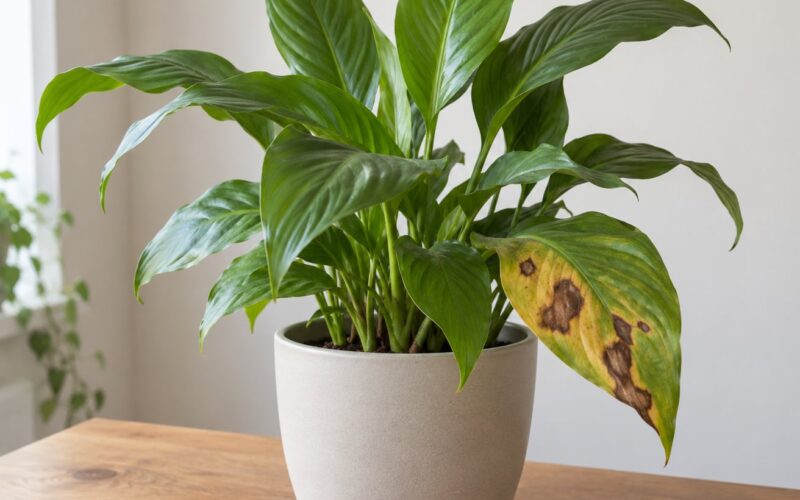
- Yellowing leaves, especially lower ones that go soft rather than crispy, are the usual first signal of excess water.
- A sour or swampy smell from the soil means anaerobic bacteria are working on dead organic matter in the wet zone.
- Slime on the mix surface or a thin film in the base of the outer pot means the mix has been saturated for days.
- Fungus gnats circling the pot appear within days of a wet soil surface, and standing water adds mosquito breeding on top of that.
- Mushy or darkened roots when you check, which smell bad when you lift the inner pot out.
Correct an early problem by moving the plant out of the wet zone. Lift the inner pot, tip out any water, blot the surface of the mix with a paper towel, and leave it out of the decorative pot for a few days so the root ball can dry slightly. Then put it back once the mix is no longer wet to the touch.
Once roots are brown and mushy, the pot is not the problem, the roots are. Repot into fresh mix in a draining nursery pot, trim away dead root material with clean scissors, and hold off on fertilizer. Repotting after the plant recovers is easier than trying to nurse damaged roots inside a sealed container, which is why people on gardening.stackexchange.com handling balcony containers in sealed vessels usually end up doing exactly that.
One warning sign is worth acting on immediately: if a plant keeps showing yellowing, sour smell and fungus gnats even after you correct the watering, stop treating the hole-less pot as a compromise and move the plant into a draining container permanently.
Common Mistakes
Adding only a gravel layer. The most common and the most damaging mistake. A gravel layer does not drain anything; it creates a perched water table, and the water in it wicks back up into the soil by capillary action, holding the root zone wet for longer. It also reduces the volume of soil available to the roots. Skip it.
Using a dense mix. Garden soil, peat-heavy compost straight from the bag, or old mix that has compacted into a slab. In a sealed pot this traps water in a lump and goes anaerobic at the edges. Mix in perlite or pumice so the medium drains slowly and evenly.
Watering on a fixed schedule. Every Sunday, every ten days, whatever a blog said. Schedules ignore the actual state of the soil and the light in your room. Test the top of the mix first, every time.
Leaving water in the outer pot or a saucer. Roots should not sit in a bath. Empty after 30 to 60 minutes, check again before bed, and get fungus gnats and mosquitoes out of the equation.
Choosing a drought-tolerant plant. Succulents, cacti, rosemary and thyme are the wrong choice for a sealed pot, and no watering adjustment rescues them. Choose a moisture-tolerant foliage plant, or give the container a hole.
Placing the pot where you cannot check the soil. A high shelf or the back of a bookcase means you water by habit instead of by touch. If you cannot reach the surface and see the mix, choose a different spot.
Drilling a fragile container unsafely. Dry glazed ceramic plus full drill speed equals a cracked pot and a trip hazard. Soak the pot, drill slowly with water cooling the bit, and drill from the outside in. If the pot is valuable or brittle, do not drill it at all; use a nursery pot inside it.
A short list of prevention tips: use a removable nursery pot every time, never leave standing water, test the soil before watering, keep the mix loose, and pick a plant that likes moisture. Those five habits cover almost every failure a hole-less pot produces.
Frequently Asked Questions
Can I put gravel at the bottom of a pot without drainage holes?
No. Gravel does not create drainage in a sealed pot. Water collects in the pebble layer and then wicks back up into the soil by capillary action, which keeps the root zone wet for longer than an empty pot would. It also eats into the soil volume the roots get. If you need the inner pot raised off the base, use pot feet or a riser under the inner pot itself rather than a layer of rocks underneath it.
What plants grow best in pots without drainage holes?
Moisture-loving plants do best: ferns, pothos, snake plants, ZZ plants, prayer plants, calatheas and most tropical foliage plants, since a slow-draining pot behaves like a slightly humid environment. Semi-hydro set-ups in LECA clay pebbles also work well in hole-less vessels because the roots sit in a measured reservoir rather than wet soil. Succulents, cacti, rosemary and thyme are the poor choices here.
Is a cachepot without a drainage hole safe for plants?
Yes, as long as the plant is not actually growing in it. A cachepot is an outer decorative pot, and the plant lives in a plastic nursery pot with drainage holes that sits inside it. Water runs out of the inner pot into the outer one, away from the roots. Empty the outer pot after 30 to 60 minutes so the inner pot never sits in collected water, and check on that every time you water.
How often should I water a plant in a pot without drainage?
Only when the soil tells you to. Push a finger 2 to 3 cm into the top of the mix; water when it comes up dry and the pot feels lighter than it did after the last watering. For a foliage plant that lands roughly every 7 to 10 days in summer and every 2 to 3 weeks in winter, less in cool or low-light rooms. Pour until water runs from the inner pot’s holes, then empty the outer pot.
Can I make drainage holes in a terracotta or ceramic pot?
Terracotta is straightforward: use a masonry bit on a low setting with water running over the surface, and make two or three holes about 1 cm across. Glazed ceramic and stoneware crack easily, so soak the pot in water for 20 minutes, drill at the lowest speed you can hold, keep the bit lubricated, and drill from the outside in rather than pushing through. Check the manufacturer’s guidance first, and skip drilling on antique or valuable pieces.
Start by checking the two things that decide everything: does the plant like moisture, and does excess water have a route out of the pot? Give it one with a removable nursery pot inside, leave nothing at the bottom, and water only when the top of the mix says it is time.