To build a vertical garden wall indoors you need a support system fixed or stood against a blank wall, a free-draining potting mix, low-light plants matched to that wall’s brightness, and a watering method that reaches every pocket. The sequence below runs from measuring the wall through to a weekly care routine, and most people finish a small wall in an afternoon with basic tools. The part that decides whether it survives the year is what happens behind the planters.
Dry soil is roughly half the weight of the same volume saturated, so a wall that looks light on the shelf ends up heavy once you water it. Plan for that before anything touches the wall. Updated for 2026.
Table of Contents
- What You Need
- How to Build a Vertical Garden Wall Indoors: Step by Step
- 1. Choose a wall and plan how to build a vertical garden wall indoors
- 2. Choose the support system
- 3. Install the frame and waterproof the area
- 4. Add the planting pockets or shelves
- 5. Select and install suitable plants
- 6. Set up watering and drainage
- 7. Add lighting and finish the installation
- 8. Check the result and establish a care routine
- Common Mistakes
- Frequently Asked Questions
- Can I build a vertical garden wall indoors without damaging the wall?
- What is the best support system for an indoor vertical garden?
- Which plants work best in an indoor vertical garden?
- How often should I water a vertical garden wall indoors?
- Do I need waterproofing behind an indoor vertical garden?
- How much light does an indoor vertical garden need?
- Conclusion
What You Need
Three families of support system cover almost every indoor installation, and the difference matters more than the plants do. Freestanding frames take the weight themselves and never touch plaster. Pocket panels hang from rails or a frame and hold many small plants but need even spacing and careful watering. Shelf units hold removable pots, which makes repotting and swapping plants far easier than anything pocket-based.
- Support system — a freestanding frame, a pocket panel on rails, or a set of wall-mounted shelves sized to your wall.
- Fixings — masonry plugs and screws for brick or concrete, self-drilling drywall anchors for plasterboard, or nothing at all for a freestanding frame.
- Planters — felt pockets with drainage holes, or pot holders with a lip that holds a nursery pot in place.
- Substrate — a peat-free, free-draining potting mix. Add perlite or grit if the mix holds water for more than a few seconds.
- Waterproofing — a rigid splash guard or plastic sheet behind the wall of planters, plus a waterproof floor mat.
- Watering kit — a watering can with a fine rose, a small hose-fed drip line with adjustable emitters, and a shallow reservoir tray at the base.
- Lighting — a full-spectrum LED grow light on an adjustable bracket if the wall gets under a few hours of indirect light.
- Tools — tape measure, pencil, stud finder, spirit level, drill, and a step ladder.
- Safety gear — eye protection, gloves, and someone else in the room while you are on a ladder with a drill.
Buy the substrate and plants last. If you buy them first they sit in their nursery pots waiting for a wall that is not built yet.
How to Build a Vertical Garden Wall Indoors: Step by Step
1. Choose a wall and plan how to build a vertical garden wall indoors
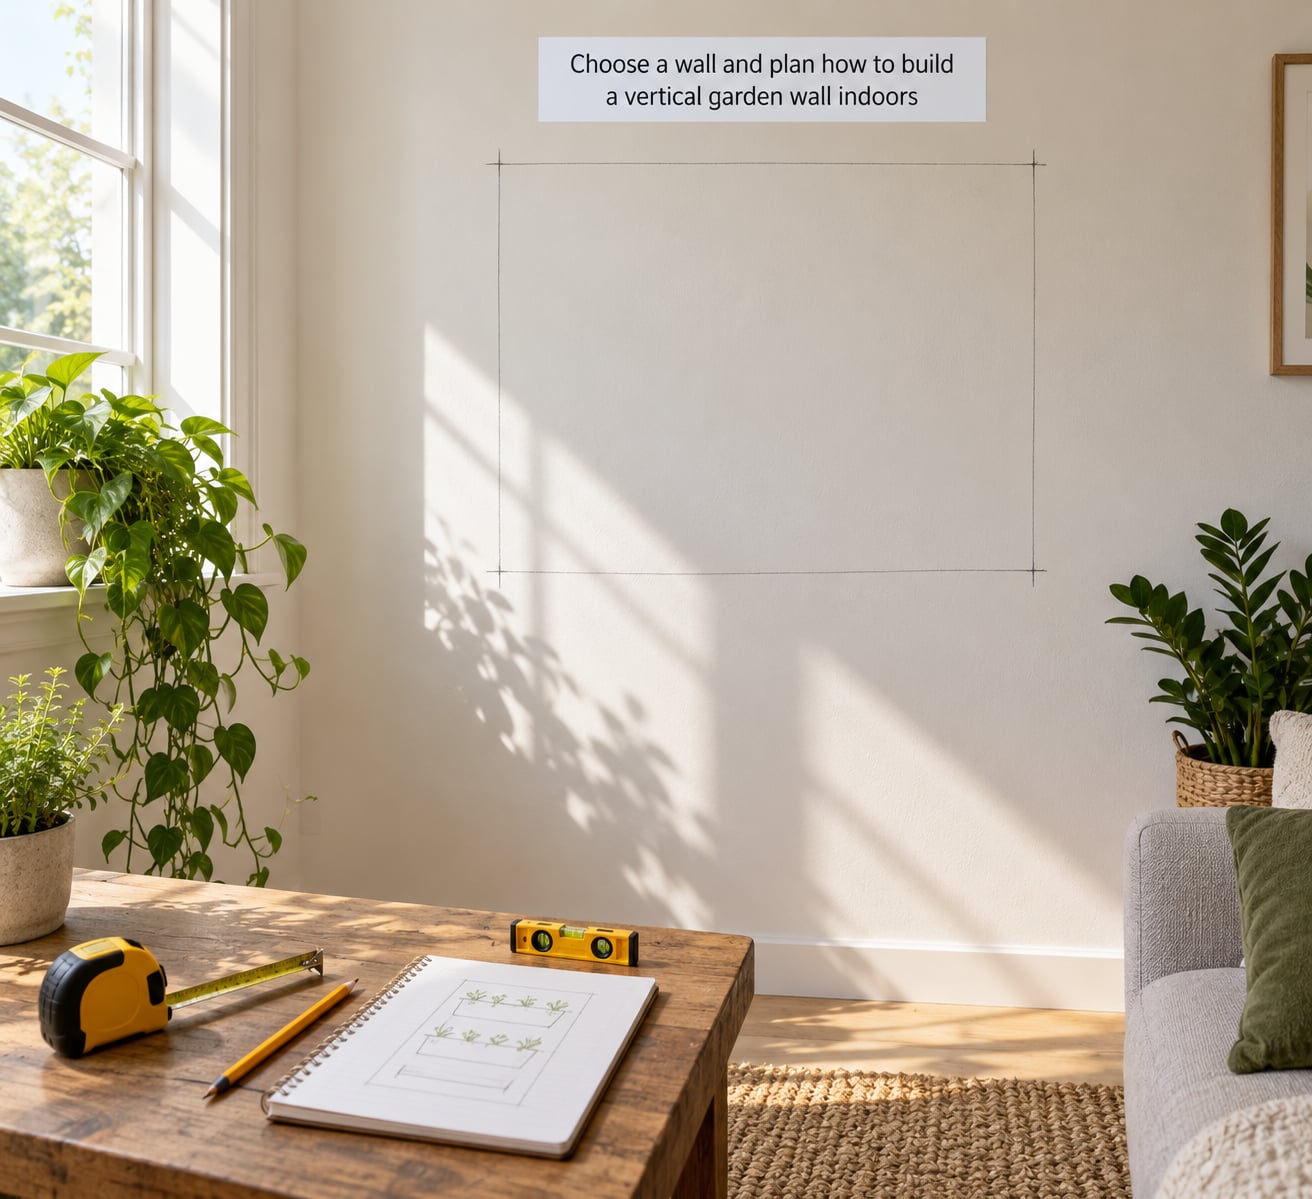
Choose a wall you can reach with your hands at full stretch, because you will be watering and pruning it weekly. A wall that reads fine from the sofa can be impossible to service if the top row sits above shoulder height.
Check light before anything else. Note where the sun falls through the room in the morning, midday, and evening, and whether a building opposite blocks it. A wall beside a south-facing window in a bright room suits almost everything. A north-facing interior wall suits a much shorter list.
Check the wall itself. Run a stud finder across the whole area and mark every stud. Drywall hangs on plasterboard that crushes under sustained load, so fix into studs wherever you can and use the widest plate anchors available between them. Brick and concrete take masonry plugs. Plaster over lath is fragile, so go freestanding instead.
Sketch the plan on paper first: overall width and height, distance from the floor to the lowest pocket, and the number of rows you can physically reach.
2. Choose the support system
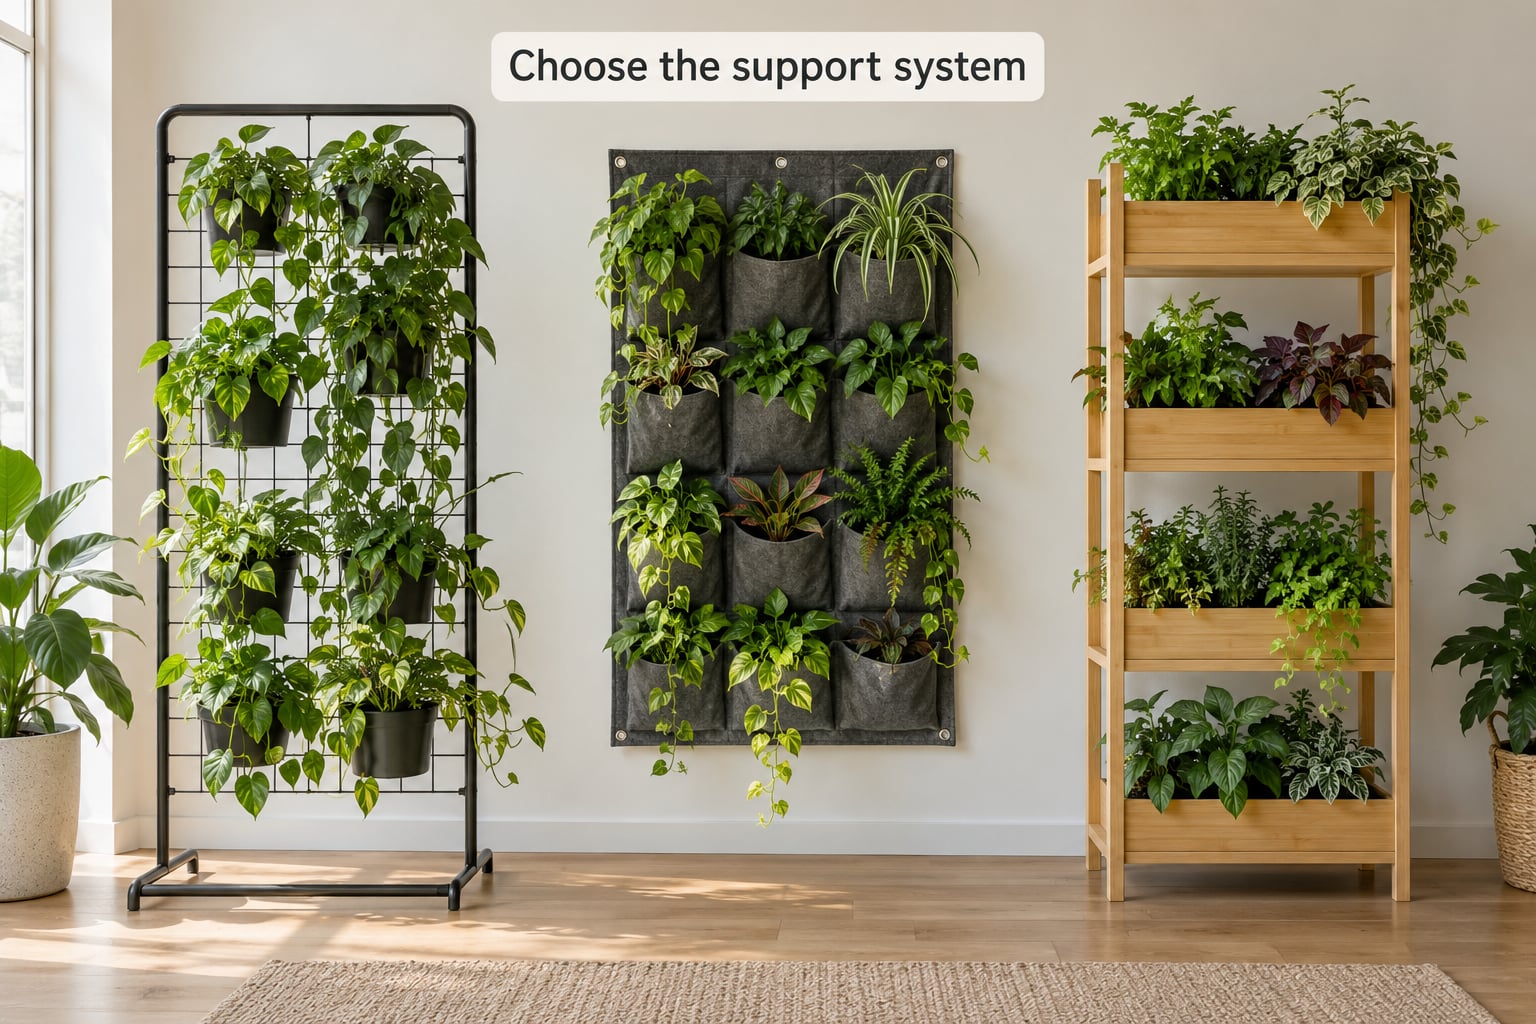
Freestanding frames are the safest choice for plaster, rentals, and anyone nervous about their walls. They can be moved, they carry their own weight, and they cost nothing in repairs. Their one drawback is floor depth, which eats into a narrow room.
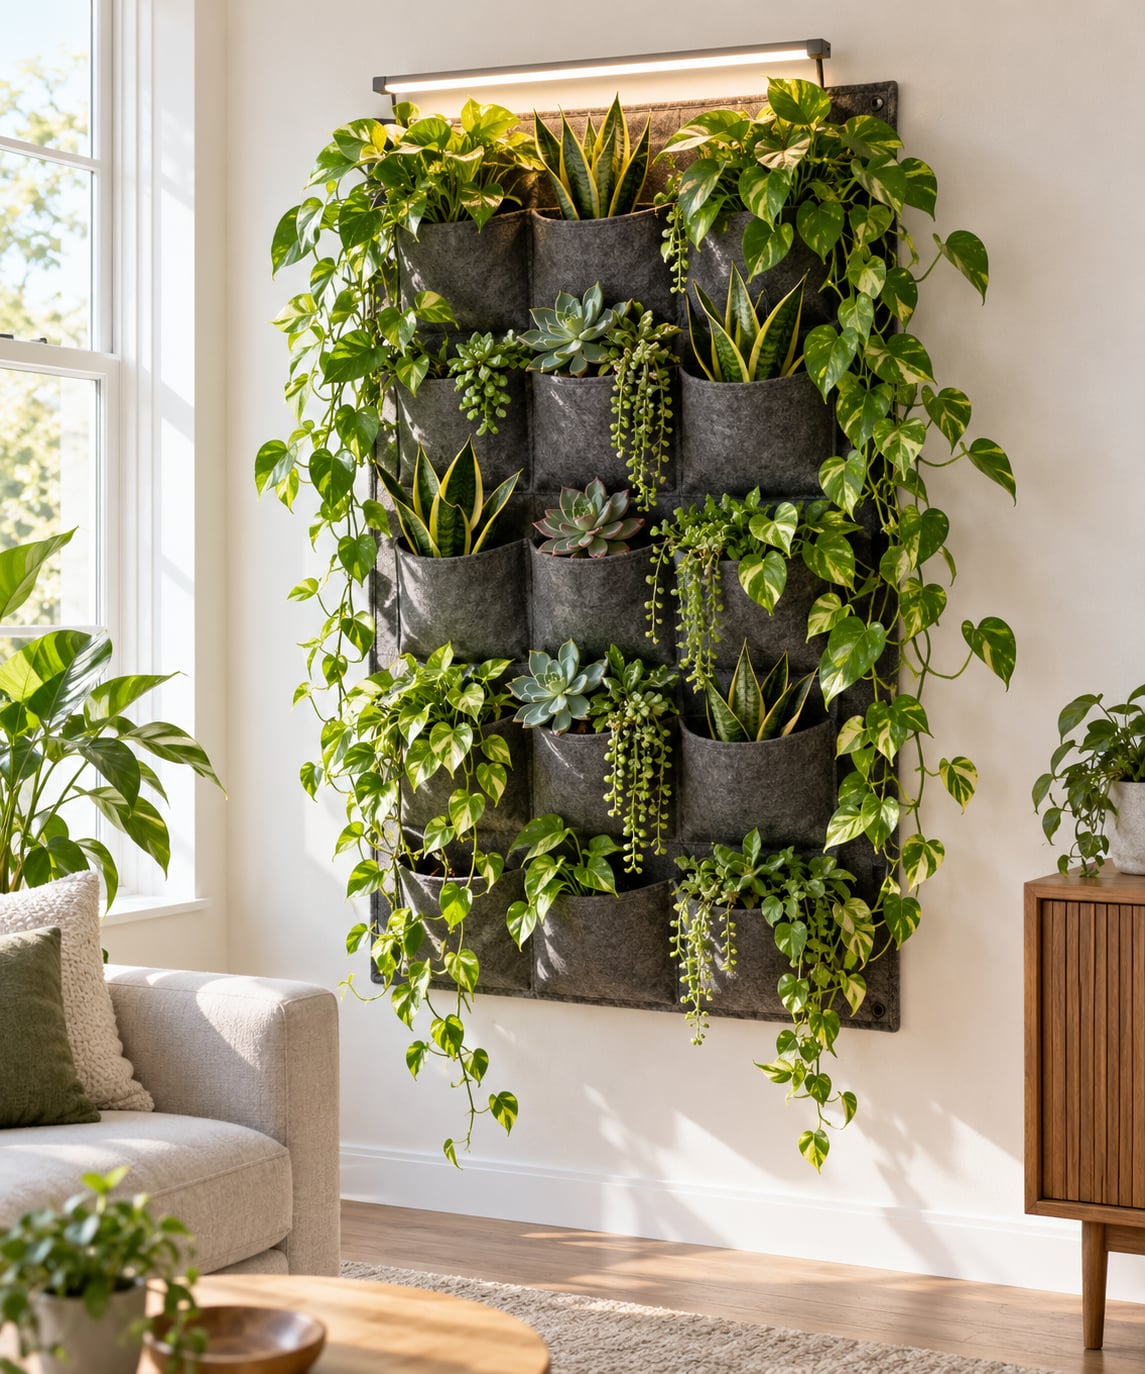
Pocket panels give the densest, lushest look, often three or four plants per pocket in staggered rows. They are the hardest to maintain, because every plant shares the same small volume of soil and the top dries while the bottom stays soggy. Pocket panels are also the system most likely to leave water marks, so they need the best waterproofing.
Shelf units with pot holders are the practical middle. Pots come out, roots get checked, and a dead plant can be replaced in minutes. If you think you will repot often or travel for stretches, this is the system to build.
Hydroponic modular panels are the fourth option. They use nutrient film over a channel instead of soil, which eliminates gnats and rot almost entirely, but they need a pump, a reservoir, and more setup. Most indoor installations do not need that complexity to work.
3. Install the frame and waterproof the area
Mark your rail heights with the pencil and check every height twice with the spirit level. A frame that is out of square by a few millimetres will drift further out as you add rows, and tilted pockets pour water down the wall rather than into their own soil.
Fix the top rail into studs, then work down. If you are building a freestanding frame, assemble it flat on the floor, brace the back with a diagonal timber, then stand it up and check it does not rock when you push the top corner.
Fit the waterproofing before the planters go on. Cut a rigid sheet of plastic or a splash panel slightly larger than the planted area and fix it behind the frame. Add a waterproof floor mat below. This is the single cheapest step in the build and it is what stops the streaking and staining everyone complains about later.
Leave access at the base for drainage and at one side for the irrigation feed. A wall you cannot get a hand or a hose behind is a wall you will end up dismantling.
4. Add the planting pockets or shelves
Attach pockets in staggered rows rather than straight columns. Offset each row by half a pocket width so plants trail into the gaps instead of hiding behind the row above, and keep a finger’s width between filled pockets so air still moves behind them.
Reinforce the load at the top and bottom of the frame. The bottom pockets and the fixings carry most of the weight once everything is wet, so spend your strongest fixings there.
Before you drill each hole, run a scrap of soil across the intended gap and check the drainage path below it. Every pocket needs somewhere for excess water to go, and it needs to reach a tray or the floor mat rather than the drywall.
5. Select and install suitable plants
Match plants to light, then to your watering discipline. Trailers and cascading plants cover the pockets best, but most need steady moisture, so you will see root rot first in the bottom rows if you overwater the whole wall uniformly.
- Low light, very forgiving: snake plant, ZZ plant, pothos. These tolerate missed waterings and low light.
- Low to medium light, trailing: pothos varieties, spider plant, string of hearts.
- Medium to bright light, upright: small philodendrons, compact snake plants, ferns in the brighter spots only.
- Low maintenance filler: succulents and air plants in the top row, where they dry out fastest.
Prepare each root ball before it goes in. Tease circling roots loose, trim dead material, and set the plant so its crown sits level with the surrounding mix rather than buried. A plant buried too deep in a shallow pocket rots at the stem.
Leave a little space in each pocket. Overpacking feels lush on day one and turns into a dense, airless mass that traps fungus gnats within weeks.
6. Set up watering and drainage
Hand watering with a fine rose is the most controllable method and the right choice for a small wall. Check the top row and the bottom row with a finger every few days rather than watering on a fixed schedule, because those two rows dry at very different rates.
A simple drip line handles more pockets with less daily work. Run the line along the top rail with one emitter per pocket, then adjust each emitter by hand until the flow is even. Uneven emitters are the most reported problem with DIY installations: some deliver double the volume of others and leave permanent wet spots below.
Self-watering and recirculating systems use a reservoir at the base with wicking or a pumped return line. They suit plants in a similar water range and they cut maintenance, but one thirsty plant in the mix can dry the whole wall unevenly.
Test drainage before you plant anything. Run the line for five minutes with empty pockets over a sink or in the shower, and confirm the flow rate at the far end matches the near end. Seal the top of each pocket so water runs into the soil instead of straight out of the back.
7. Add lighting and finish the installation
If the wall gets fewer than a few hours of decent indirect light, mount a full-spectrum LED grow light above it and slightly in front, angled down at roughly 30 to 45 degrees. Aim the fixture at the foliage rather than straight down the wall, and set a timer for 12 to 14 hours a day.
Run the light for a couple of weeks before planting so you know whether it needs raising or angling toward the middle rows. Mount it on a bracket you can adjust, not a fixed screw, because plants reach for light and the aim will need changing as growth moves.
Secure all tubing along the rail with clips so nothing hangs free, clean any soil off the frame and floor, and wipe the waterproofing panel down.
8. Check the result and establish a care routine
Push gently on each corner and the middle of the frame. Nothing should flex or creak, and the wall should not lean when you press the top edge.
Water the whole system once and watch where it goes. Every pocket should drain evenly, and no planter should shed water straight down the face of the wall.
Walk the light level at midday and again in the evening to spot rows sitting in shadow. Those rows are where the plants will stretch and drop their lower leaves first.
Set a weekly routine: check moisture top and bottom, inspect for pests on leaf undersides, deadhead and trim stragglers, and wipe leaves with a damp cloth. Do it the same day each week and it stays under twenty minutes for a small wall. Monthly, check the fixings and pull out any root ball that has grown into its pocket fabric. Each season, shift your lights and reassess which plants are struggling.
Common Mistakes
- Hanging too much weight on drywall. A saturated pocket wall is several times heavier than it looks. Fix into studs, use the widest plate anchors between them, and move to a freestanding frame if your wall is plaster or hollow lath.
- No waterproofing behind the wall. Runoff will streak the wall and soak the floor. Fit the splash panel and floor mat before the first planter goes on.
- Watering the whole wall uniformly. The top dries out while the bottom stays sogged, which is how you get root rot in the bottom row and dead plants at the top. Check each zone separately.
- Packing too many plants into a pocket. Density looks great on day one and creates a stale, airless pocket that fungus gnats move into fast. Leave space and prune regularly.
- Plants in the wrong light. Matching a pothos or a fern to a dim corner produces stretched stems and dropped leaves within a few weeks. Choose hardy species for dim walls or add a grow light.
- Sealing irrigation emitters unevenly. Adjust each emitter by hand and test the line before planting. A single over-flowing emitter damages the wall below it.
- Building a wall you cannot reach or drain. If you cannot get a hand or a hose behind the system, you will take it apart to fix problems. Leave service access and keep the lowest row at waist height.
- Forgetting pocket limits. Felt pockets and fabric panels break down as soil and roots work into them. Expect to refresh or replace panels every year or two rather than treating them as permanent.
One honest note on expectations. Maintaining a dense wall properly takes real weekly time, and a lot of people who underestimate that step end up replacing living plants with high-quality artificial ones. There is nothing wrong with either choice, as long as you pick the one you will actually keep up with.
Frequently Asked Questions
Can I build a vertical garden wall indoors without damaging the wall?
Yes. A freestanding frame, a tension-rod system or a shelving unit that stands on the floor leaves the wall untouched, which makes it the safe option for rentals and plaster. If you want a fixed installation, use the widest drywall plate anchors you can find, screw every fixing into a stud, and keep the planted area smaller than you think you need. Removing the anchors later still means patching.
What is the best support system for an indoor vertical garden?
Shelf units with pot holders are the best all-round choice indoors, because pots come out for repotting and individual plants can be swapped in minutes. Freestanding frames win on safety, and pocket panels win on density and visual impact but are the hardest to water evenly. Whichever you pick, check that every planter drains and that you can reach the top row to service it.
Which plants work best in an indoor vertical garden?
Snake plant, ZZ plant and pothos are the safest starting trio because they tolerate low light and missed waterings. Trailing pothos varieties, spider plant and string of hearts fill the pockets well. Put succulents and air plants in the top row where they dry fastest, and keep thirsty herbs such as basil in a separate zone rather than mixed into the display wall.
How often should I water a vertical garden wall indoors?
Check rather than schedule. Test the top and bottom pockets with a finger every few days and water whichever zones are dry, since a vertical wall dries from the top down. In a warm bright room that can be three or four times a week; in a cool dim room, once a week may be enough. Drip or self-watering systems cut this down, but still need a weekly inspection.
Do I need waterproofing behind an indoor vertical garden?
Yes, whatever the system. A rigid plastic splash panel behind the planters and a waterproof mat on the floor stop runoff from streaking paint and soaking drywall, and it is much easier to fit before planting than to patch afterwards. Seal the top of each pocket so water enters the soil rather than running down the face of the wall.
How much light does an indoor vertical garden need?
Most low-maintenance indoor species do well with a few hours of bright indirect light, which means a position near a window but out of harsh midday sun. On a dim wall, mount a full-spectrum LED grow light above and slightly in front of the wall, angled down at the foliage, and run it 12 to 14 hours a day on a timer.
Conclusion
Start with the wall, not the plants. Measure it, check the light at three points in the day, find your studs, and choose a support system you can actually service — then fit drainage and waterproofing before the first planter goes in.
Everything after that is maintenance. Give the wall a weekly twenty-minute check for moisture, pests and stragglers, adjust your watering zone by zone rather than on a schedule, and swap hardy plants in for anything that keeps struggling in your light.