How to drill drainage holes in a ceramic pot comes down to three things: a diamond-tipped bit, a pot that cannot move while you work, and patience. Ceramic is not hard, it is brittle, so the moment you lean on it or rush the bit, it chips or splits. Done properly, the whole job takes about ten minutes per pot, plus drying time.
I have drilled more of these than I would like to admit, and the first one is always the tense one. The rest get easier because you stop fighting the material and start working with it.
Table of Contents
- What You Need
- Step-by-Step: How to Drill Drainage Holes in a Ceramic Pot
- Choose the Right Drill Bit for Ceramic
- Mark the Drainage Hole Positions
- Support and Secure the Pot
- Drill the Holes Slowly with Low Pressure
- Clear and Finish the Holes
- Common Mistakes
- Frequently Asked Questions
- What type of drill bit is best for drilling holes in a ceramic pot?
- Can you drill holes in a ceramic pot without cracking it?
- How many drainage holes should a pot have?
- Should I drill from the inside or the outside of the pot?
- How do I make drainage holes without a drill?
- Is drilling safe for all ceramic planters?
- Conclusion
What You Need
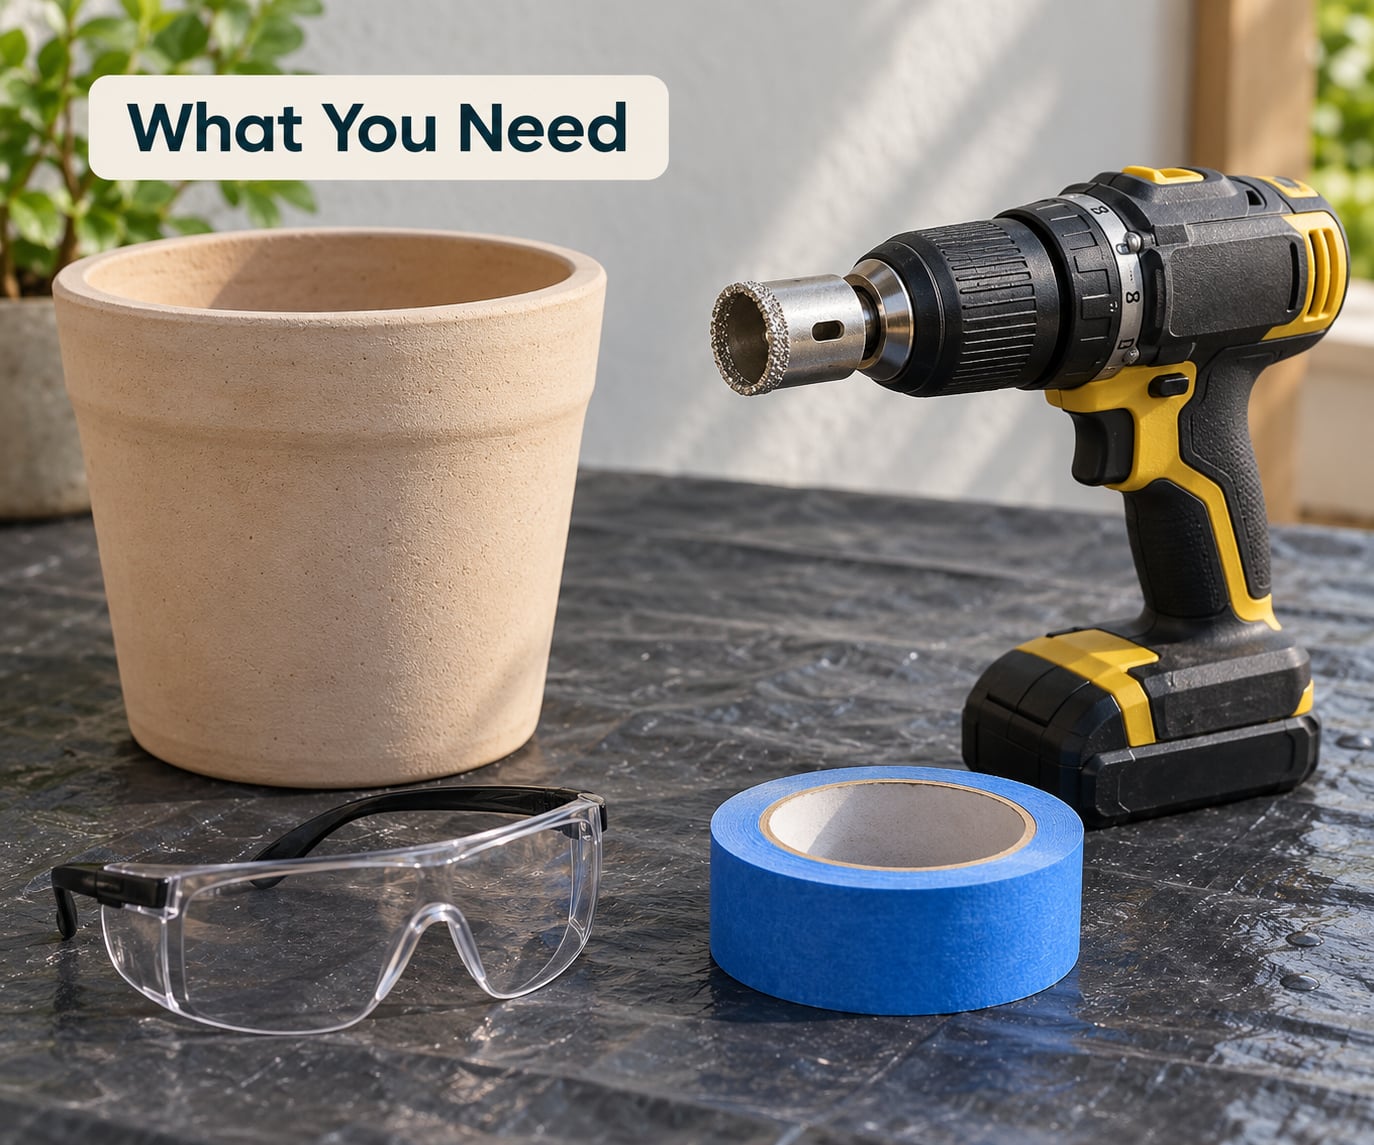
Most of the tool list is short, and you can borrow half of it.
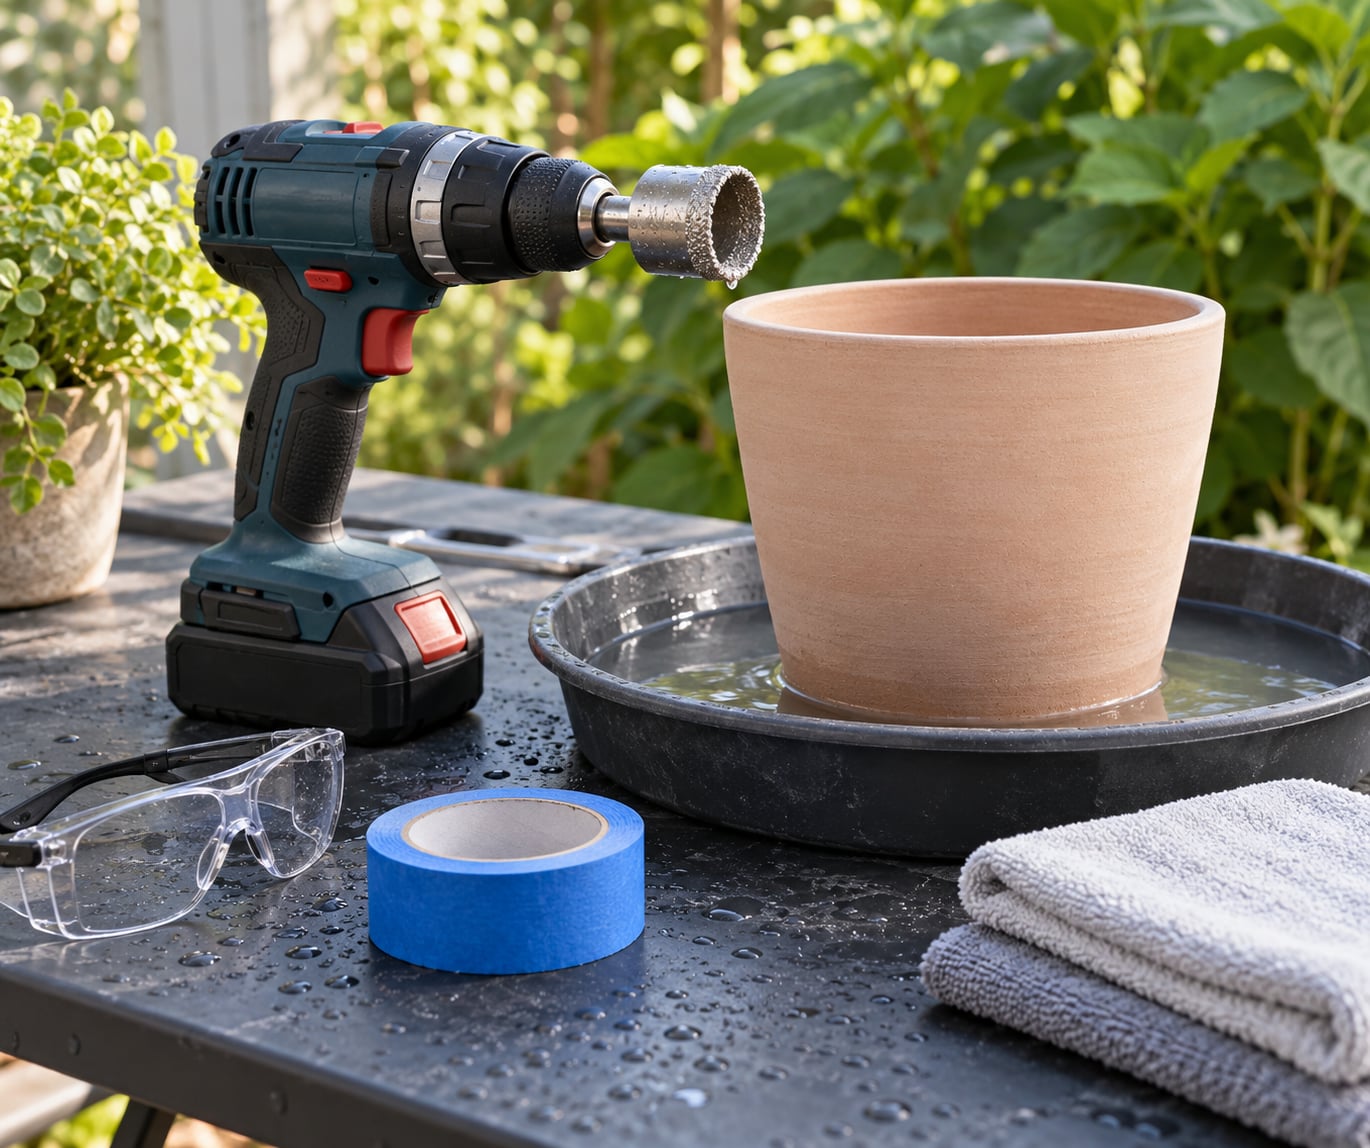
- A cordless drill — any battery drill with two speed settings. A hammer drill is fine, but you will not use the hammer function.
- A diamond coring bit — the piece that actually matters. Diamond grit grinds through glaze and body instead of shattering it.
- Painter’s tape — one strip over each hole spot gives the bit something to bite into on a smooth glazed surface.
- Safety goggles and a dust mask — ceramic dust is fine and sharp, and it goes straight into your lungs when the bit first catches.
- A waterproof surface and a shallow tray — a sink, a bucket, a patio table with a towel on it. You will be using water, so plan where it drains.
- A folded towel or a lump of play sand — to cradle the pot so it does not rock.
- Optional: a small piece of window screen or a plastic pot plug — for when you want drainage but not soil washing out, or when a hole needs sealing later.
A regular wood bit and a twist bit are not on that list for a reason. They dull almost instantly on glaze and leave a chipped, ragged edge that weakens the wall around the hole.
Step-by-Step: How to Drill Drainage Holes in a Ceramic Pot
Choose the Right Drill Bit for Ceramic
Use a diamond coring bit whenever you can. The diamond layer is a grinding wheel in disguise, so it shaves the glaze and the clay body cleanly rather than punching through them.
A diamond tile and glass bit is the budget alternative. It has a narrower spear-point tip and works well on thinner walls, but on a thick-walled planter it wanders and the hole comes out at an angle. A masonry bit is honest about what it is: it cuts unglazed terracotta without drama and struggles once it reaches a glaze layer. A carbide tip bit is the same story with fewer teeth and more risk.
Size the bit to the pot, not the other way round. As a working rule for how to drill drainage holes in a ceramic pot without going through a wall, small pots take two or three holes around a quarter inch across, mid-size planters take three to five holes near three-eighths of an inch, and anything wide or tall wants five to seven holes around half an inch. Several small holes drain better than one big one and leave the base structurally intact.
Mark the Drainage Hole Positions
Pencil or marker the spots before you touch the drill. A ring of holes evenly spaced a half inch to three-quarters of an inch above the base is the standard layout, and adding one in the center helps move water off the bottom of a wide pot.
Keep every hole clear of the rim, the foot, and any place where the walls look thicker or the shape changes. Those ridges are already the weak points, and a hole started near one is a crack waiting to happen.
Press a strip of painter’s tape over each mark and draw a small cross on top of it. The tape stops the bit from skating, and the cross gives you a target when the bit is spinning fast enough to blur.
Support and Secure the Pot
This is where most broken pots meet their end. A pot held in your hand while you drill will twist, and a pot resting on a hard surface will chatter. Both end badly.
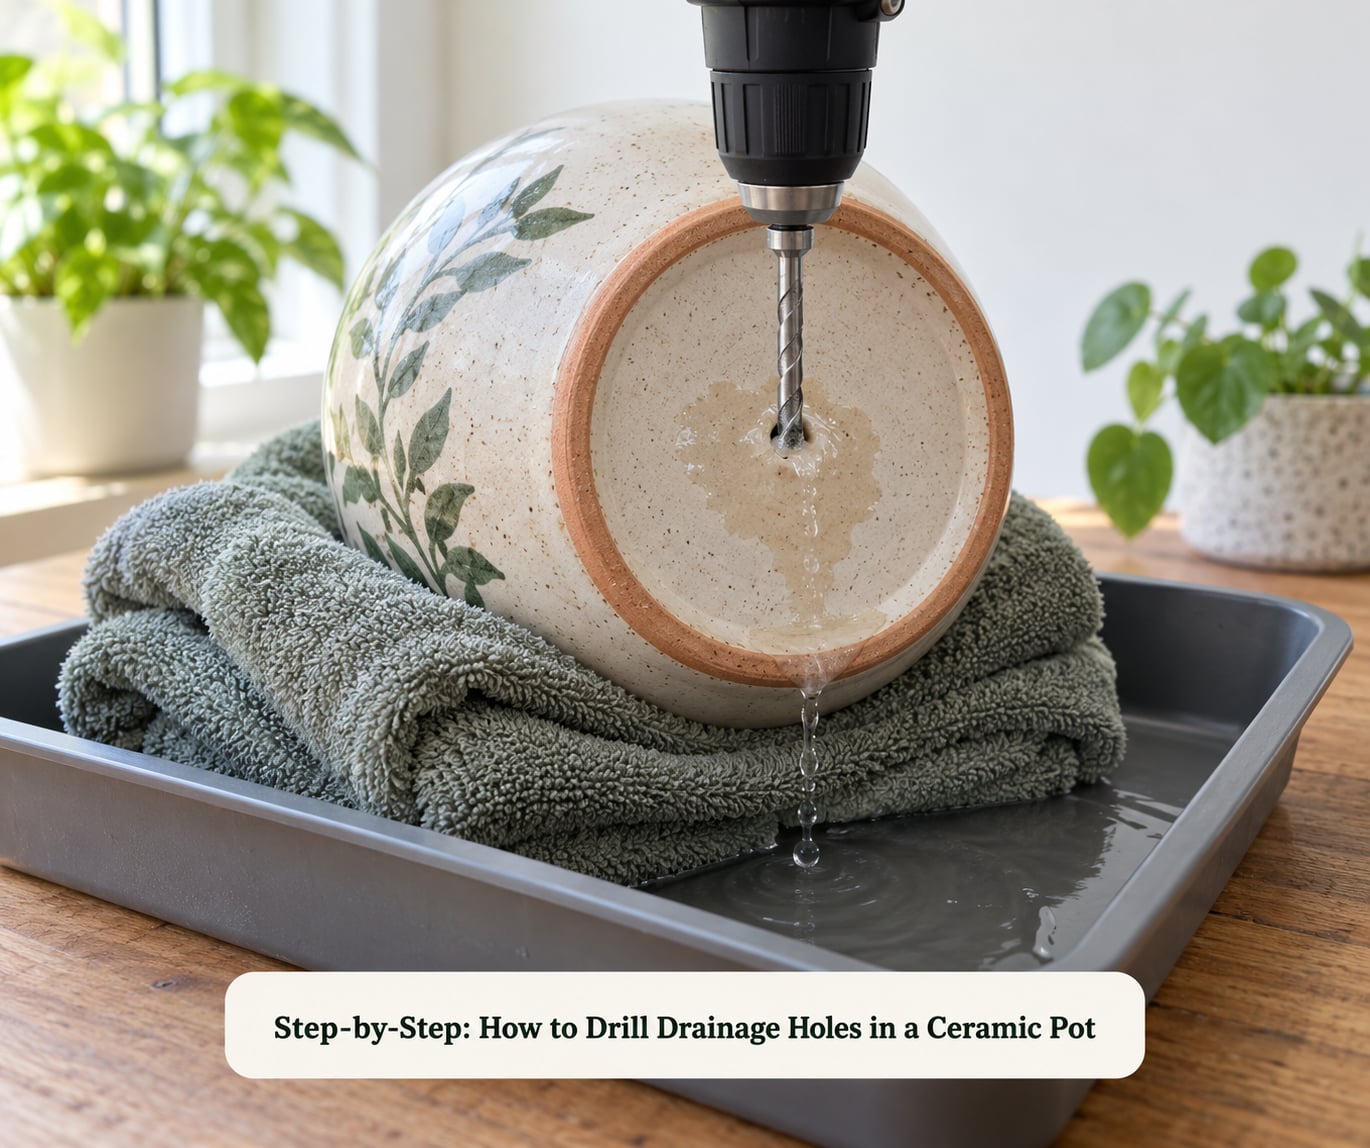
Set the pot on a folded towel, a bed of play sand, or a scrap of foam board. Put a shallow tray or basin underneath, add an inch of water, and let the pot sit in it. Drilling with the bottom submerged cools the bit, carries dust away, and gives the pot a heavy, stable base.
Never support the pot with your free hand while the drill is running. Rest it on something and let it sit still.
Drill the Holes Slowly with Low Pressure
Start on the lower speed setting. Touch the bit to the cross at about a 45 degree angle and run the drill until you feel it bite and cut a shallow groove.
Then straighten up to 90 degrees and continue. That angled start is what stops the bit from walking off the mark and skating across the glaze, and it is the single technique that separates a clean hole from a chipped one.
Let the weight of the drill do the work. Push down gently, pause every few seconds to let water flush the hole, and keep the surface wet the whole time. A dry bit heats up, glazes over, and grinds instead of cutting, and that heat is what cracks the pot.
Approach the breakthrough slowly. Ease off the pressure in the last fraction of the wall and you will get a round hole. Push straight through at full force and you get the blow-out chip that everybody pictures.
If the bit jams or starts to smoke, back it out, wipe it clean, wet the spot again, and restart from the groove. For tough glazed pieces, flip the pot over and drill up from inside so the mess lands on the interior.
Clear and Finish the Holes
Pull the tape off slowly so it does not take a glaze chip with it, then brush the hole edges with a stiff brush or rinse the pot under running water. Wear gloves for this part. The slurry that comes off a drilled pot is sharp enough to cut your fingers.
Soak an unglazed terracotta pot in water for an hour or two before planting, because drilling opens the pores and it drinks more than it did before.
Test the drainage by pouring water into the empty pot and watching whether it leaves through the base within a few seconds. Cut a square of window screen and tape it over the holes if soil keeps washing out, and fit a plastic plug if you want to close one up.
For sealing, a silicone adhesive that is safe for aquariums cures to a rubbery plug and will not block water if you leave the hole only partly covered. Any sealant on a drainage hole has to be removable with a screwdriver later.
Common Mistakes
Almost every cracked pot traces back to one of a handful of avoidable errors.
- Forcing the drill. Ceramic cuts fast when it is cool and dull when it is hot. Lean harder and you only build heat. Light pressure, frequent pauses, constant water.
- Drilling a dry pot. Dust becomes a grinding paste, the bit gums up, and friction does the damage. If you are not seeing water at the hole, stop.
- Skipping the tape on glazed pots. The bit will wander on the first contact. Tape and the 45 degree groove solve it.
- Drilling with no support. Vibration travels into the pot and finds the crack lines. Cradle it and let it sit in a puddle.
- Using a standard bit. Wood and twist bits chip glaze and leave a rough edge that weakens the wall.
- One oversized hole. A single large opening removes more of the base than the pot can spare. Several small holes drain just as well.
- Sealing the hole by accident. Smearing caulk or paint over a drainage hole, or setting the planted pot straight into a waterproof saucer with no gap, puts you back to soggy roots.
If your pot already has a hairline crack, stop and use another container. Drilling propagates cracks that are already there.
Some pots are better left alone. Thick porcelain and very thin decorative pieces carry more risk than the reward, and a thrift find is never worth a trip to the ER. Three good alternatives work fine: double potting with the planted pot sitting inside a slightly larger nursery pot, a cache pot with a layer of pebbles or gravel under the soil, or a hammer and nail driven gently through the base from the inside for small unglazed pieces. A rotary tool with a diamond bit handles thin-walled pots where a full-size drill feels too heavy-handed.
Frequently Asked Questions
What type of drill bit is best for drilling holes in a ceramic pot?
A diamond coring bit is the best choice for glazed ceramic and porcelain because the diamond grit grinds through the glaze instead of shattering it. Diamond tile and glass bits work on thinner walls but drift on thick planters. Masonry bits handle unglazed terracotta well and struggle once they hit glaze. Avoid standard wood, twist and general-purpose bits entirely.
Can you drill holes in a ceramic pot without cracking it?
Most pots survive if you drill slowly, keep the surface wet, use almost no downward pressure, support the pot so it cannot rock, and start at a 45 degree angle before straightening to 90 degrees. Ease off the pressure just before the bit breaks through to prevent blow-out on the exit side. Take your time and never hold the pot in your hand.
How many drainage holes should a pot have?
Aim for two or three holes around a quarter inch across in a small pot, three to five holes near three-eighths of an inch in a mid-size planter, and five to seven holes around half an inch in a large one. Space them evenly in a ring about half an inch to three-quarters of an inch above the base, and add a center hole for wide pots. Several small holes drain better than one large hole.
Should I drill from the inside or the outside of the pot?
Drilling from the outside gives you clear sight of the bit and the easiest angle. Drilling from inside is worth trying on a glazed pot when you care about the finish, because chipping then happens on the inside where soil and roots hide it. Flipping the pot over means working upward, so keep the drill vertical and brace the pot very securely in a basin of water.
How do I make drainage holes without a drill?
For unglazed terracotta, place the pot upside down on a folded towel and tap a nail or thin punch with a hammer, turning a little between each strike. Expect chipping on glazed pieces, so keep to small holes only. No power tools at all? Double pot the plant inside a larger container, or set the planted pot on a gravel layer in a cache pot so excess water drains into the pebbles.
Is drilling safe for all ceramic planters?
No. Very thick porcelain, thin decorative shells, antique pieces and any pot with an existing hairline crack are poor candidates, because drilling follows cracks that are already there. Always wear safety goggles and a dust mask, work wet, and drill outdoors or in a ventilated space. If a pot is worth more than the hole is worth to you, use a cache pot instead.
Conclusion
Start with the safest first step: tape the marks, cradle the pot in a puddle of water, and put a diamond coring bit in the drill at low speed. Let the bit do the cutting, keep it wet, and test the finished holes with water before you plant anything. If the pot shows a crack you did not see before you started, put it aside and move to the next one.