To make a hypertufa planter, mix 3 parts peat moss, 3 parts perlite and 2 parts Portland cement by volume, add water until the mix holds together like cottage cheese, pack it into a mold, and let it cure under plastic for 48 hours. Give the finished pot another two weeks of drying time before you plant in it.
Here is how to make a hypertufa planter that holds up for years. The whole project takes an afternoon of active work plus a couple of weeks of waiting, and it is beginner-friendly as long as you are patient about curing, which is where most first attempts go wrong.
Hypertufa is a manufactured stand-in for natural tufa, the soft limestone Romans carved. Real tufa planters are heavy, pricey and hard to find in a shape you actually want. Hypertufa gives you the same weathered stone look in a pot you can carry with one hand, and because the mix stays porous, roots still get the air and steady moisture they need. That porosity is also the reason succulents, alpine plants and herbs do so well in it.
Table of Contents
- What You Need
- Step-by-Step: How to Make a Hypertufa Planter
- Choose the Mold and Plan the Drainage
- Mix the Hypertufa Material
- Build and Shape the Planter
- Cure, Drain, and Finish the Planter
- Common Mistakes
- Cracking, Crumbling and Rims That Split
- Frequently Asked Questions
- How long does it take to make a hypertufa planter?
- Do I need Portland cement to make hypertufa?
- How long should a hypertufa planter cure before planting?
- Can a hypertufa planter be used indoors?
- How do I waterproof a hypertufa planter without blocking drainage?
- What plants grow best in a homemade hypertufa planter?
What You Need
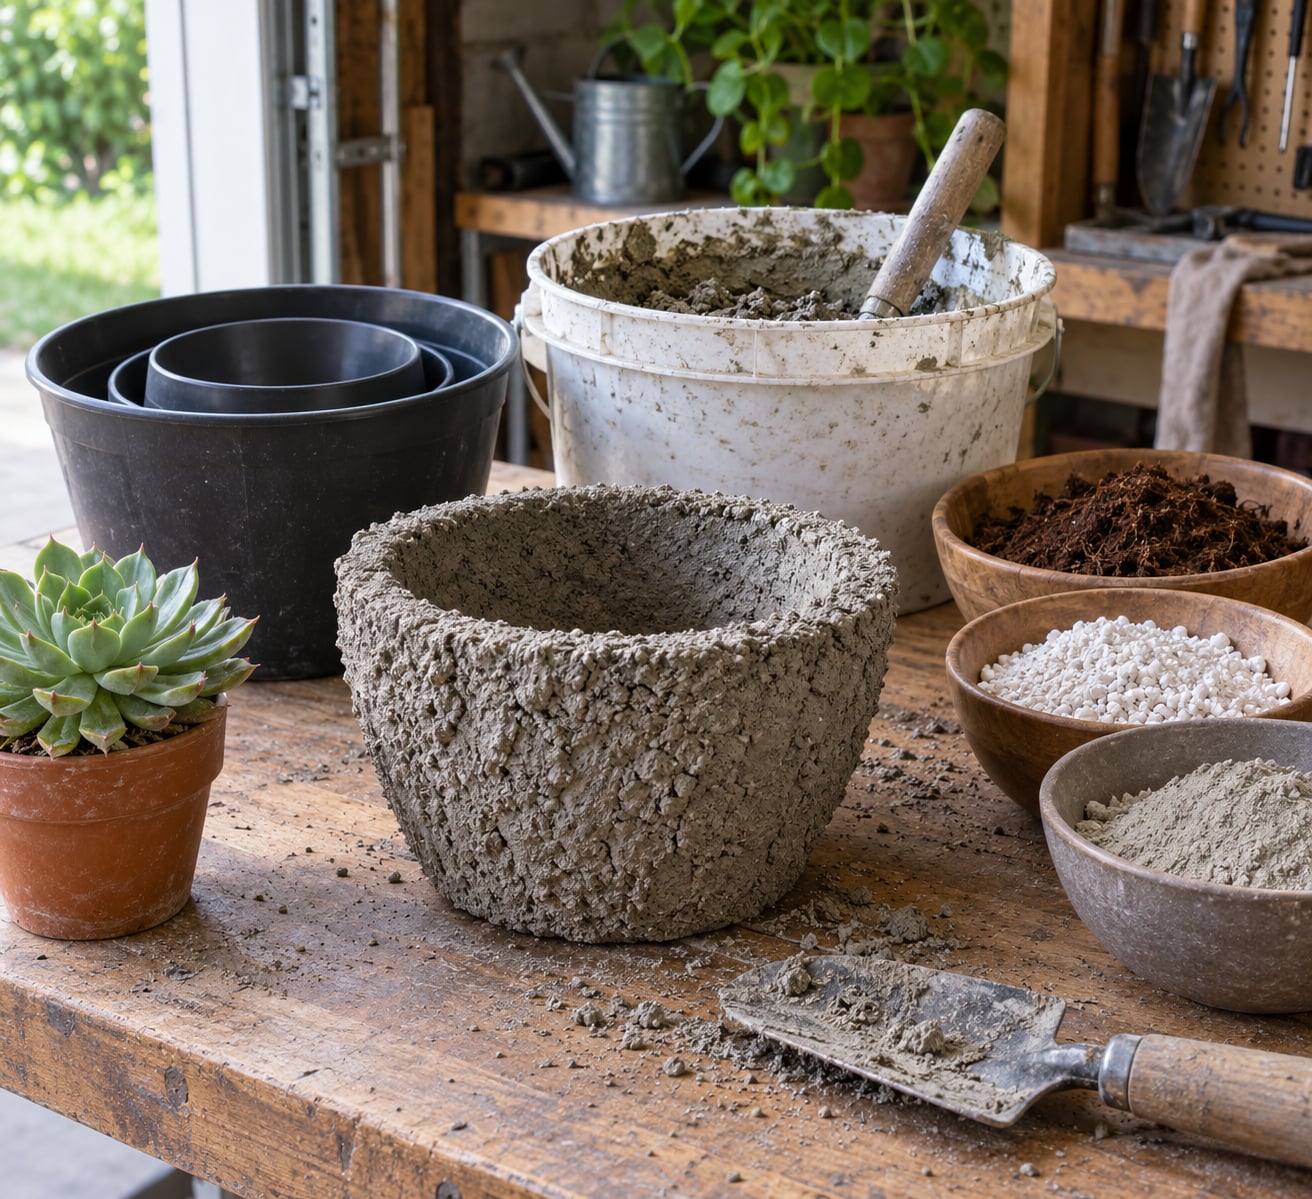
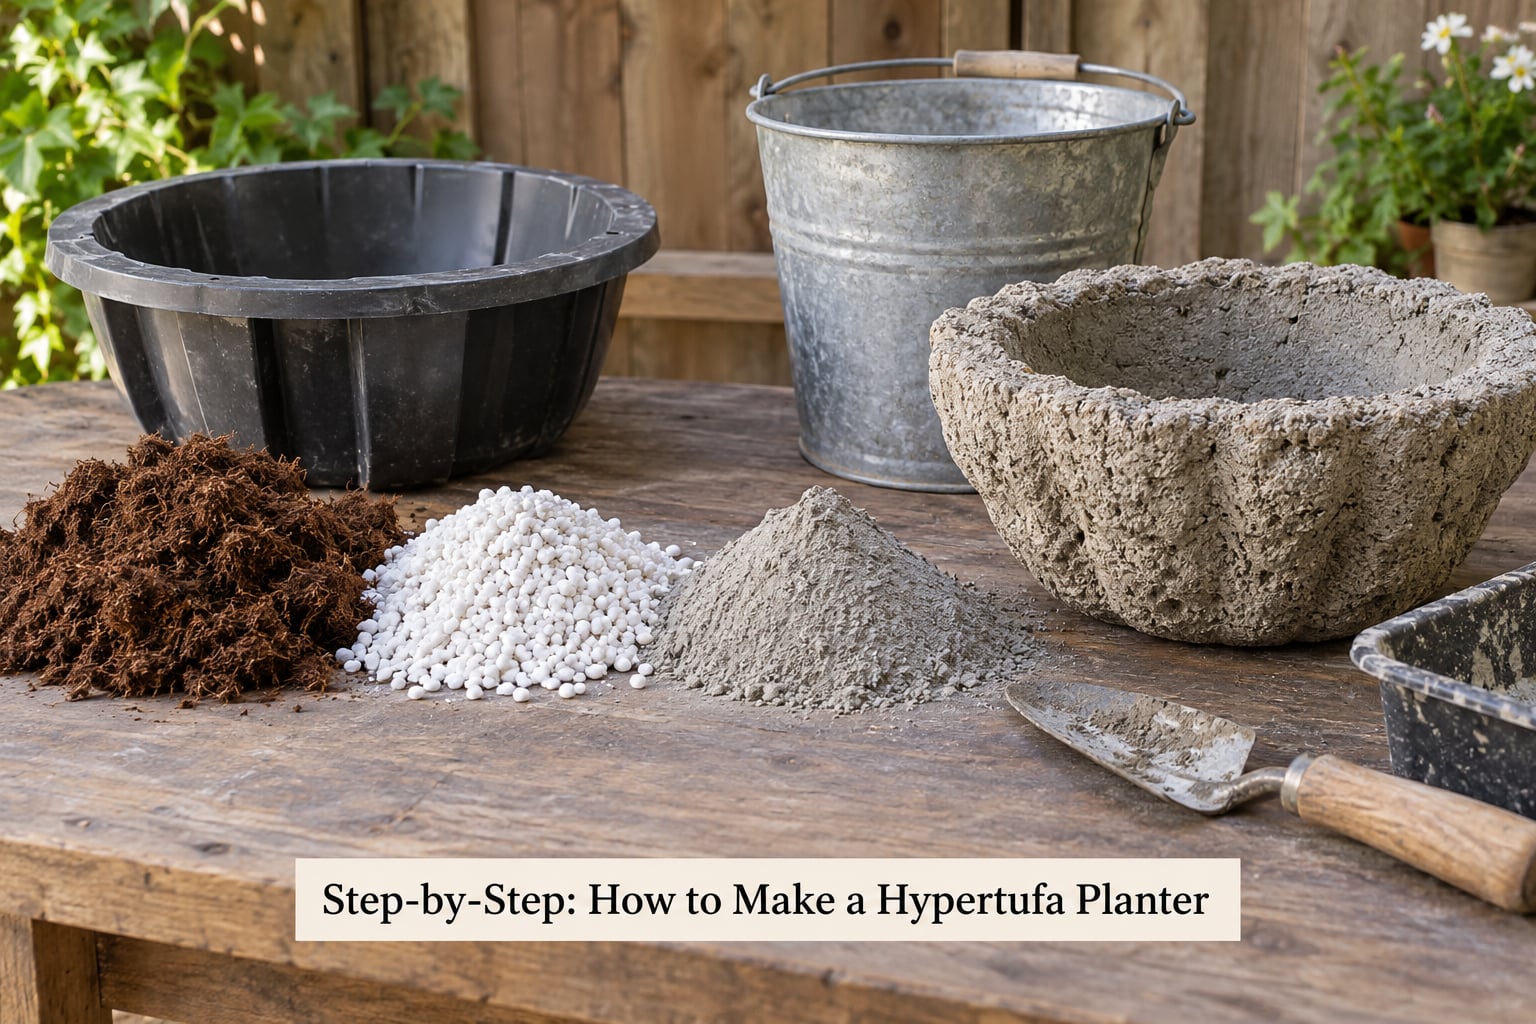
The classic recipe is measured by volume, not weight, and the parts are level scoops. For one planter roughly 8 inches across, mix about 6 cups of peat moss, 6 cups of perlite and 4 cups of Portland cement. Mixing by volume matters because peat compacts down as you scoop it, and eyeballed weights give you a drier mix than you want.
Here is what goes into the bucket and what goes on the bench.
- Peat moss for moisture retention and the fibrous structure that gives the pot its strength.
- Perlite for bulk and light weight. It is the white volcanic aggregate, and it is what keeps the planter lighter than concrete.
- Portland cement, not masonry or concrete mix. Regular Portland cement sets slowly enough to give you working time.
- Water, added gradually rather than all at once.
- A mold: a plastic nursery pot nested inside a larger pot, a plastic bucket, a cardboard box, or a plastic bin.
- Cooking spray or petroleum jelly as a mold release.
- A 1 inch dowel or a length of PVC pipe to form the drainage hole while the base is still soft.
- Plastic sheeting or a large garbage bag to cover while the pot cures.
- Gloves, a dust mask and eye protection. Dry cement dust is the one real hazard here, and mixing it in a garage or outdoors keeps it out of your lungs.
Most people mix perlite or vermiculite but rarely both. They serve the same structural job, so pick one and keep the ratio. Perlite drains faster and gives a rougher, more stone-like surface. Vermiculite holds more water and produces a slightly smoother, warmer-looking pot, which suits indoor plants that want less frequent watering.
Peat moss has substitutes. Coco coir or coir fiber works well and is the swap most people make, since peat is a slow-renewing resource. Coir fiber takes water more readily than peat, so add it a little drier and expect to nudge the water up during mixing. Sand is the other option, and it gives a heavier, more concrete-like result rather than a lightweight one. A cement-free moss mix made with water, peat or coir and compost also exists, but it will not harden into stone, so treat it as a moss liner for a pot that already exists rather than as a cast planter.
Choose your mold size before you mix. A finished planter is a little larger than its mold because the mix shrinks slightly as it cures, and any mold with a lip or taper works in your favor since it releases more easily. Aim for walls three-quarters to one inch thick on a pot under 12 inches. Anything thinner starts cracking around the base, and anything much thicker on a large pot adds weight without adding much strength.
Large planters need one extra ingredient: a short length of reinforcing fiber, the kind sold for concrete work. Mixed into the dry ingredients, it helps hold the wall together on pots that will hold a mature shrub.
Step-by-Step: How to Make a Hypertufa Planter
Choose the Mold and Plan the Drainage
The nesting pot method is the easiest starting point. Take a plastic nursery pot and a second pot or bowl at least 4 inches wider. The gap between them becomes the wall, so the difference in diameter decides how thick your planter wall will be.
Line the inside of the mold with a plastic sheet or a cut-open garbage bag and spray both the liner and the inner pot with cooking spray. Petroleum jelly works too, and it matters on cardboard molds because the cardboard soaks up water from the mix and sticks to the wall.
Decide where the drainage goes before any cement enters the mold. A single hole in the center of the base is enough for most plants, and a short piece of dowel pressed straight down makes a clean one. Two or three holes spaced around the base drain better for moisture-loving plants. Whatever you choose, put it in while the base is still soft, because drilling through a cured base later tends to shatter it.
Mix the Hypertufa Material
Combine the peat moss, perlite and cement dry in a bucket and mix with your hands until the color is even and there are no dry pockets of cement. This matters more than it sounds: pockets of dry cement later hydrate and expand, and that expansion is a common cause of hairline cracks.
Now add water slowly, a little at a time, stirring between each addition. You are looking for a consistency like cottage cheese, where the material holds its shape when you squeeze a handful but still leaves a faint damp print on your palm. Too wet and the pot forms weak, crumbly walls that slump under their own weight. Too dry and the cement hydrates unevenly, which is exactly how you get a planter that crumbles to dust a few days later.
Use standard Portland cement and avoid anything labeled fast-setting or rapid-set. The fast-setting varieties are the single most reported cause of cracking among people making these at home, because they harden in minutes and the mix has no time to settle. They also skip most of the early hydration stage, leaving the interior weaker than the shell.
Mix a batch no bigger than you can use in about 30 minutes. Working cement does not wait, and a half-mixed bucket that starts to set is waste.
Build and Shape the Planter
Scoop the mix into the mold and pack it down firmly with your hands or a mortar trowel. Press, do not scoop. Air pockets become weak spots, and packed walls stand a much better chance of surviving demolding.
Build the base about three-quarters of an inch thick first, push the dowel or pipe through for drainage, then add mix around the inner pot to build the wall upward. Work in layers and tamp each one. Keep a finger-width of mix above the inner pot as you fill so the finished rim has something solid to sit on.
Keep the rim even all the way around. Tap the mold on a flat surface while turning it to settle the mix, then skim the top with a trowel edge. An uneven rim looks like a mistake from ten feet away, and it is the easiest flaw to fix now and the hardest later.
Texture the surface while the mix is still damp but firm. A stiff wire brush or a piece of coarse scrub pad works well for a limestone look. For a smoother, cast-stone appearance, run a damp sponge over the outside once it has set for an hour or two.
If your mold is a separate outer form, like a box you built to take apart, load something flat and heavy on top after the last layer. A bag of soil or a few bricks presses out air pockets and keeps the rim straight while it cures.
Cure, Drain, and Finish the Planter
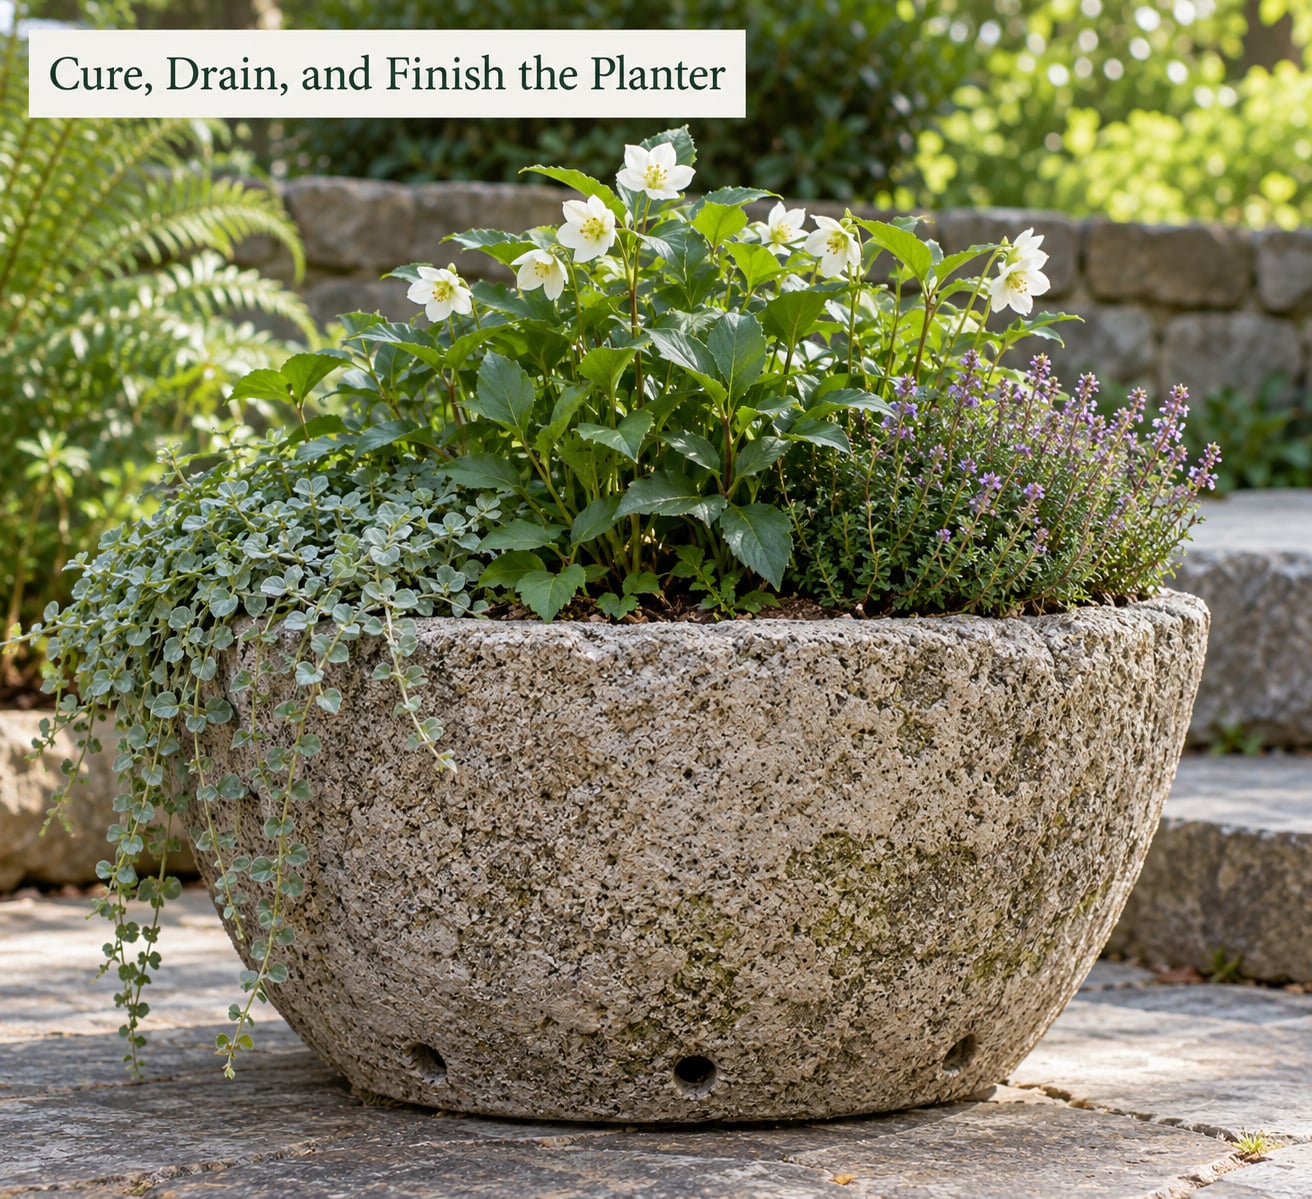
Curing is where the plan goes quiet, and it is the step that decides whether the planter holds up. The stages run like this.
- First 24 hours: cover the mold loosely with plastic or a bag so the mix keeps its moisture. Do not let it sit in direct sun or in a breeze. Heat and wind pull water out of the surface too early, and that is the number one cause of crumbly planters.
- 24 to 48 hours: the mix firms to a soft green-grey. Most removable molds can come off at this point. Go slowly, tapping the mold loose and easing the walls apart rather than levering the pot out. Pulling hard at this stage is how pots break.
- 2 to 7 days: set the demolded pot somewhere shaded and out of the weather to dry. Covering it with a bin or cardboard box slows the drying rate, which is what you want in warm or dry conditions.
- 7 to 21 days: full cure. The pot should feel dry and noticeably lighter in color, and a knock on the side should sound solid rather than dull.
For a removable mold that you could not get out, or for a cardboard form, leave the planter alone and knock the mold away later once it is dry. Chiseling and tapping gets old cardboard off without much risk.
If you did not form a hole in the base, drill through the cured base now with a masonry bit, working from the outside inward and clearing the dust afterward. Drainage matters here more than it does in plastic pots, because the hypertufa holds water in its own pores and a pot without a hole will stay wet at the bottom long after the top has dried out.
Now deal with the lime. Fresh cement is highly alkaline, and many plants will sit in a decline for weeks before you work out why. Wash the pot with water, then wet it with a weak solution of vinegar or diluted acetic acid, let it sit, rinse, and repeat once. Some makers scrub the surface with plain yogurt instead, which works more slowly and leaves a nicer finish.
Onto the finishing. A coat of live-culture plain yogurt, left on for a few hours and rinsed off, knocks back the grey and pulls out the high points of the texture. Instant coffee or strong brewed coffee brushed on gives an aged, weathered patina in a single pass. Outdoor planters do their own aging from there, but a yogurt wash gives them a better starting point.
If you plan to use the pot indoors, or as a cachepot, seal it once the cement has fully cured. A penetrating stone sealer or a water-based masonry sealer closes the surface pores without blocking the holes you drilled. Skip sealers on outdoor pots that will hold succulents, because the porosity is the point there.
Common Mistakes
Cracking, Crumbling and Rims That Split
Cracking almost always traces back to one of four things: fast-setting cement, a mix that was too wet, walls that are too thin, or drying that happened too fast. Work down the list in that order when a pot cracks.
A base that splits open on the first dry day means the walls were built too thin for the size, or the base was cast too early in the process and had shrunk under the weight of fresh wall mix. Base first, then walls, and keep the base at three-quarters of an inch for pots under 12 inches and an inch for anything larger.
Pots that crumble when touched are a curing failure rather than a recipe failure. The mix dried on the surface before the cement finished hydrating underneath. Keep it wrapped for the full 48 hours, work out of direct sun, and skip windy garages entirely.
A planter that breaks apart while you remove it from the mold has not set long enough. Wait the full 48 hours, run a thin blade around the seam, and lift instead of prying. A plastic mold that flexes with your hands is usually the safest option.
An uneven rim usually means the mix was placed in one uneven scoop and not leveled. Tap the mold down as you build and skim the top.
Two climate questions come up constantly. In cold regions, freeze-thaw cycles can crack any porous cement, so empty the pot of soil in autumn or bring it in for the winter if you live somewhere with hard freezes. And in hot weather, deliberately slow the cure down: more plastic, more shade, less wind.
Frequently Asked Questions
How long does it take to make a hypertufa planter?
About 30 to 45 minutes of mixing and molding, plus two to three hours of finishing and texturing. The active work fits into a single afternoon. The planter is demoldable after 48 hours and needs a further two to three weeks of drying before it is safe to plant.
Do I need Portland cement to make hypertufa?
For a hard, stone-like planter, yes. Portland cement is what binds the peat and perlite into something that holds water and stands up to weather. Mixtures made from peat, coir, water and compost alone form a mossy liner rather than a cast planter, which is a different project with a different result.
How long should a hypertufa planter cure before planting?
Treat 21 days as the safe figure. The pot is demoldable at 48 hours, but it keeps gaining strength for weeks afterwards, and a heavy root ball pressed into a half-cured pot can crack the walls. A knock test that sounds solid rather than dull is a good sign it is ready.
Can a hypertufa planter be used indoors?
Yes, and it suits plants that dislike a wet root zone. Indoors, mix in a little more perlite so the walls dry faster between waterings, and seal the pot with a masonry sealer if you want to put it on a wood floor or use it as a cachepot. Watering is less frequent than in a plastic pot.
How do I waterproof a hypertufa planter without blocking drainage?
Waterproof the walls only, and always leave the drainage holes open. A penetrating stone sealer applied once the cement has fully cured closes the surface pores without sealing the holes you drilled. Leave pots holding succulents or alpine plants unsealed, since those plants rely on fast drying.
What plants grow best in a homemade hypertufa planter?
Succulents and cacti are the easiest, because they tolerate the slow drying inherent in the mix. Herbs such as thyme, oregano and rosemary do well too. Alpine plants and small grasses also suit the porosity. Just remember to neutralize the lime first, since fresh cement is alkaline enough to burn most roots.
Start with one 8 inch pot, a 3:3:2 mix, and a plastic mold nested inside a larger one. Get the curing right on the first try and everything after that gets easier.