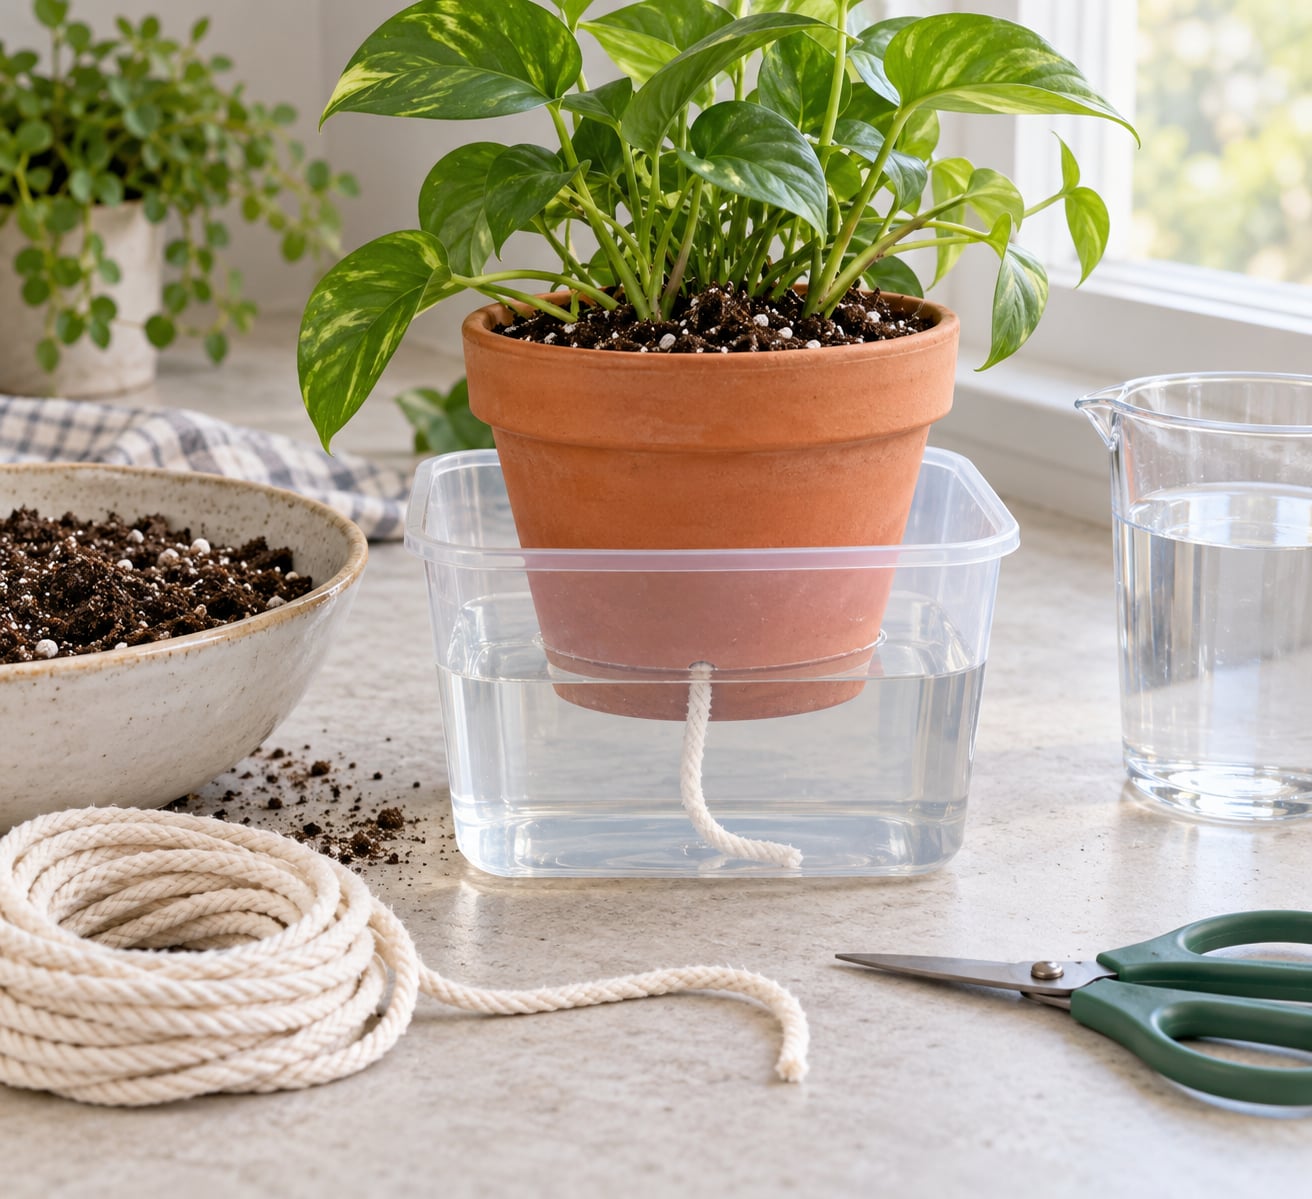
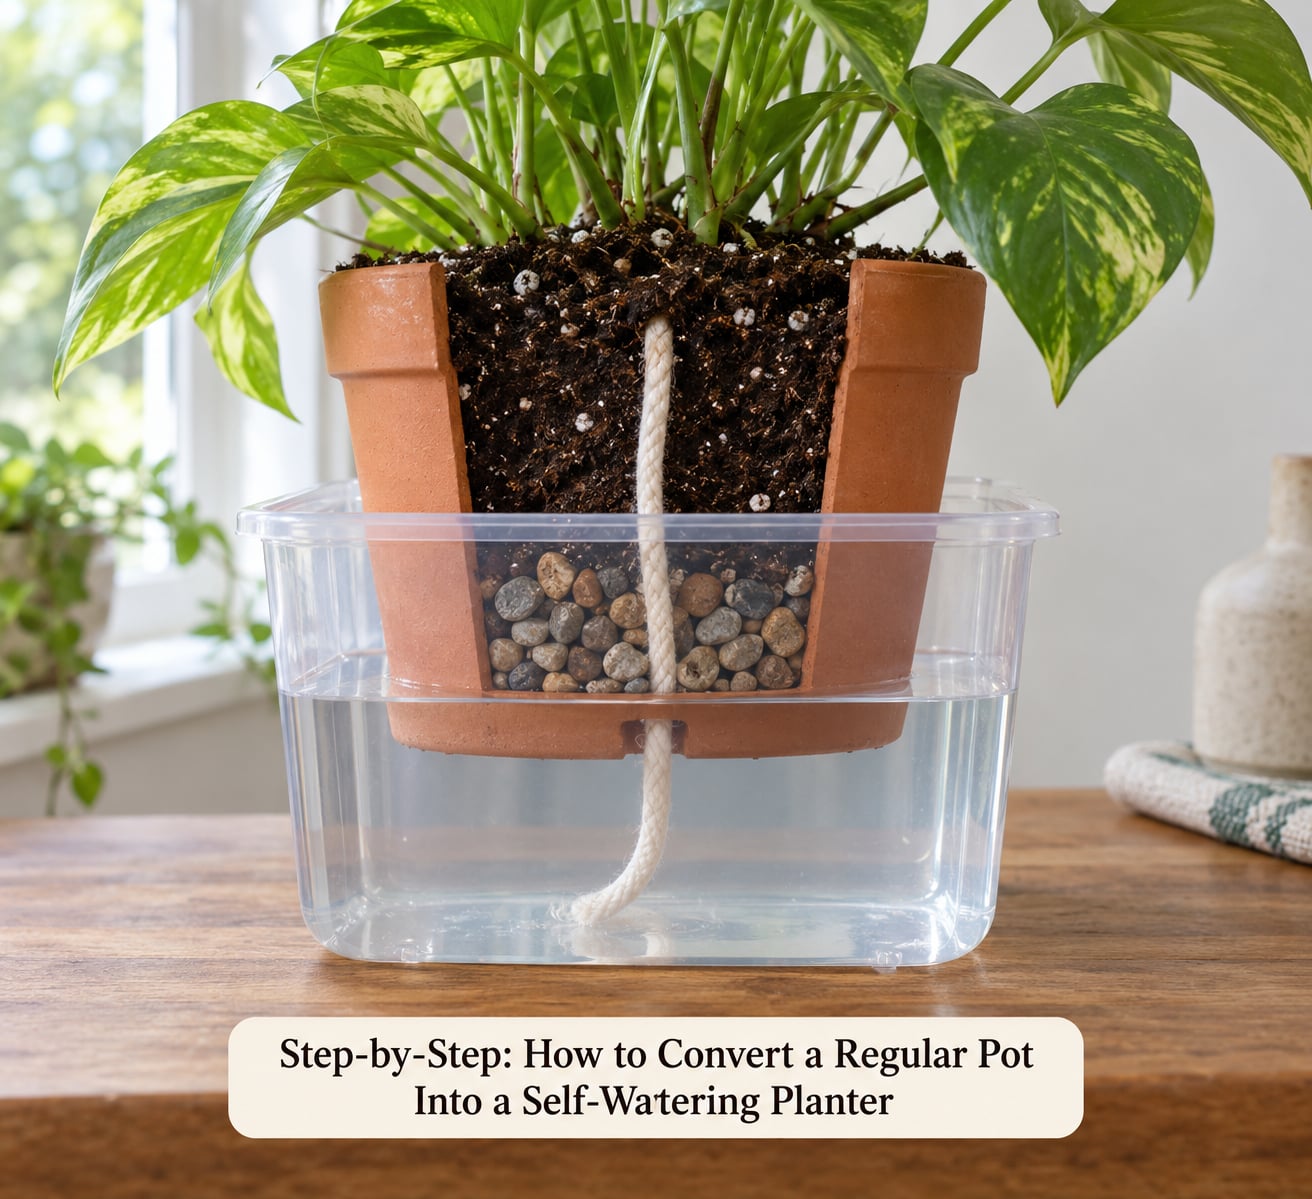
To convert a regular pot into a self watering planter, you nest the pot inside a watertight reservoir and run an absorbent wick from the water up through the drainage hole into the soil. As the soil dries, the wick pulls water upward on its own, so the root zone stays evenly moist and you stop guessing whether it is too dry or too wet. The whole build takes about 20 minutes and most of it is waiting for the wick to soak.
A self-watering planter has three parts, and it is worth naming them before you start. The reservoir holds the water, usually a plastic tub, a bucket, or a waterproof liner. The false bottom is whatever keeps that water from turning the soil into soup, a false bottom is a rack, a mesh disc, or the rim of the pot itself. The wick is a strip of absorbent material that bridges the two, and it is the only part doing the actual work.
Two things decide whether you are happy with the result: the wick has to reach the damp soil, and the soil has to be light enough for water to move through it. Get those right and the system runs for weeks between refills. Get them wrong and you will spend more time troubleshooting than you ever would have spent with a watering can.
Table of Contents
- What You Need
- Which conversion method should you pick?
- Step-by-Step: How to Convert a Regular Pot Into a Self-Watering Planter
- 1. Check That the Pot Has a Drainage Hole
- 2. Choose a Reservoir and Cut the Wick
- 3. Seat the Reservoir and Thread the Wick
- 4. Add Soil and Plant at the Right Depth
- 5. Prime the Soil and Fill the Reservoir
- 6. Test the Wick and Set a Refill Rhythm
- Common Mistakes and Fixes
- Converting a Regular Pot Into a Self-Watering Planter Without Removing the Soil
- How to Choose the Right Pot, Wick, and Plant
- Match the pot by size, depth, and material
- Choose the wick material that will actually wick
- Know which plants to leave out
- Frequently Asked Questions
- Can you convert any pot into a self-watering planter?
- Do self-watering pots lead to root rot?
- How long does a converted pot last between refills?
- What is the best wick material for a self-watering planter?
- Why is my self-watering planter not wicking water?
- How do I refill the reservoir without disturbing the soil?
- A Better Watering Routine Starts With the Right Setup
What You Need
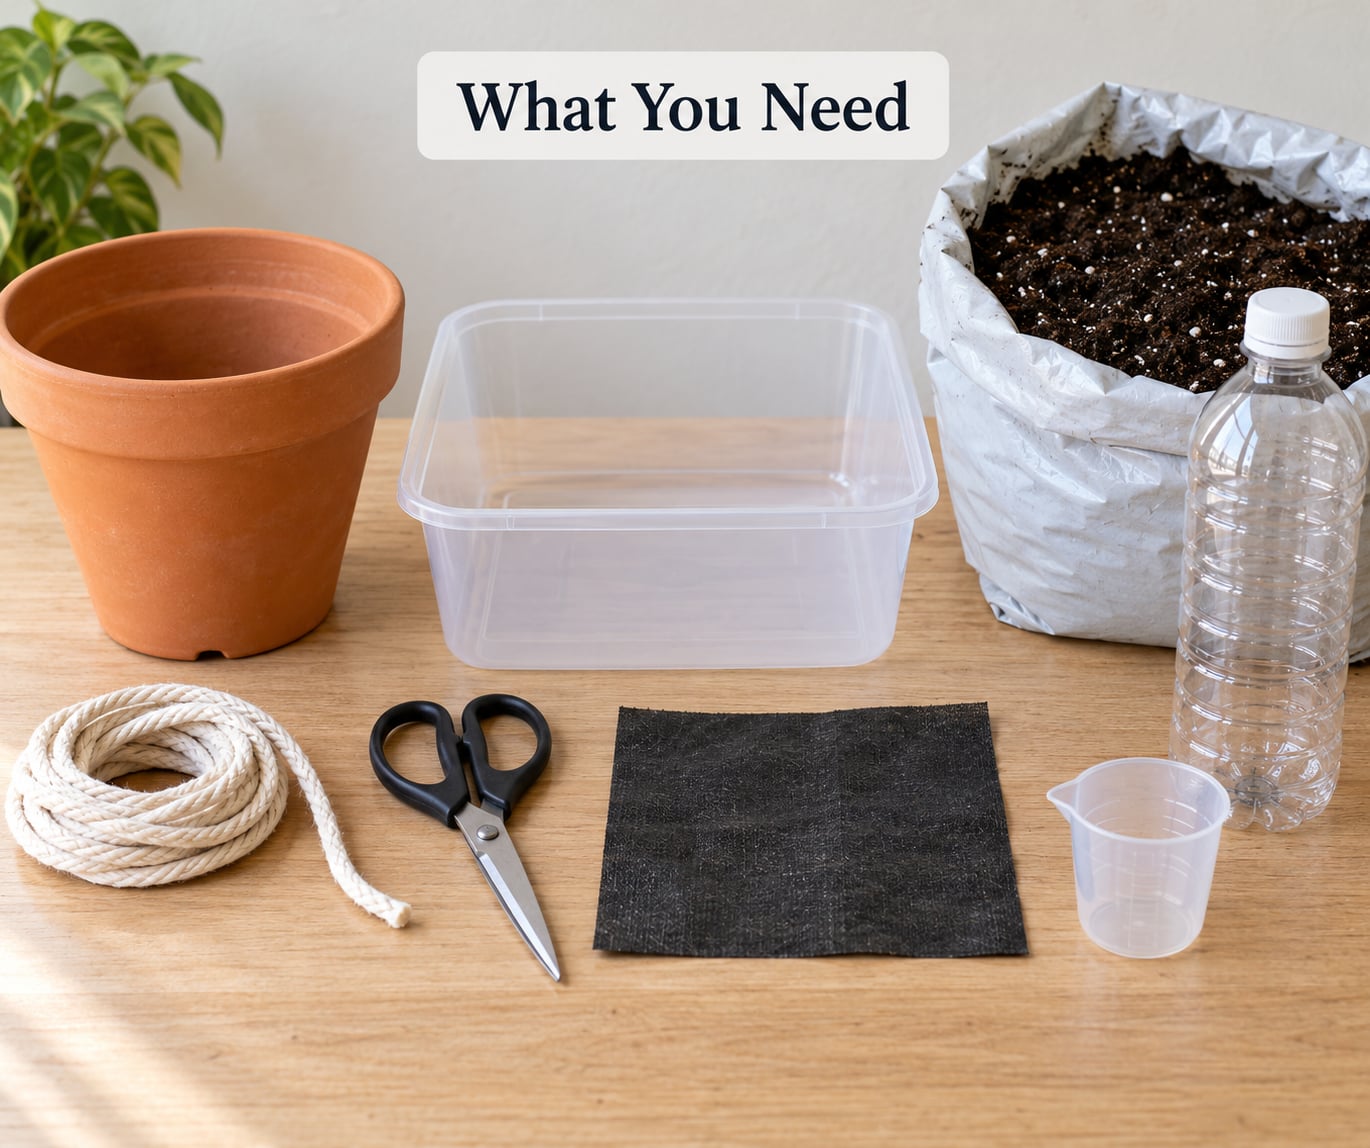
Most of this list is already in a kitchen drawer. The items that are genuinely optional are the fill tube and the overflow fitting, and you can live without both for your first build.
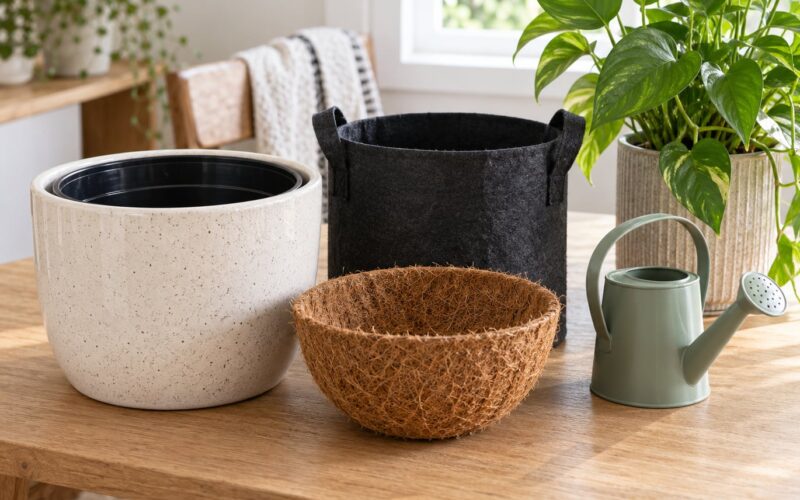
- A regular pot with a drainage hole. Terracotta, glazed ceramic, and plastic all work. See the checklist later in the guide for the ones that do not.
- A watertight reservoir. A plastic storage tub, a 5-gallon bucket, a food-grade container, or even a sturdy plastic bin from the hardware store. It needs to be wider than the base of the pot and deep enough to hold a meaningful amount of water.
- Cotton rope wick, roughly 1/4 to 1/2 inch thick, cut to about three times the height of the pot including the reservoir. Thicker rope moves more water, which matters for thirsty plants.
- A cotton ball or a small plug of fabric to seat the wick in the drainage hole so it does not slip out.
- Light, free-draining potting mix. Ideally a mix with perlite or pumice in it. Do not use garden soil or a heavy bagged topsoil straight from the bag.
- A false bottom, depending on your method. For the simplest wick conversion this is the reservoir rim itself, so nothing extra is needed. The wick-in-reservoir method can use a plastic cup, a landscape fabric disc, or a piece of hardware cloth cut to fit.
- Optional: a fill tube made from PVC or ABS pipe for topping up water without disturbing the soil, a small overflow fitting or a drill for a side overflow hole, landscape fabric to line the reservoir, and a small gravel layer to keep the pot off a wet surface.
Tool-wise you need scissors for the rope, a trowel, and a phone flashlight. The flashlight matters more than it sounds like it should, because you will want to check that the wick is actually saturated before you fill the reservoir.
One note on materials: skip PVC pipe for anything long-term. Gardeners on the forums point out that PVC can leach, and copper, bamboo, ABS, or plain food-safe plastic are the usual substitutes for a fill tube. A short piece of PVC indoors is not a serious risk, but it costs nothing to use a material you have not had to think about.
Which conversion method should you pick?
There are four realistic ways to do this, and they differ mostly in how much you have to build. The no-drill wick conversion below is the one I would start with, because it works on a pot you already own and leaves it intact.
| Method | Build time | Tools | Best for |
|---|---|---|---|
| No-drill wick conversion | About 20 minutes | Scissors only | Any pot with a drainage hole, especially decorative or glazed ones you cannot drill |
| Container-in-pot reservoir | 30 to 45 minutes | Drill, snips, landscape fabric | Large patio containers and 5-gallon buckets where you want maximum water capacity |
| False bottom with a bucket reservoir | 45 to 90 minutes | Drill, hole saw, mesh or hardware cloth | Vegetable containers and planters that need a real fill tube and overflow hole |
| Commercial wick insert | 10 minutes | None | Fastest option, and the only one that suits hanging baskets and shallow bowls |
Only the last two involve cutting into a container. The first two are what this guide walks through, and between them they cover nearly every pot anyone actually owns.
Step-by-Step: How to Convert a Regular Pot Into a Self-Watering Planter
1. Check That the Pot Has a Drainage Hole
Look at the base of the pot and confirm at least one hole, and that it is open. Run water through it into a sink. If water barely moves, clear the hole with a bottle brush or a wooden skewer before you go any further.
A drainage hole is the wick’s highway. Without one, there is no path for water to travel, and any reservoir you build underneath will just sit there while the plant dries out. Glazed ceramic and decorative pots often have small or offset holes, which is fine, but they do need to be open.
2. Choose a Reservoir and Cut the Wick
Pick a watertight container whose opening is at least as wide as the base of your pot, and place it where the whole assembly will live. A shallow tub under a 10-inch pot might hold half a gallon; a 5-gallon bucket under a large patio planter can hold several gallons.
Then cut your wick. Measure from the bottom of the reservoir, up through the pot, and to about two-thirds of the pot’s height, then add several inches of slack. Threading the wick through the drainage hole and laying the pot on the rim means the rope has to run down the inside wall and back up, so it needs to be roughly three times the pot’s height.
Set the wick aside. Wetting it first helps, but the real soaking happens in step 5.
3. Seat the Reservoir and Thread the Wick
Put the reservoir where it will stay. If it is a thin plastic tub, set it on a tray or a few pebbles so the floor above the water does not sit in a puddle, and add a couple of pebbles or a small block under the pot rim so the base is not sealed against the reservoir. That gap is what lets water move and lets you see it.
Thread the wick up through the drainage hole from below, then wedge a cotton ball or a small folded piece of landscape fabric into the hole around the rope. The plug should hold the wick in place without squeezing it flat. Fold the section of rope that runs up the inside of the pot against the wall so it stays out of the way while you add soil.
This is the step where most builds go wrong. A wick lying loose on the floor of the reservoir, with dry soil sitting above it and never touching, will not wick. The rope has to end up embedded in damp soil at the bottom of the root zone.
4. Add Soil and Plant at the Right Depth
Fill the pot with a light potting mix, packing the rope into the lower third so it is surrounded by soil on all sides rather than sitting in an air pocket. A perlite or pumice blend works well here, and mixing in extra perlite makes a heavy mix more workable.
Plant at the same depth the plant was already at. Do not bury the stem higher in the hope of getting more moisture, and do not compress the soil so hard that the pore spaces collapse. Firm it gently, leave about an inch at the top as a watering rim, and skip the decorative gravel mulch until the system is working, because a gravel layer slows the whole thing down.
5. Prime the Soil and Fill the Reservoir
Water the pot from the top until water runs out of the drainage hole and the soil is saturated. This is the single most important step, and it is the one people skip because it feels redundant on a self-watering planter. Dry soil will not accept water from a wick, so you have to wet it first and let it stay wet.
With the soil saturated, pour water into the reservoir. The rope should darken as it drinks. Fill to somewhere below the base of the pot, roughly halfway up the reservoir, and stop. Then check your overflow rule: in a container with a side overflow hole, water should stop just below that hole, since the hole exists to dump excess before it reaches the soil.
If your soil is heavier than you would like, this is the moment to fix it rather than later. Add perlite, replant, and prime again. Compaction is the usual reason capillary action stalls.
6. Test the Wick and Set a Refill Rhythm
Shine a flashlight down the wick. Wet rope looks darker than dry rope, and if the whole length is dark you know water is moving the full height. Touch the soil about an inch down with a finger. It should be cool and damp, not dry, and the surface may even show a faint damp halo, which is normal.
Then wait a day and check again before you trust it. New plants with small root systems often need a week or two of top watering while their roots grow down toward the wick, and after that the reservoir usually carries them.
Set a refill rhythm based on the table below rather than a fixed schedule. A cheap moisture meter in the reservoir takes the guessing out of it, and topping up through a fill tube means you never have to dig into wet soil.
| Pot size | Typical reservoir | Days between refills indoors | Days between refills outdoors in summer |
|---|---|---|---|
| 4 to 6 inch pot | 1 to 2 quarts | 5 to 8 days | 2 to 3 days |
| 8 to 10 inch pot | Half gallon to 1 gallon | 7 to 12 days | 3 to 5 days |
| 12 to 14 inch pot | 1 to 2 gallons | 10 to 16 days | 4 to 6 days |
| Large patio container | 3 gallons or more | 14 to 21 days | 5 to 8 days |
Treat those as starting points, not rules. A shaded fern in a glazed pot runs much longer than a tomato in full sun, and a pot sitting in a hot pan of reflected patio heat can empty twice as fast.
Common Mistakes and Fixes
Almost every wick problem traces back to one of four things: the rope, the soil, the anchor point, or the water supply. The table below maps what you see to what to change.
| Symptom | Likely cause | Fix |
|---|---|---|
| The wick pulls water a few inches and stops | Wick too thin, or soil packed tight around it | Use thicker rope, at least 1/4 inch, and add perlite to the mix |
| Wick sits dry in a full reservoir | Wick lying loose on the reservoir floor, not in the soil | Pull the rope up into the lower third of the soil column and re-prime from the top |
| Pot has no drainage hole | No path for the wick | Use a wicking cup or a commercial insert instead, or drill only if the pot is plastic |
| Soil is constantly soggy, plant yellowing | Reservoir too full or wick delivering too much | Drop the water level, thin the wick to a single strand, or add more perlite |
| Stale smell, algae film, small flies | Water sitting untouched too long | Empty and scrub the reservoir monthly, add a lid or a dark layer, refill smaller amounts more often |
| Roots brown and soft at the base | Saturated root zone on a plant that wants air | Move the plant to a free-draining pot; wicking is wrong for succulents, cacti, and most herbs |
| Wick mouldy or brittle | Old natural fibre | Replace the rope in spring when you refresh the soil |
One structural mistake is worth calling out because it is not in the table: a reservoir sitting below the level of the pot’s base. If the bottom of the pot is submerged, the soil can never drain and the whole assembly becomes a swamp. Always keep the pot base above the water line, with air between them.
Converting a Regular Pot Into a Self-Watering Planter Without Removing the Soil
If your plant is already in the pot you want to convert, you do not have to unplant it. Lift the plant out with as much of its root ball intact as you can, set it in a bowl of dry soil, and leave it there while you build the reservoir around the pot.
Then thread the wick down through the drainage hole and up into the root ball itself, and set the whole thing back in place. A cotton ball plug around the hole holds the rope while you firm soil over the top. This is messier than starting fresh, and the plant will be briefly stressed, but it saves a large specimen from a full unpot.
Plan on top watering for two weeks after you do it. The roots need time to grow down into the new wicked zone, and top watering during that stretch keeps them alive while the connection forms.
How to Choose the Right Pot, Wick, and Plant
Match the pot by size, depth, and material
Most pots can be converted, but a few will fight you.
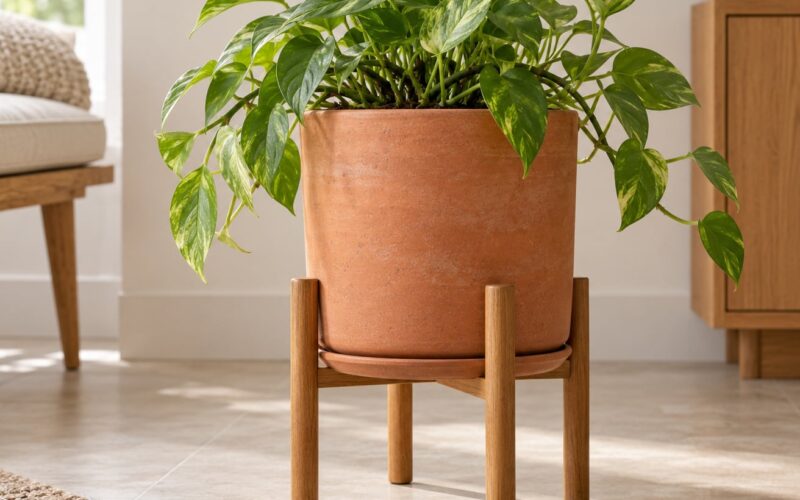
- Easy: terracotta, plastic nursery pots, and unglazed ceramic. They all have open drainage holes and they breathe a little, which helps prevent rot.
- Workable: glazed ceramic and decorative planters. The hole is often small or at the edge, so the wick has to be thin and patient, but you never need to drill.
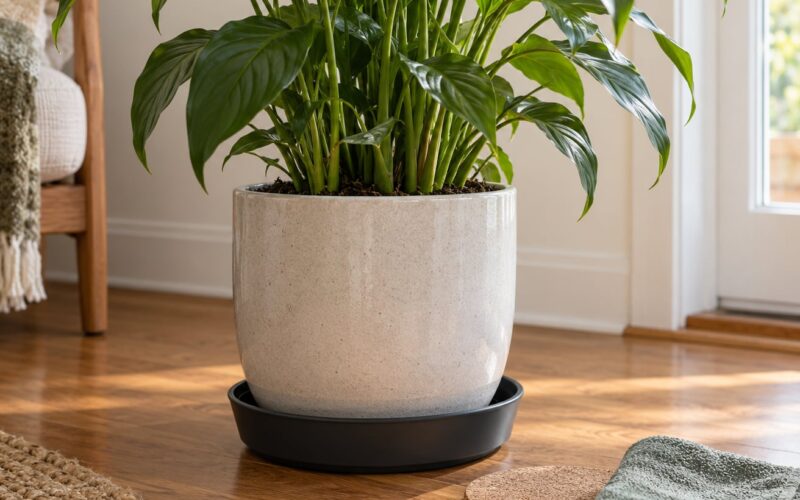
- Hard: pots with saucers that seal the base, and self-watering pots that already have a reservoir. Leave both alone.
- Poor fits: shallow bowls, cachepots without a hole, and hanging baskets. There is no depth for a reservoir, and a basket needs a commercial insert designed for it.
Depth matters more than width. A container under 5 inches deep has no room for both a reservoir and a root zone, so use a wick insert or skip it. For most houseplants, 8 inches or deeper gives you a usable split.
Choose the wick material that will actually wick
The single most asked question on gardening forums is which rope to use, and the answer is consistent: natural fibre wins, synthetic rope largely fails.
| Wick material | Wicking ability | Lasts | Where to find it |
|---|---|---|---|
| Cotton rope | Good, reliable, easy to adjust | About one season | Hardware store, craft aisle |
| Wool roving or wool yarn | Very good, often better than cotton | About one season | Craft and yarn shops |
| Unbleached cotton twine | Fair to good, thin so low flow | About one season | Craft aisle |
| Polyester or nylon rope | Poor, unreliable | Long, but not worth it | Hardware store, avoid for wicks |
| Cotton mop head strands | Good, cheap, plentiful | Varies | Hardware store, or your recycling bin |
Yes, cotton rope works, and it is the standard choice. One rule people get wrong: never use a treated or waxed rope, and never coat the wick in anything. The rope has to be able to absorb and pass water untreated.
Match the thickness to the plant. A pothos in a 10-inch pot is fine on a single strand, while a large ficus or a container tomato will need a rope the thickness of your little finger or two wicks side by side. When in doubt, go thicker, because a wick that pulls too much is easier to fix than one that pulls too little.
Know which plants to leave out
Self-watering is not a universal upgrade. Constantly moist soil causes real problems for a large group of plants, and this is where most of the drawbacks of self-watering pots actually come from.
- Succulents and cacti need their soil to dry fully between waterings. In a wicking pot they will stay damp and the roots will rot.
- Most herbs, including basil, rosemary, thyme, and oregano, prefer air around the roots and will sulk in a permanently moist zone.
- Orchids need their bark to dry between soaks and will rot against a wet wick.
- Root and tuber crops such as carrots, beets, and potatoes want loose, dry soil, and a wicking pot gives them the opposite.
- Plants that like to dry out between drinks, including snake plant, ponytail palm, and most succulents, will show it as yellowing lower leaves.
Wicking suits the opposite list: thirsty foliage plants, ferns in bright indirect light, begonias, peace lilies, coleus, herbs that like moisture such as mint and parsley, and most patio vegetables in full sun. Forum readers who have kept wicking systems running long term treat it as a permanent setup once it is calibrated, not just a vacation hack, so it is worth learning the rhythm rather than testing it only when you are about to leave town.
Two housekeeping items round this out. Empty and scrub the reservoir every month, because water that sits untouched for weeks goes stale and breeds algae and fungus gnats. And in winter, drain the reservoir if the pot is outdoors, since frozen water expands and can crack the container; bring the whole assembly inside if it is not rated for freezing.
Frequently Asked Questions
Can you convert any pot into a self-watering planter?
Most pots with a drainage hole can be converted, including terracotta, plastic nursery pots, and glazed ceramic. The pot needs an open hole for the wick to pass through, and enough depth to split into a reservoir and a soil chamber, usually 8 inches or more. Shallow bowls, cachepots without holes, and hanging baskets are poor fits and work better with a commercial wick insert.
Do self-watering pots lead to root rot?
They can, and the plant type matters more than the system. A wicking pot keeps the root zone evenly moist, which is wrong for succulents, cacti, most herbs, and orchids, so those plants will rot. For plants that like moisture, rot usually points to a reservoir filled too high, a wick that is too thick, or soil that is packed too densely to hold air.
How long does a converted pot last between refills?
It depends on pot size, plant, and climate. A 10-inch pot indoors usually runs 7 to 12 days on a half gallon to a gallon, while the same pot outdoors in summer heat may need filling every 3 to 5 days. A 5-gallon bucket reservoir under a large patio container can stretch to two or three weeks indoors. Check the reservoir by feel or with a moisture meter rather than trusting a fixed schedule.
What is the best wick material for a self-watering planter?
Natural fibre, and cotton rope is the standard choice because it is cheap, easy to find, and easy to swap out. Wool roving and cotton mop strands are reported to wick even better. Polyester and nylon rope wick poorly and consistently disappoint, and no rope should be waxed or treated, since the finish stops it absorbing water.
Why is my self-watering planter not wicking water?
In most cases the wick ends in the wrong place. If it lies loose on the floor of the reservoir with dry soil above it, it never becomes continuous and nothing travels. It has to run up through the drainage hole and be embedded in the lower third of the soil column. Thin rope, dense soil, and a plant whose roots have not reached the wick yet are the other common causes.
How do I refill the reservoir without disturbing the soil?
Pour water into the reservoir from above through a gap, or better, add a fill tube made from a short length of ABS or food-safe pipe that runs from the top of the pot down into the water. A narrow bottle spout also works on small pots. Stop below the level of the pot base, and never fill above the top of the wick or you will drown the root zone.
A Better Watering Routine Starts With the Right Setup
Start by checking one thing: does the pot have an open drainage hole, and can you find a container to sit it in? That is the whole gate on whether this project is worth your afternoon, and everything after it is a 20-minute build with scissors, a cotton rope, and a bag of potting mix.
The part people rush is the priming. Water the pot from the top until it drains, let the rope soak dark all the way through, and then fill the reservoir to just below the pot base. That single soak is what turns a nice idea into a working system, and skipping it is the reason so many conversions fail in week one.
Once it runs, check the reservoir by feel every few days rather than on a fixed schedule, scrub it monthly, and swap the rope and refresh the soil each spring. If your plant is a succulent, an herb, or an orchid, keep the pot the way it is, and spend the afternoon on a fern instead.