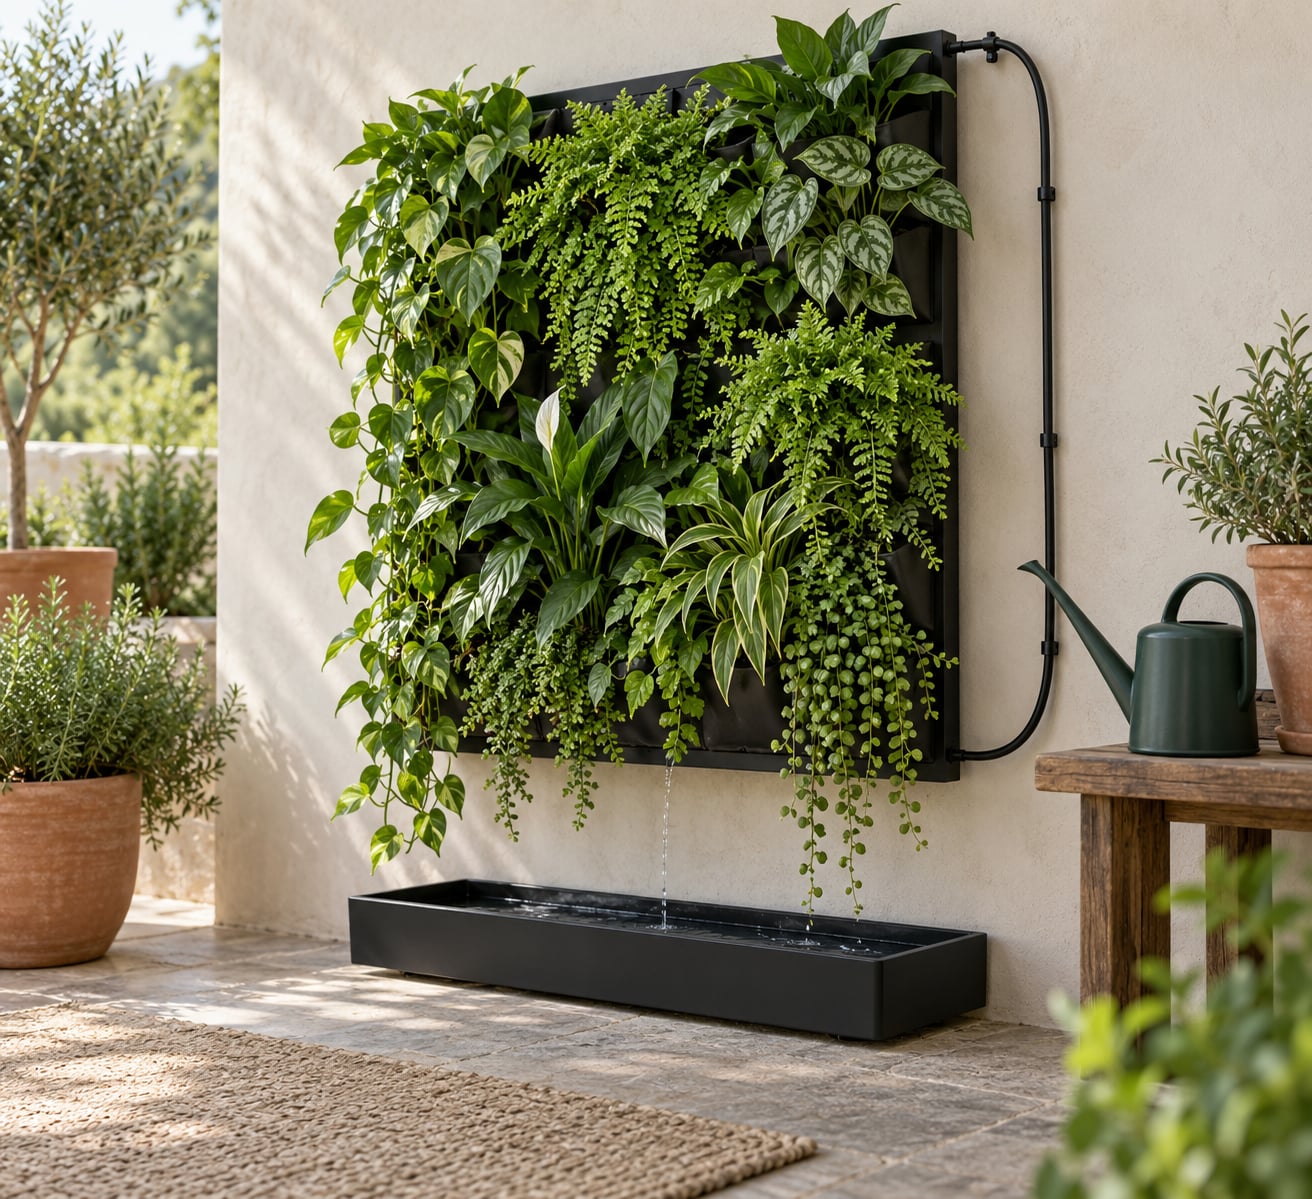
Watering a living wall without making a mess comes down to one rule: never pour water from above. Feed it into a reservoir or drip line at the top, let gravity carry it down through the pockets, and stand a waterproof tray underneath to catch whatever runs out. Ten minutes of setup saves you a wet floor every week, and it keeps water out of the drywall behind the panel.
Most of the splashing people complain about comes from one habit — tipping a watering can over a wall and letting gravity improvise. That wets the foliage, misses most of the root zone, and sends the runoff down the back of the installation where nobody can see it. The routine below replaces guesswork with a repeatable cycle.
Start with the manufacturer’s irrigation instructions if you have them. Walls vary enormously: a felt pocket wall, a hydroponic panel and a moss frame drink differently, and there is no single schedule that fits all three. Where I say “until evenly moist” below, that means damp all the way down, not dripping.
Table of Contents
- What You Need
- Four ways to water, compared
- Step-by-Step: How to Water a Living Wall Without Making a Mess
- 1. Check the irrigation system before watering
- 2. Protect the wall, floor, and surrounding room
- 3. Water slowly and evenly from the top or designated inlet
- 4. Check drainage and stop before overflow
- 5. Clean up and reset the system
- Common Mistakes That Leave You Mopping
- Watering too fast
- Using the wrong outlet
- Ignoring drainage until it overflows
- Wetting the foliage
- Leaving the floor unprotected
- Running the wall against an unprotected wall
- Assuming every living wall waters the same
- Short routines worth adding
- Frequently Asked Questions
- How often should I water a living wall indoors?
- Can I water a living wall from the top?
- Why is water leaking out of my living wall?
- Should I wet the leaves when watering a vertical garden?
- Is a timer better than hand-watering a living wall?
- How do I clean up after watering without damaging the plants?
- Conclusion
What You Need
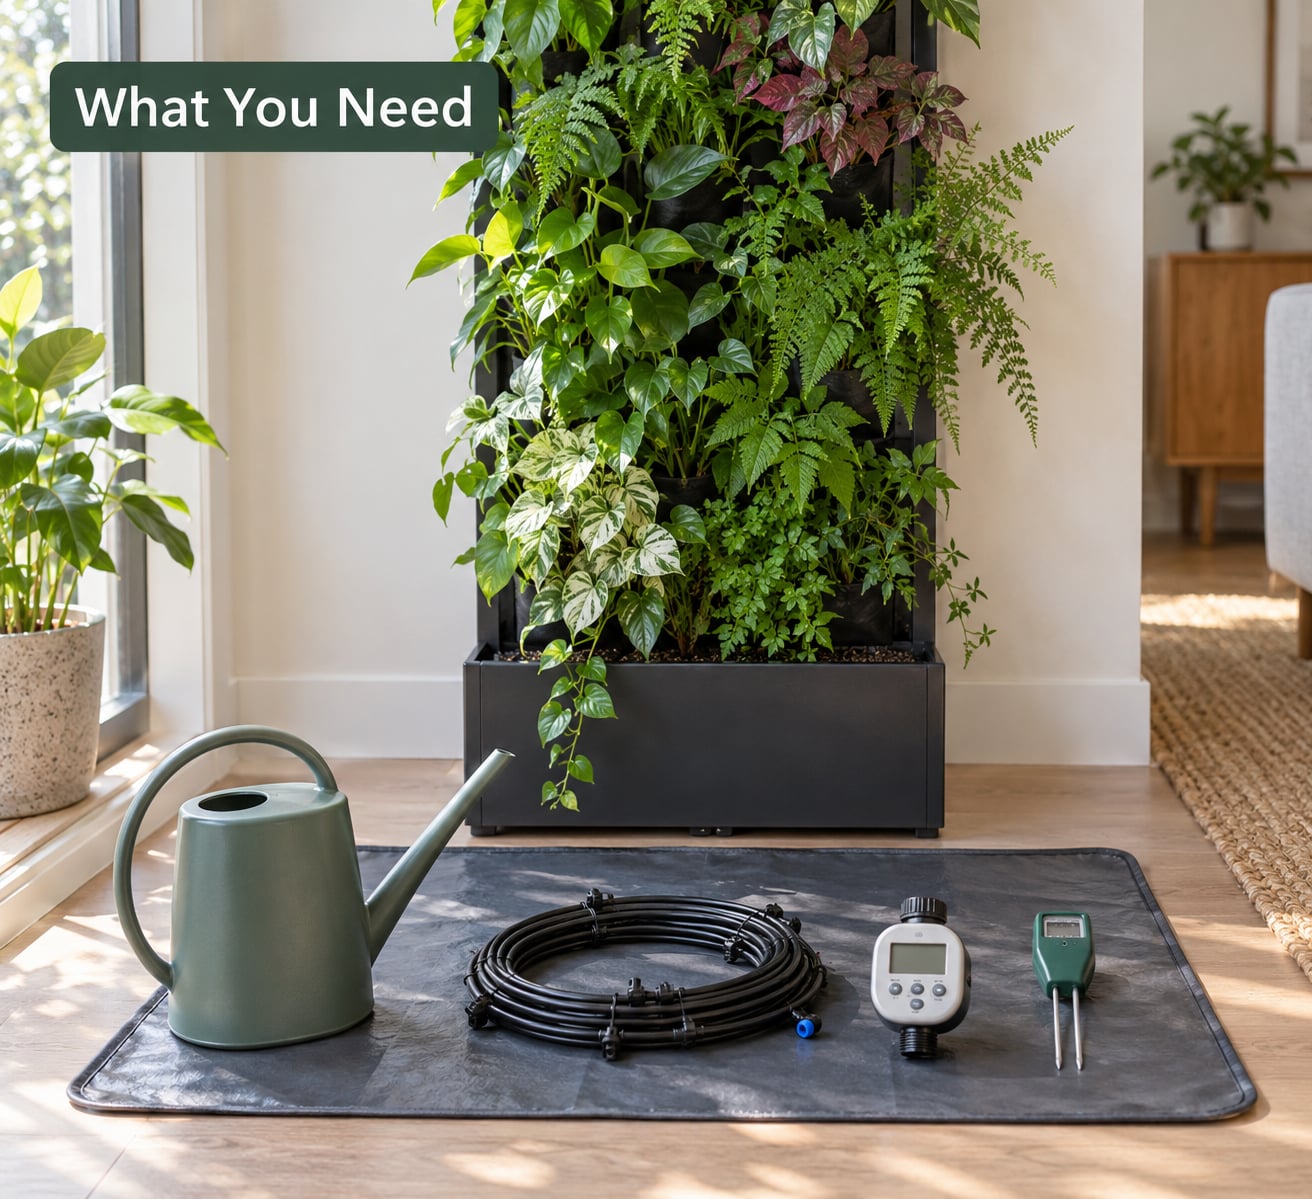
Gather this before you open the tap, not halfway through. The whole setup fits on a shelf and takes about ten minutes to lay out.
- The wall’s irrigation instructions. Flow rate, cycle length and reservoir volume if the system has one.
- A drip line, or a long-reach watering wand with a shower head. Either one puts water where you want it instead of everywhere.
- A timer, or a controlled water source. A kitchen tap with a lever valve is already enough for hand watering.
- A bucket or watering can with adjustable flow. The rose attachment matters more than the can’s size.
- A spare container to catch drainage while you work, plus a towel.
- A washable mat or plastic tray for the floor beneath the wall.
- A moisture meter if the wall is tall enough that you cannot reach the bottom pockets by hand. Optional, but it removes the guessing.
Four ways to water, compared
Most home walls fall into one of two of these four setups. Here is how each one trades off on mess risk, time and where it actually fits.
- Long-reach wand with a shower head. Low mess as long as you keep the pressure down, 10 to 15 minutes a session. Best for an apartment wall you can reach from the side.
- Top drip line with a reservoir. Very low mess, two minutes of setup and then you leave. Best for tall walls and for anyone who travels.
- Recirculating pump and timer. Very low mess, but it needs a sealed loop and costs minutes a week in maintenance. Worth it for large panels and commercial installs.
- Overhead watering from a can. High mess, 15 minutes plus cleanup. Fits almost nothing — avoid it.
A recirculating system earns its cost only once the wall is big enough that hand watering has become a chore.
Step-by-Step: How to Water a Living Wall Without Making a Mess
1. Check the irrigation system before watering
Find the water inlet first. On most systems it sits at the top edge of the frame or inside a top tray, and it is usually a small tube, a spray bar or a fabric channel. If you cannot identify it, do not guess — pull the installation manual or ask the supplier which fitting is the inlet and which is the drain.
Run your hand along the tubing and look for kinks, mineral crust or a blocked emitter. A kink is the most common cause of a wall that waters unevenly, and it takes ten seconds to straighten.
Place your catch container beneath the drainage outlet before you turn anything on, not after. Then follow the manufacturer’s guidance on flow and timing rather than picking a number that feels right. The system is ready when water leaves the lowest outlet at a steady drip rather than a gush, and when the top pockets are not visibly pooling.
2. Protect the wall, floor, and surrounding room
Slide a washable mat or a shallow plastic tray under the full width of the wall. This is the single habit that separates a tidy watering session from a mop-and-bucket one.
Move any portable planters or floor pots that sit within splash range, and clear shelves of breakables underneath. If the wall is fixed to a wall, check the gap behind it — a deliberate 20 to 30 mm air gap, ideally with a waterproof membrane, keeps water off the drywall. Leaning a wet frame straight against drywall is how mold starts, and it is a problem people only notice when the paint bubbles.
Move chairs, cables and paperwork out of the run-off path while you work. It takes ten seconds now and saves a soaked cable later.
3. Water slowly and evenly from the top or designated inlet
Start at low pressure. On a wand, keep the trigger barely open so the output is a soft rain rather than a jet. On a drip line, open the valve a quarter turn and increase from there.
Work across the wall in horizontal passes instead of dwelling on one spot, then let the substrate absorb before you repeat. A short pause between passes matters more than pressure does, because most pockets will not take a full pour on contact and the rest runs straight down and out.
Never aim at the leaves or the wall face. Water hitting foliage spreads mildew, and water hitting the panel front runs down the outside of the installation — the exact mess you are trying to avoid.
4. Check drainage and stop before overflow
Watch the lowest drainage points while the water is still moving. A slow, even trickle from the bottom is healthy. A steady stream means you are putting in more than the substrate can hold, and continuing is how you get a puddle in the tray and waterlogged soil at the base.
Do a touch test: press a finger a centimeter into the top pocket, then one near the bottom. Both should feel damp. If the top is dry and the bottom is soaked, you have a flow problem — check for a clogged emitter or a pocket packed too densely — not a watering problem.
A moisture meter gives you the same read without climbing a ladder. Stop when the root zone is evenly moist. Signs of overwatering include yellowing leaves, a musty smell from the base tray, and soft, dark roots.
5. Clean up and reset the system
Wipe the outlet and the wall face with a damp cloth. Let it air dry before you walk away, because trapped moisture behind a wet panel is what causes spotting.
Empty the catch container rather than leaving it standing. Water left in a tray goes stagnant within a week, smells, and turns green. Rinse it, dry it, and slide it back under the wall.
Note how long the cycle took and how the soil felt. Five minutes and slightly damp is a data point you will want next week, when you are trying to work out whether the wall needs water at all.
Common Mistakes That Leave You Mopping
Watering too fast
High pressure blasts soil out of the pockets and sends water down the front of the panel. Fix: low flow, multiple short passes, with a pause in between. A wand set to a shower setting solves this on its own.
Using the wrong outlet
Pouring into a decorative pocket or spraying at the top edge of the frame bypasses the irrigation channel entirely. Fix: confirm which fitting is the inlet, and use only that.
Ignoring drainage until it overflows
A tray that sits full is an overflow waiting for the next watering. Fix: empty it every session, and treat standing water as a signal to reduce cycle length.
Wetting the foliage
Overhead watering cools the leaves briefly and then promotes fungus and mildew in the humid pockets behind them. Fix: water into the substrate, not over it.
Leaving the floor unprotected
A bare floor guarantees a wet patch. Fix: mat or tray under the full width, every single time.
Running the wall against an unprotected wall
A wet frame flush to drywall traps moisture in a space you will never check. Fix: an air gap plus a waterproof membrane behind the panel, and keep the rear of the installation dry.
Assuming every living wall waters the same
Felt pockets, hydroponic panels and moss frames behave nothing alike. Moss in particular is kept evenly damp by misting rather than drenched, and it has no pockets to flood. Check what your wall actually is before you copy a schedule from anywhere, including here.
Short routines worth adding
Once a week, check the top pockets first. They dry fastest because they sit furthest from the drainage path, and they are the first sign that the wall needs water. Empty and rinse the tray in the same visit so standing water never gets a chance.
Two weeks away? The escalation is simple: hand-water thoroughly the day you leave, then fit a drip line on a digital timer set for a short cycle every few days. A neighbor with a key beats any timer when the plants are thirsty and the timer is slightly wrong.
Frequently Asked Questions
How often should I water a living wall indoors?
Check the top pockets every few days and water when they feel dry to a fingertip, rather than watering to a fixed calendar. Indoors, most potted living walls need attention roughly every three to five days in a warm, lit room, and less often in a cool or air-conditioned one. The touch test beats any schedule because light, temperature and plant mix all move the answer around.
Can I water a living wall from the top?
Yes — the top is exactly where water should enter, as long as it goes into the irrigation channel or a top reservoir rather than over the plants. Gravity then carries it down through the pockets and out through the drainage at the base. Watering from above onto foliage or the panel face is what causes drips, mildew and runoff behind the installation.
Why is water leaking out of my living wall?
Common causes are a blocked or missing emitter, too much water per cycle, a pocket packed so densely that water cannot spread sideways, and a drainage outlet that is seated incorrectly. Water running down the back of the panel usually means there is no air gap or waterproof membrane behind it. Start by checking the tubing for kinks and reducing the cycle length, then look at the drainage points.
Should I wet the leaves when watering a vertical garden?
No. Wetting foliage adds nothing the substrate does not already absorb, and it promotes fungus and mildew in the humid, shaded pockets behind the plants. Aim at the growing medium instead. The exception is moss, which is not planted in soil and is kept damp by a fine mist on its surface rather than by flooding the frame.
Is a timer better than hand-watering a living wall?
A timer is better once you want the wall watered evenly while you are away or busy, and it removes the temptation to rush. Set a short cycle rather than a long one, check the first two runs by hand to calibrate, and confirm the tray is not filling up faster than it drains. For a small wall you can reach by hand, a long-reach wand and a set routine works just as well.
How do I clean up after watering without damaging the plants?
Wipe the outlet and the panel face with a damp cloth while the wall is still dripping, then let it air dry. Empty and rinse the catch tray every session rather than leaving standing water behind, and slide a mat under the wall before you start so the floor never takes the runoff. Keep the cleaning cloth separate from any fertilizer or pest treatment you use.
Conclusion
The safest first move is small: read the wall’s irrigation instructions, lay a mat or tray under the full width, and run one slow cycle at the top while you watch the drainage at the base. Stop when the root zone is evenly moist, empty the tray, and write down how long it took. Adjust that number to your plants, your wall type and the room’s light and heat — it is the only schedule that stays accurate as the season changes.