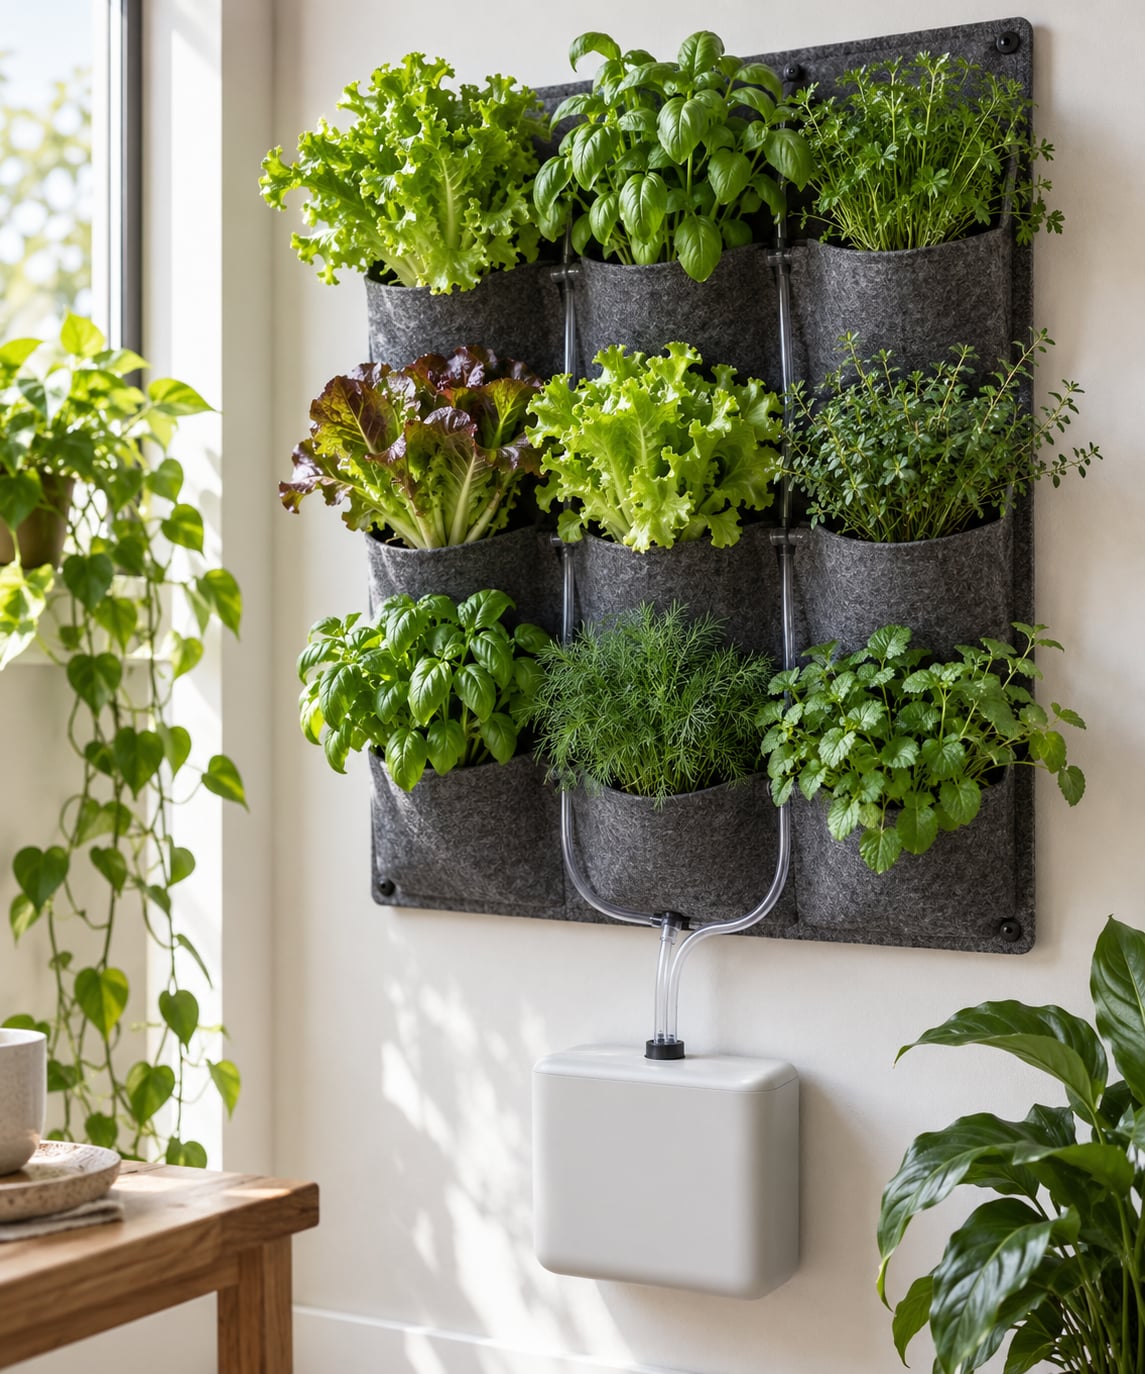
A hydroponic living wall is a vertical panel where plants sit in net pots or pockets mounted flat against a wall, with their roots fed a pumped, recirculating nutrient solution instead of soil. For beginners, the winning approach is small: one panel of leafy greens, one reservoir, one pump, and a light you can reach with a stepladder.
The whole build takes an afternoon once the parts are in front of you. What takes longer is the learning curve around water, light and plant choices, and those are the three things this guide covers in detail. Everything below is aimed at one goal: making a hydroponic living wall for beginners run the way it should, so you can tell when your wall is actually working instead of guessing.
Table of Contents
- What You Need
- The core component list
- Nice to have, not needed on day one
- Check the wall before you buy anything
- Step-by-Step Setup
- Choose the Right Plants
- Skip these on the first wall
- Set Up Lighting and Watering
- Maintain Your Hydroponic Living Wall
- Common Mistakes and Fixes
- Frequently Asked Questions
- Do hydroponic living walls need a pump running all the time?
- How big should a beginner hydroponic living wall be?
- What pH and EC should a beginner use?
- Why is algae growing in my hydroponic wall reservoir?
- Can I grow a hydroponic living wall in an apartment?
- Can herbs and ornamental plants share one hydroponic living wall?
- Conclusion
What You Need
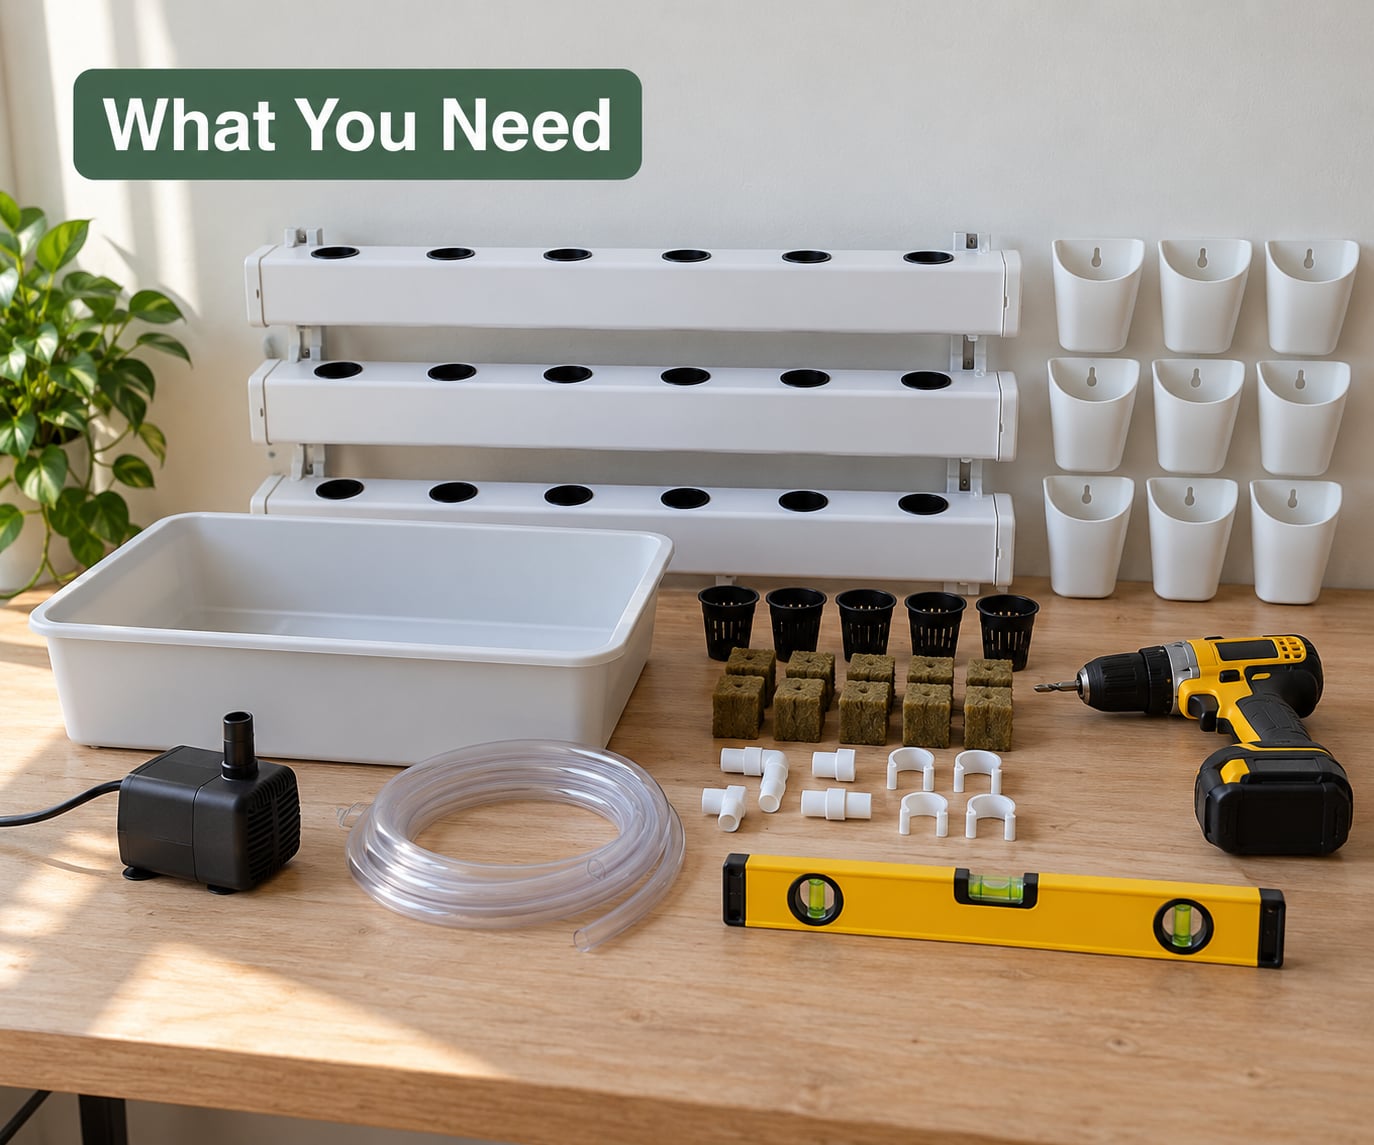
Every hydroponic living wall needs the same five pieces. The list is short because a recirculating system is simple plumbing rather than complex machinery, and the difference between a wall that thrives and one that fails usually comes down to two of these parts.
The core component list
| Component | What it does | What to look for |
|---|---|---|
| Reservoir | Holds the water and nutrient solution | Opaque, with a lid you can reach; opaque matters more than size because light is what grows algae |
| Submersible pump | Lifts solution to the top of the wall | Rated flow matched to your channel count, quiet enough to sit in a living room |
| Channels or pockets | Hold the roots and spread the water film | Food-safe PVC channel or felt pockets on a solid backing panel |
| Net pots and medium | Hold each plant and its root plug | Net pots sized to the channel, with clay pebbles, rockwool or coco coir |
| Grow light | Supplies the energy plants need | Full-spectrum LED, with a timer so the photoperiod is consistent |
Add a small air pump and air stone if you go with deep water culture or towers, since still water loses oxygen fast. A pH meter and an EC or TDS meter are the two instruments worth buying properly, since guessing at either one is how beginners lock themselves out of their own plants.
Nice to have, not needed on day one
A timer for the pump and the light lets you stop thinking about the wall entirely between checks. A reservoir sight tube shows the water level at a glance. Extra net pots and a spare pump cost little compared with the annoyance of a Friday evening failure with no replacement part.
Check the wall before you buy anything
A filled system is heavier than most people expect, so check what is behind the drywall before you drill. Mount into studs where you can, use anchors rated well above your calculated load, and keep the reservoir accessible for refilling without pulling the panel off the wall.
Renters have good options. A freestanding A-frame or shelf system leaning against the wall needs no holes at all, and tension rods or removable adhesive hooks work for lighter felt-pocket panels. Whatever you pick, put a waterproof liner behind the reservoir and think about how water would drain if a fitting failed.
Step-by-Step Setup
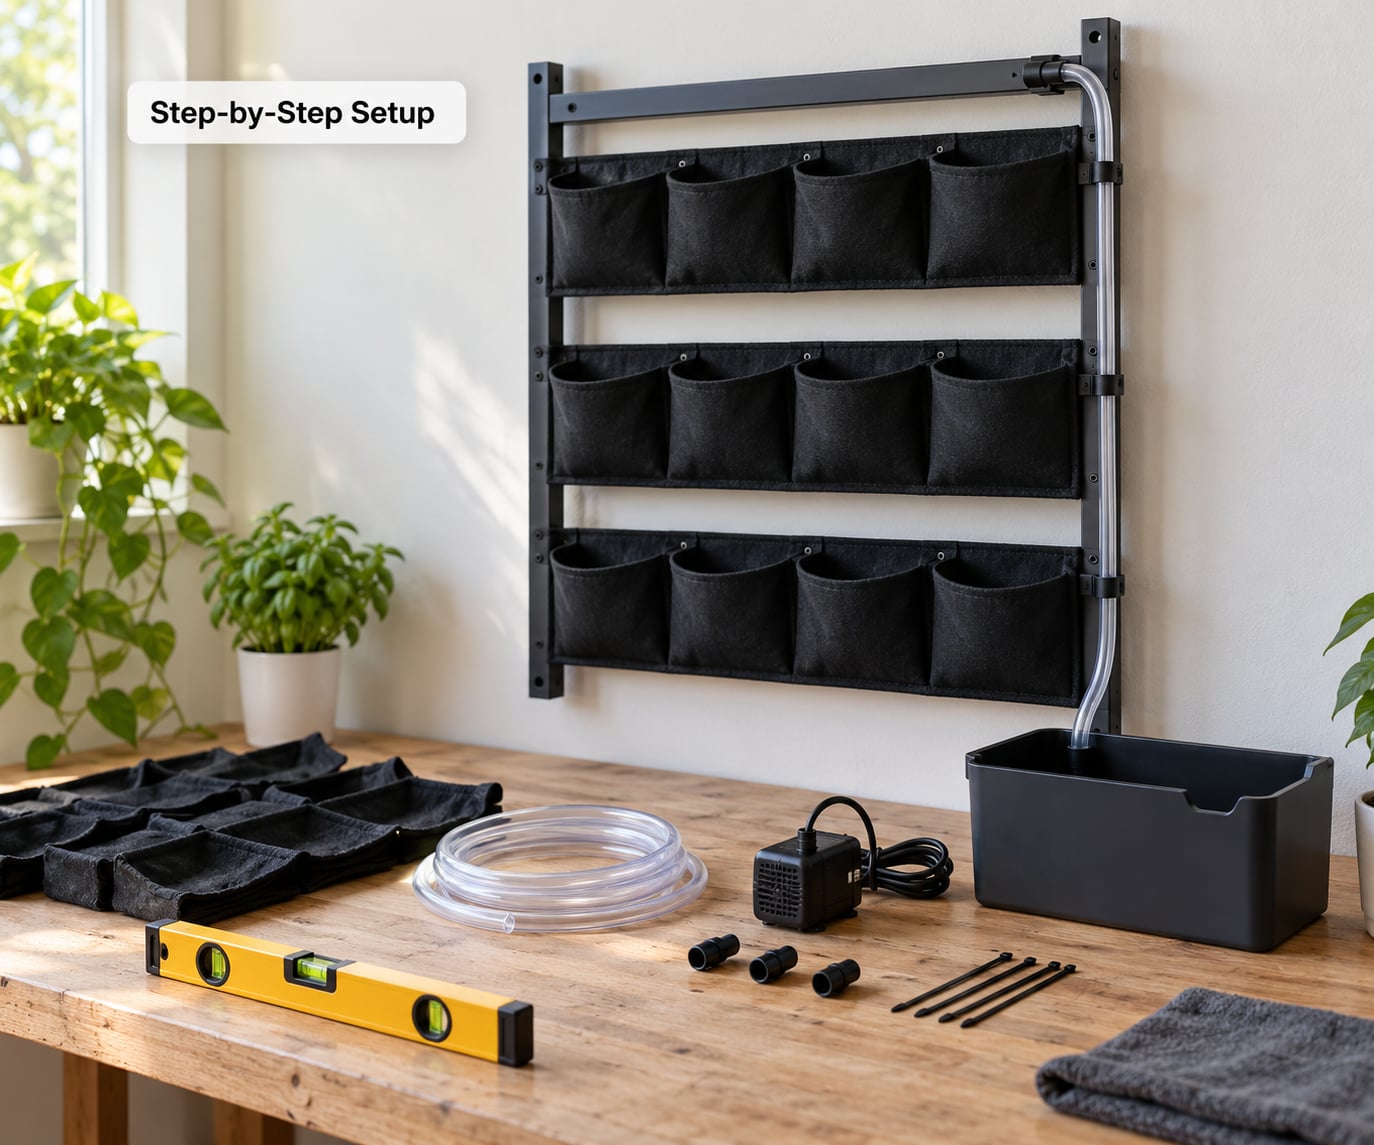
Build the structure dry, plumb it with plain water, and only add nutrients once the loop has run clean for an hour. Skipping that order is the most common way a first wall turns into a nutrient-stained wall.
- Pick the spot and check the light. Choose a wall that gets a timer-controlled light source or reasonable ambient daylight. Measure the panel area twice and leave a few inches of clearance at the top for the light and at the bottom for the reservoir.
- Build the frame. Assemble the backing panel and attach channels or pockets at a consistent height. Mark the site of each planting hole before drilling; spacing of roughly 8 to 10 inches gives leafy greens room to fill out without shading the row below.
- Set the slope. Channels run from 1 to 2 degrees downward toward the reservoir, just enough for water to move and not enough for it to race past the roots. A short bubble level on the channel gets you there.
- Plumb the return. Run the drain line from the lowest channel back into the reservoir and seal every grommet and fitting. Keep the reservoir below the lowest point of the channel so gravity finishes the job.
- Install the pump and the flow. Set the pump inside the reservoir with its intake clear of the wall, and aim for roughly 1 to 2 liters per minute of total flow. Run the pump and watch where water lands, not just whether the pump turns on.
- Leak test with plain water. Fill the reservoir with plain water and let the loop run for a full hour. Wipe every joint dry and check for damp spots. Fix anything weeping before it becomes a wall stain.
- Mix the solution and set pH. Fill with water, add nutrients, and adjust to pH 5.5 to 6.5. New seedlings want the weaker end around EC 1.2 to 1.6 mS/cm, with fruiting plants later accepting up to roughly 2.0.
- Transplant and run. Set seedlings into net pots with medium packed against the roots, seat each pot so the base touches the flowing water, and start the light on a 14 to 16 hour photoperiod. Expect to see new growth in seven to ten days once roots establish.
Keep the pump running continuously on recirculating wall systems. The thin film of water at the roots is what keeps them alive, so a pump failure means a rescue rather than a pause.
Choose the Right Plants
Beginner plants share three traits: fast growth, shallow roots, and a tolerance for constantly wet roots. Ornamental trailing plants and quick greens can share the same channel, which is how you get the layered look people picture when they hear the word living wall.
| Plant | Light needs | Hydroponic fit | Time to harvest |
|---|---|---|---|
| Butterhead lettuce | Moderate to bright | Excellent, shallow roots, cut-and-come-again | About 5 to 6 weeks |
| Basil | Bright | Excellent, productive for weeks | Snip from about 4 weeks |
| Mint | Moderate to bright | Very good, spreads fast in any system | Ongoing |
| Kale and chard | Bright | Good, taller plants for the top row | About 6 to 8 weeks |
| Strawberries | Bright | Good if you have the light and space | About 3 months |
| Trailing pothos or ivy | Low to moderate | Good for pockets, not for channels | Continuous |
Skip these on the first wall
Full-size tomato and pepper plants get tall and heavy, and a wall panel cannot support them well. Root-heavy plants like carrots and beets need far more medium than a net pot gives them. Houseplants adapted to dry air and infrequent watering generally sulk in constantly wet roots, so keep them out of the reservoir zone.
Skip anything you want to grow once and forget. A first wall teaches you how your pump, light and water behave, and a fast crop like lettuce gives you that feedback every five weeks.
Set Up Lighting and Watering
Light is the part beginners underestimate. A wall near a sunny window gets enough light for leafy greens, and anything further in a room needs a grow light delivering roughly 200 to 400 micromoles per square meter per second across the canopy. Most leafy greens want 12 to 16 hours of light a day, and a timer keeps that steady.
Mount the light above the top row and aim it straight down, then check the lower rows weekly. Dense plantings shade everything beneath them, which is exactly the complaint about thinning lower plants. Keep the spacing honest and trim aggressively so light reaches down the panel.
For watering, run the pump continuously and check flow every couple of days. Top up the reservoir as plants drink, refilling with plain water first and then adjusting pH, because topping up with nutrient solution at full strength is how salts build up and tips burn.
Keep the water in the 65 to 72 degree range if you can. Warmer water holds less oxygen, and roots sitting in warm, still water is where root rot starts. A small fan moving air across the wall also helps, both for the roots and for the leaves after you spray them.
Maintain Your Hydroponic Living Wall
Here is the honest number most guides leave out: expect 20 to 30 minutes a week once the wall is established, plus a glance most days. If a setup needs an hour every other day to stay alive, it is the wrong setup for a beginner.
| When | Tasks | Takes |
|---|---|---|
| Daily | Glance at the pump, water level and a few leaves; top up if the level has dropped | 1 to 2 minutes |
| Weekly | Check pH, top up the reservoir, confirm flow to every channel, trim and harvest | 15 to 20 minutes |
| Every two weeks | Clean the reservoir, rinse the channels, check roots and top up nutrients | 20 to 30 minutes |
| Monthly | Replace the solution entirely, sanitise tubing, inspect the pump and fittings | 30 to 40 minutes |
Change the full solution every four to six weeks rather than topping it up indefinitely, and keep the reservoir covered so light stays out. Roots should be pale and firm. Slimy brown roots smell off, and that is your signal to cut back the nutrients and get the water moving again.
Pruning is not optional on a wall. Cut lettuce back to a few centimeters above the crown, take basil above a leaf pair, and remove anything yellow at the base before it drops into the reservoir.
Common Mistakes and Fixes
Almost every failure traces back to light in the reservoir, roots without moving water, or a plant placed where it cannot get enough light. Match your symptom to the table and fix one thing at a time, because changing five variables at once tells you nothing.
| Symptom | Likely cause | Fix |
|---|---|---|
| Green slime or film in the reservoir | Light reaching the nutrient solution | Swap to an opaque reservoir, keep the lid on, add a reservoir cover |
| Brown, slimy roots | Low oxygen and warm, still water | Lower water temperature, add an air stone, cut nutrients, confirm the pump is running |
| Brown or burnt leaf tips | Salt buildup or light burn from an over-hot fixture | Change the full solution, lower the light, increase airflow |
| Yellow leaves between veins | Iron locked out by a pH drift above about 6.5 | Bring pH back to 5.5 to 6.5 and re-check after mixing |
| No new growth | Light too weak, photoperiod too short, or overcooled roots | Measure light at canopy height, hold a 14 to 16 hour cycle, keep water above 65 degrees |
| Weak, stretched stems | Plants stretching toward a dim source | Add or reposition a light closer to the top row |
| Lower rows thinning out | Upper rows shading the canopy below | Increase spacing, trim regularly, light from the side as well as above |
| No flow after a power cut | Pump off while roots dried within the hour | Fill the channels with water by hand, restore power, add a battery backup for NFT walls |
Two risks deserve their own note. First, pump dependency: on a wall system with a nutrient film, roots begin drying within about 45 minutes of lost flow, so a battery backup or an automatic restart timer is worth more than most beginners expect. Second, humidity and mould. Enclosed indoor systems raise room humidity, so leave gaps between panels, run a fan in the room, and wipe condensation off the wall rather than letting it sit.
Finally, be honest about the drawbacks. There is no soil buffer, so a missed pump check is a dead plant rather than a stressed one. Nutrients must be mixed accurately. And a wall does not survive travel or a long holiday without a neighbour looking after it.
Frequently Asked Questions
Do hydroponic living walls need a pump running all the time?
On recirculating systems, yes. A nutrient film technique wall depends on a continuous thin film of solution, and roots begin drying within about 45 minutes once flow stops. Keep the pump running 24 hours a day and add a battery backup or restart timer if you want protection during a power cut.
How big should a beginner hydroponic living wall be?
Start with one panel holding around 12 to 20 plants, roughly a two-foot section of wall. That size is large enough to learn flow, lighting and nutrient mixing, yet small enough that a pump failure is annoying rather than alarming. You can add panels later once the routine feels automatic.
What pH and EC should a beginner use?
Aim for pH between 5.5 and 6.5, and roughly EC 1.2 to 1.6 mS/cm for seedlings and leafy greens. Increase toward 1.8 to 2.0 only for hungry fruiting plants later on. Outside the pH range, nutrients stay in solution but become unavailable, which is why plants can look starved in a full tank.
Why is algae growing in my hydroponic wall reservoir?
Algae needs light, so its presence almost always means the nutrient solution is being exposed to light. Use an opaque reservoir with a fitted lid and a cover over the water surface, and keep tubing and channel lids sealed. Once established, algae clogs the flow and steals nutrients, so remove visible growth and clean the reservoir before it returns.
Can I grow a hydroponic living wall in an apartment?
Yes, and it suits small rooms well because a vertical panel uses wall space rather than floor space. Watch three things: light intensity, which is usually the limiting factor away from a window; noise from the pump, which matters in bedrooms; and drilling, which renters can avoid with a freestanding frame or tension-mounted pockets.
Can herbs and ornamental plants share one hydroponic living wall?
They can. Fast greens and herbs such as lettuce, basil and mint grow happily alongside trailing ornamentals in felt pockets, and the taller crops belong in the upper rows where light is strongest. Keep water-loving trailing plants out of the channels and give ornamentals their own pockets, since they want more air around the roots than greens do.
Conclusion
Start small: one panel, twelve to twenty slots, lettuce and basil, and a light on a timer. Choose an opaque reservoir, run the pump continuously, and check pH weekly rather than guessing at it.
A hydroponic living wall for beginners is really three decisions made well, not a complicated build. Pick a format your wall and your landlord can handle, pick plants that match the light you actually have, and pick a maintenance routine you can keep up. Get those right and the wall takes care of itself between Sunday evenings.